How to use segment builder
Overview
The Segment Builder is the section where you create and configure segments. These segments are predefined filtering parameters that you can save and quickly reuse in Segmentation Campaigns.
For example, you want to target customers who spent more than 500 on fruit products within the last month. You define the conditions once — amount spent, product category, purchase date — save the segment, and reuse it in any campaign. This example is used in the screenshots throughout this page.
You can build a fully defined segment or a partial definition to combine later in a campaign.
Example: To target Women aged 18–50, you could:
- Create one segment with both gender and age criteria.
- Or create two separate segments (gender, age) and combine them in the Campaign Canvas.
You can open the Segment Builder in two places:
- From the Segments page — click New segment to create a standalone segment, or click an existing segment to edit it.
- Inside a campaign — when configuring a Member Segment block on the Campaign Canvas.
Builder layout
The Segment Builder is organized into two tabs:
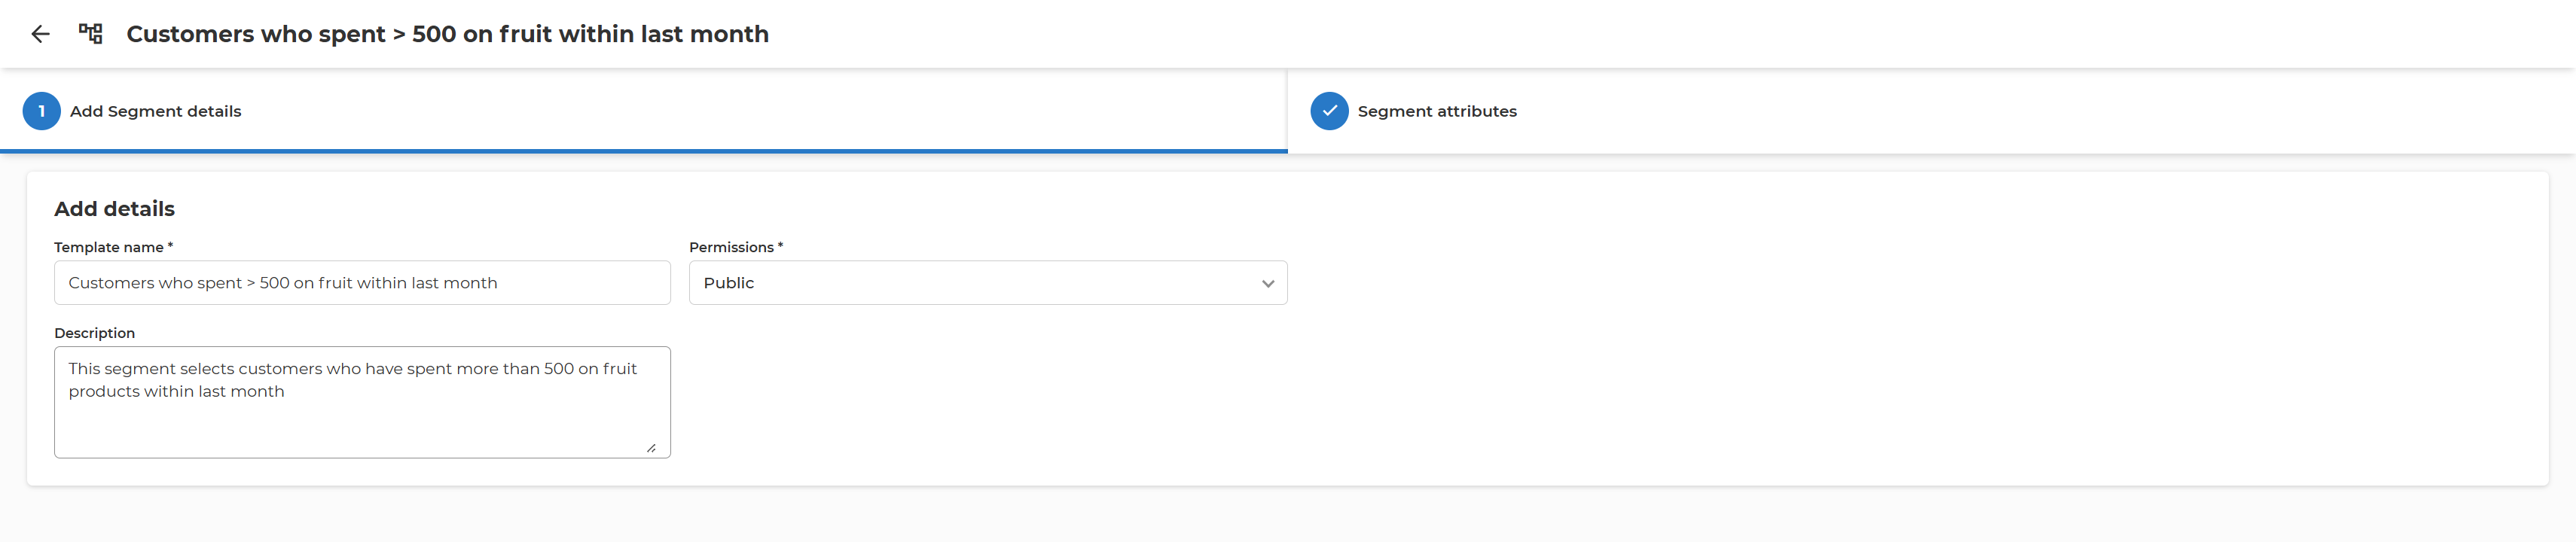
- Add Segment details – basic information about the segment.
- Segment attributes – the conditions that define who is included.
Add Segment details
On the details tab, provide:
- Template name – choose a descriptive name others can recognize.
- Description – add details about the purpose or use.
-
Permissions – select the access level:
- Public – available to all users.
- Restricted – available only to your department.
- Private – available only to you.
Segment attributes
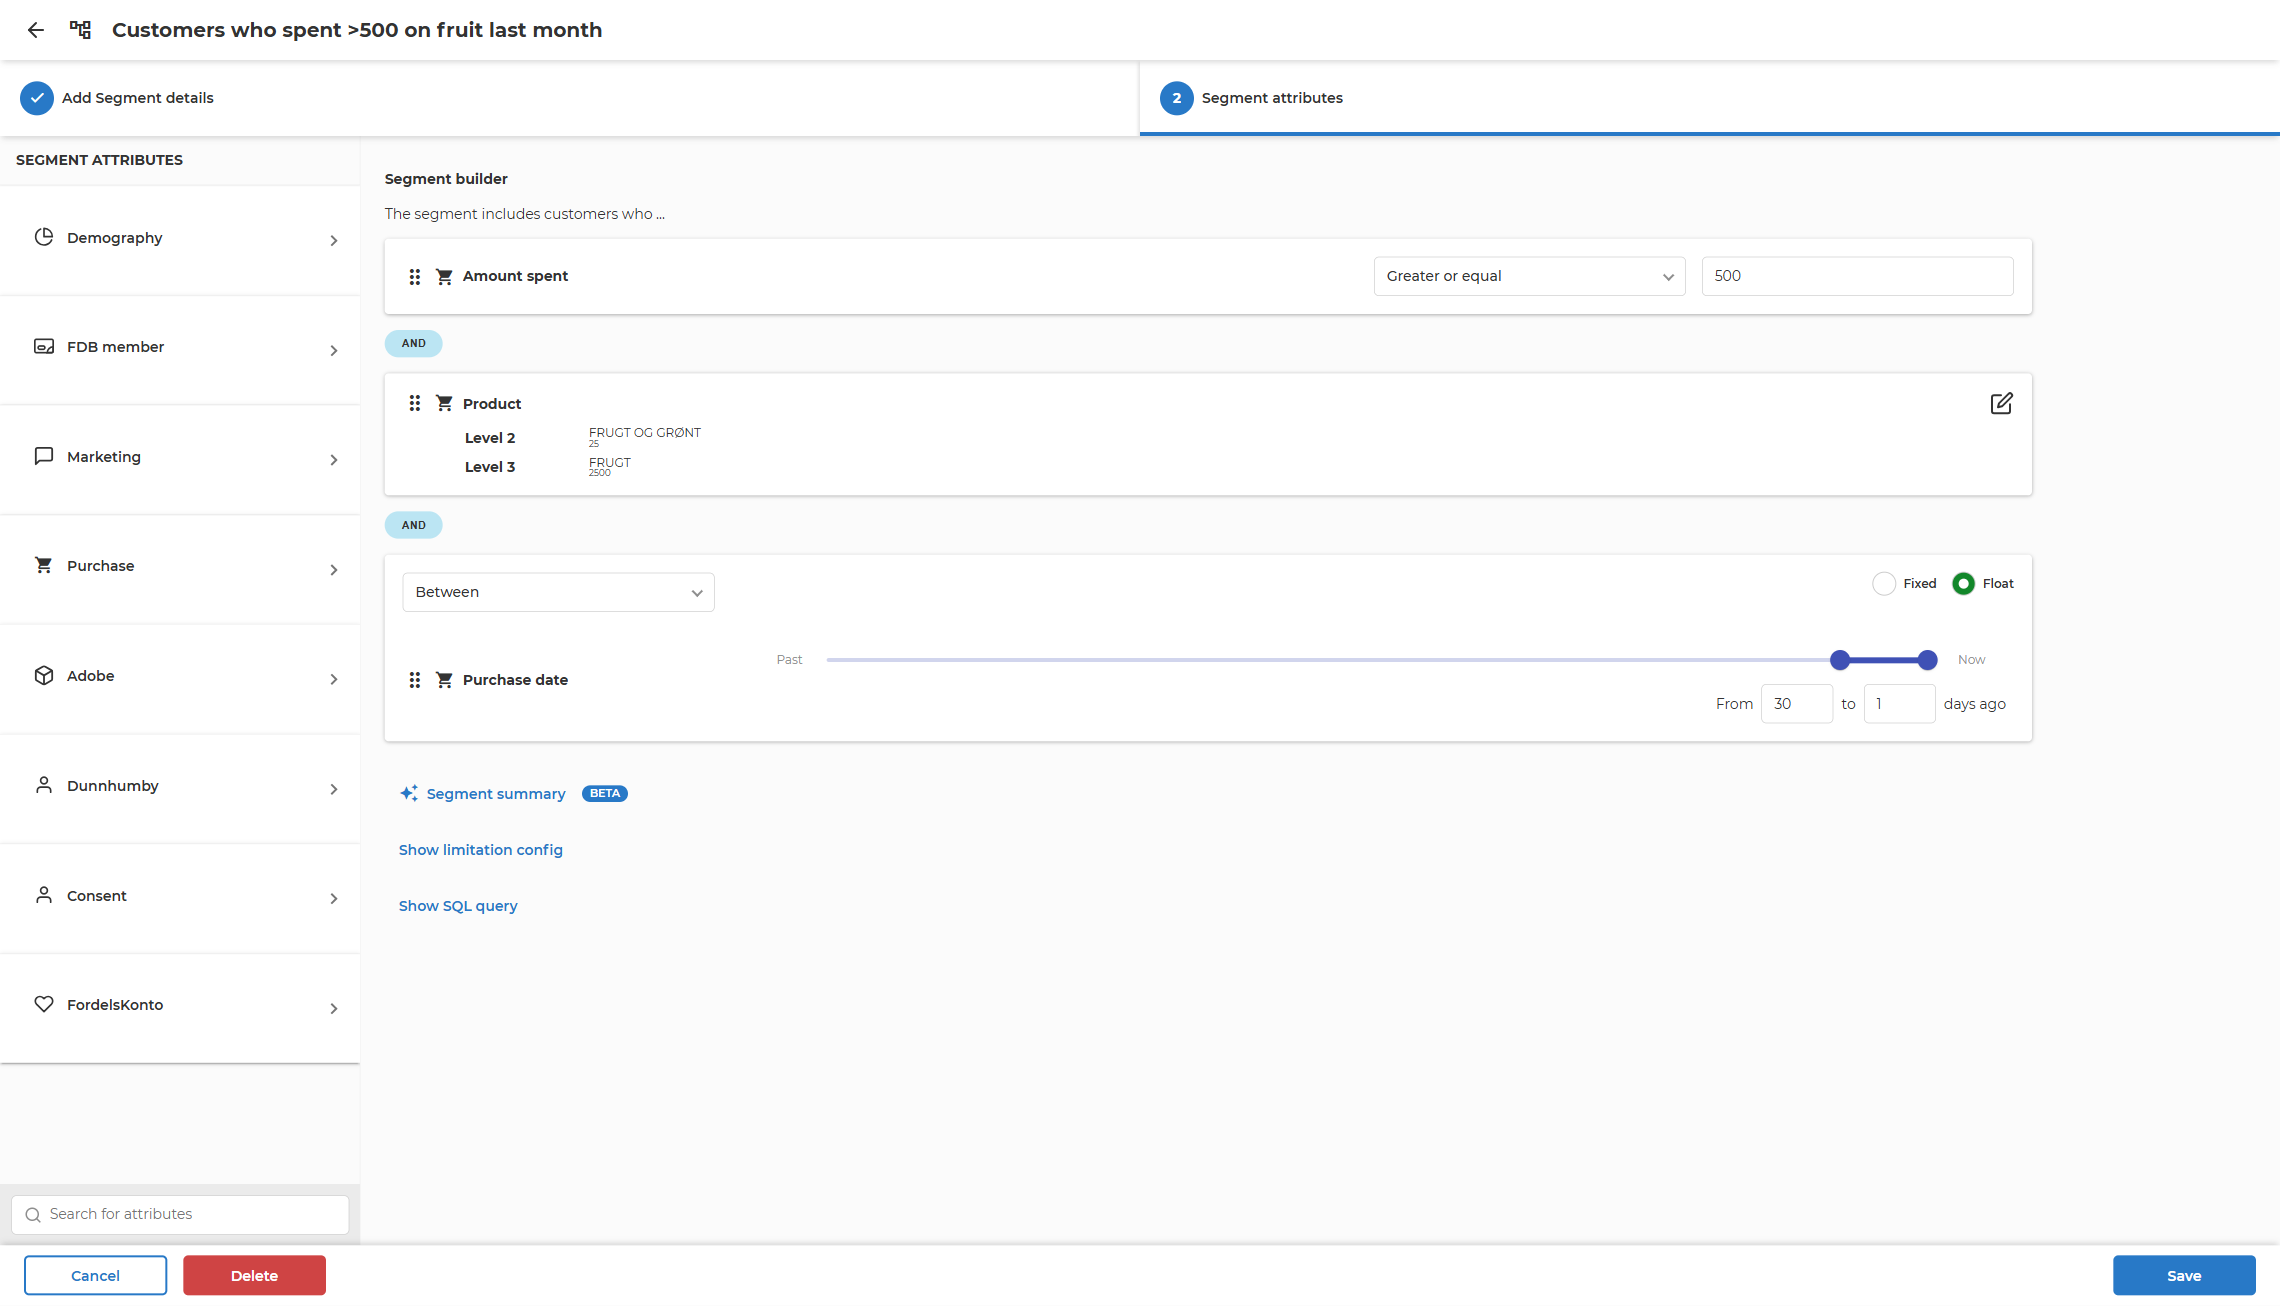
On the attributes tab you define who should be included in the segment. The builder shows the label "The segment includes customers who ..." followed by your conditions.
- Find attributes in the Segment attributes panel on the left. Use the Search for attributes box to find an attribute by name.
- Add an attribute by double-clicking its name, or drag and drop it into the definition area.
- Connect conditions with AND, OR, or AND NOT.
See How to work with segmentation attributes for details on available attributes. See How to build rules and rulesets for creating logic.
Note: If no criteria are specified, the segment includes all members.
Configuring attributes
Depending on the attribute type, conditions are configured differently:
- Value attributes (e.g. Amount spent, Age) – choose an operator (Equal, Greater than, Between, In, etc.) and enter a value.
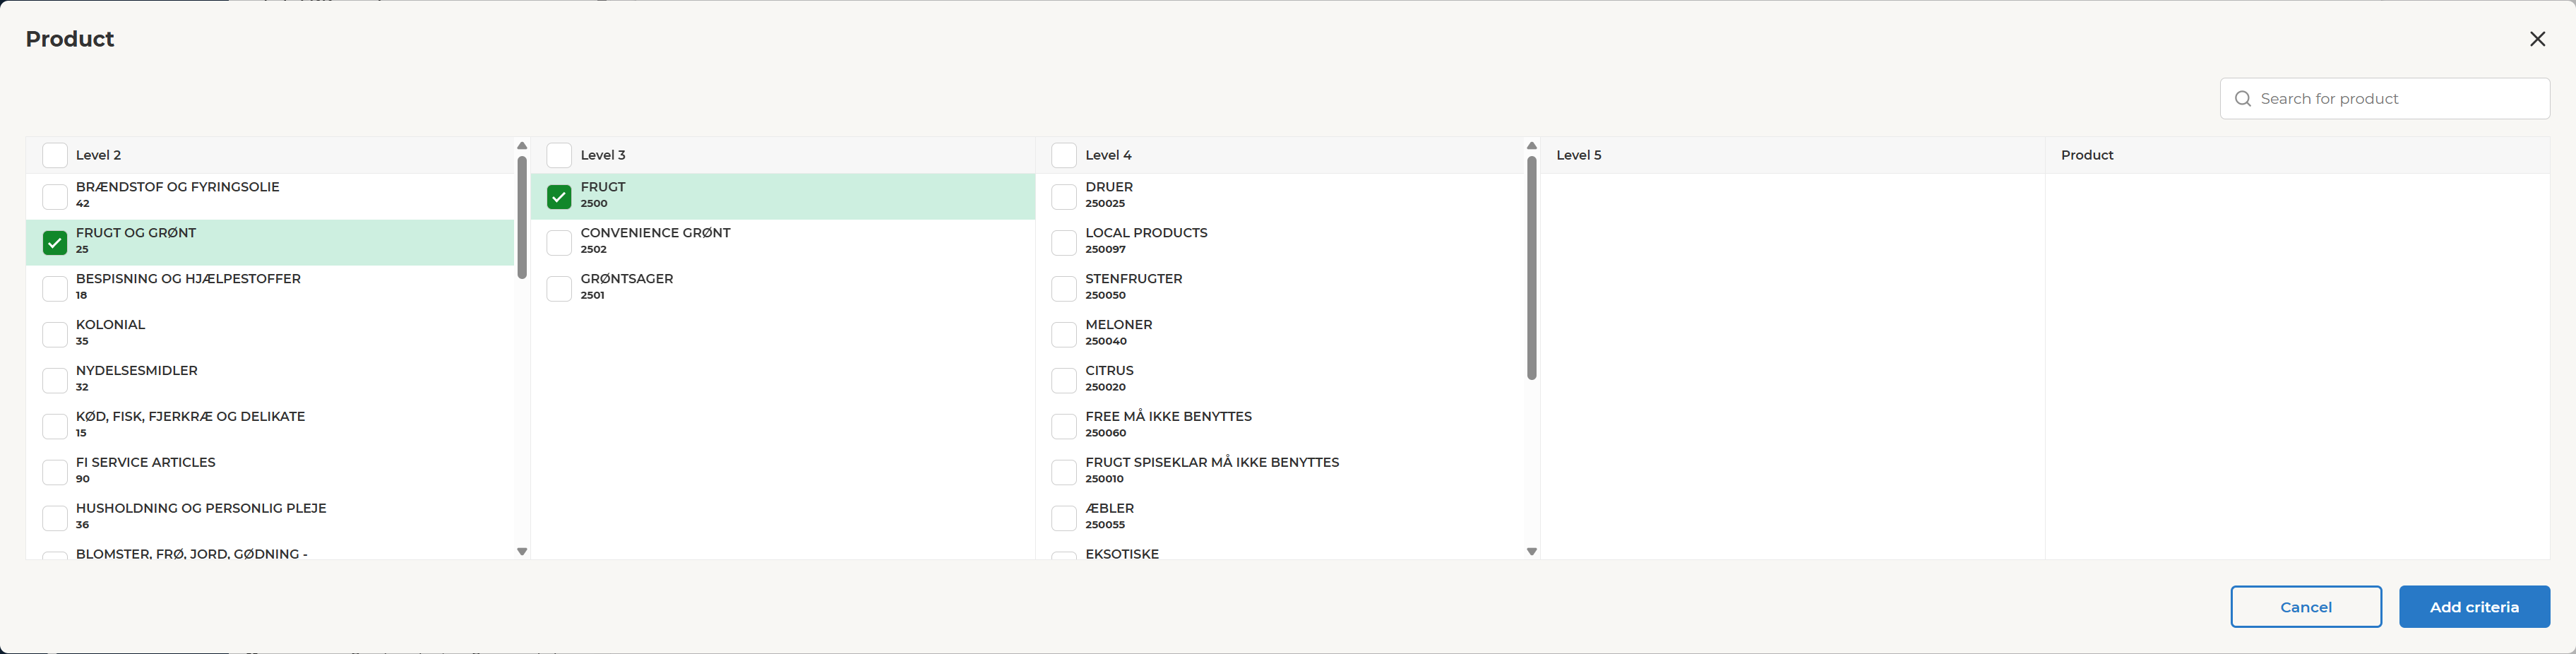
- Hierarchy attributes (e.g. Product) – a selection dialog opens where you browse or search the hierarchy levels, tick the items to include, and confirm with Add criteria. To change the selection later, click the edit icon on the condition.
- Date attributes (e.g. Purchase date) – with the Between operator you can switch between Fixed calendar dates and a Float (rolling) range such as from 30 to 1 days ago, which moves with the execution date.
Tip: If no Purchase date condition is added, purchase attributes such as Amount spent are evaluated over the last 90 days by default. Add a Purchase date condition to control the date range explicitly.
Segment summary
If you don't read SQL, use Segment summary — an AI-powered feature that explains your segment in plain language. It describes which customers the segment includes and which conditions (dates, products, thresholds, etc.) are applied, helping you:
- Quickly verify that the segment does what you intended.
- Understand segments created by other users without needing SQL expertise.
Click the Segment summary button below the segment definition area and wait a few moments while the summary is generated. The summary starts with a suggested name for the segment, followed by the heading "This segment will include customers who:" and a plain-language description of the criteria.
The summary always reflects your current segment definition — whenever you change the conditions while the panel is open, a new summary is generated automatically. Summaries are not saved; a fresh one is generated each time. Summaries are provided in English.
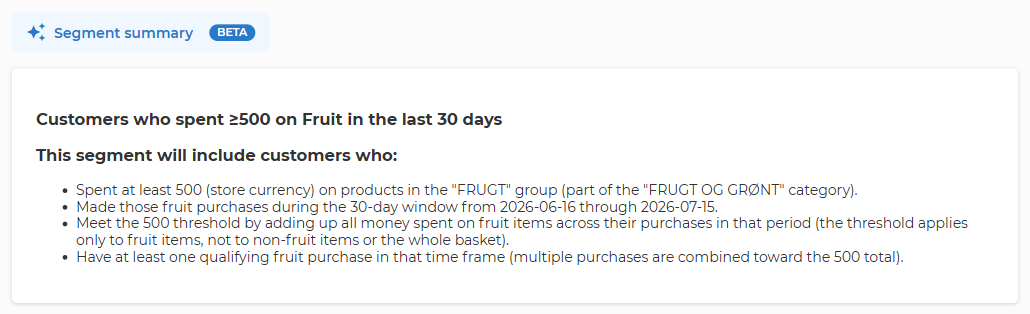
Note: This feature is currently in BETA. The summary is generated by AI and may occasionally be imprecise - always double-check business-critical segments against the configured conditions.
Limit members
Click Show limitation config to restrict the maximum number of members returned by the segment. Use the slider or enter a number directly.
Example: Only the first 100,000 members who match the criteria will be returned. For advanced limitations, see the Limit block.

This serves as optimization for scenarios where you know upfront that your segment may produce a large amount of members, but in reality you will want to limit massively how many move forward in the flow; so using a limit here makes the whole segment computation a lot more efficient.
Example: When you know your segment may produce 5 million members, but after the segment block you intend to only engage the first 10.000 members, then use this capability to make the whole computation and extraction of those members more efficient and faster.
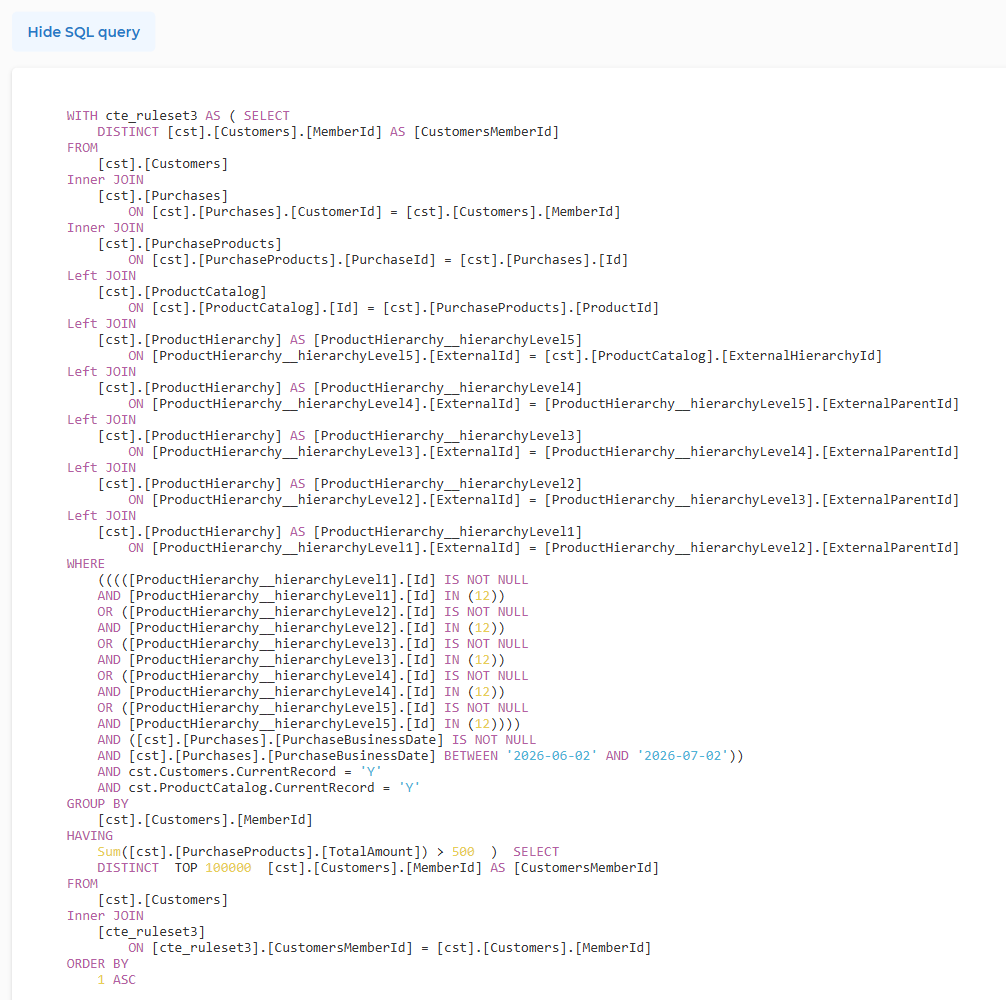
View SQL query
Click Show SQL query to view the query used to fetch segment members.
This can be useful if:
- You want to check correctness of results.
- You want to share with Lobyco Support for troubleshooting.
Save segment
When you create or edit a segment from the Segments page, click Save when done. You can also Delete an existing segment from here (if you have permission).
In a campaign
When you build a segment inside a campaign (using the Member Segment block), you have additional options:
- Save as template – open the arrow next to the Save button and choose Save as template to make the segment reusable in other campaigns.
- Select template – instead of building from scratch, click Select template to start from an existing segment template. While linked to a template you can Sync it with the latest template version, Unlink it, or Edit the template.
- Publish / Unpublish – a saved segment stays a draft until you publish it as part of your campaign flow.
Known issues
Generic consent attribute
We have a bug when multiple generic consent attributes (see attribute description here) are connected using AND condition. See image below:
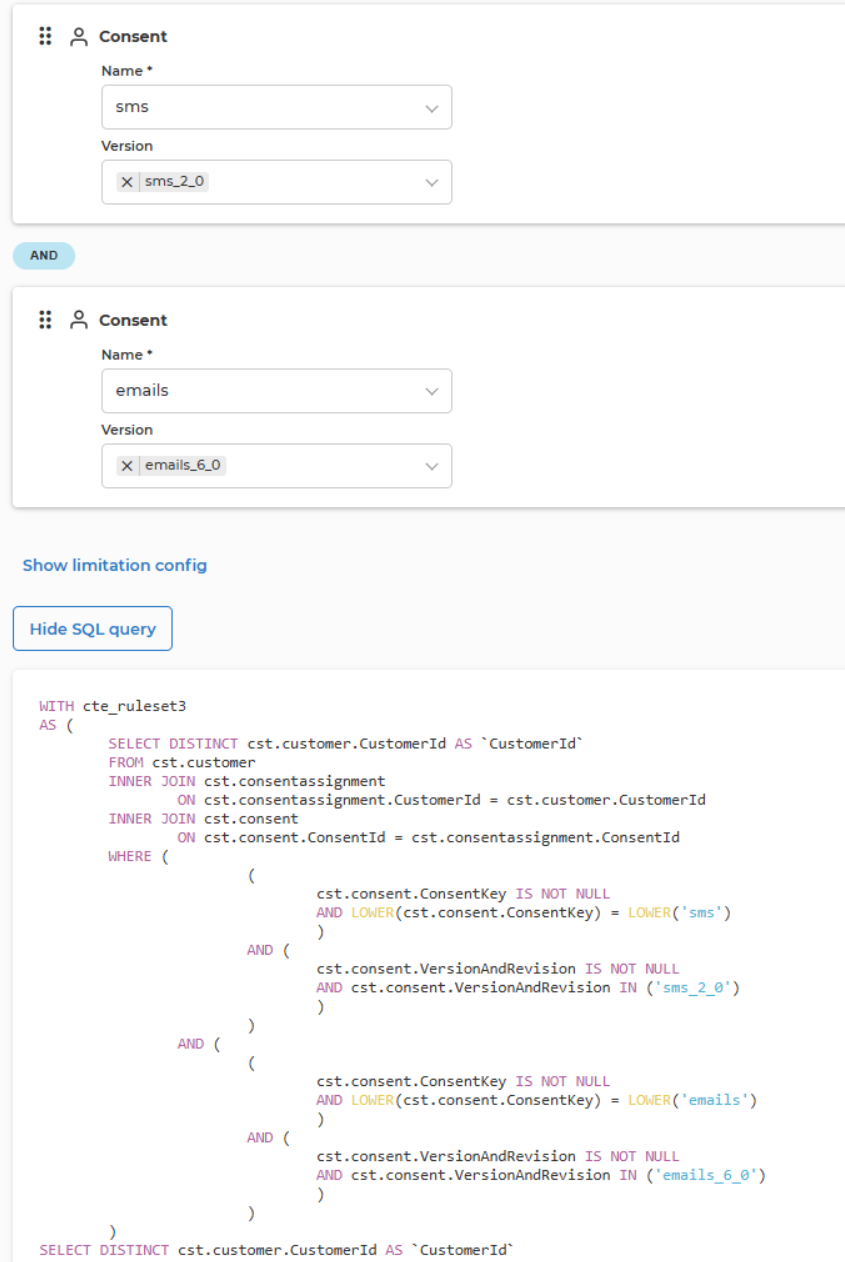
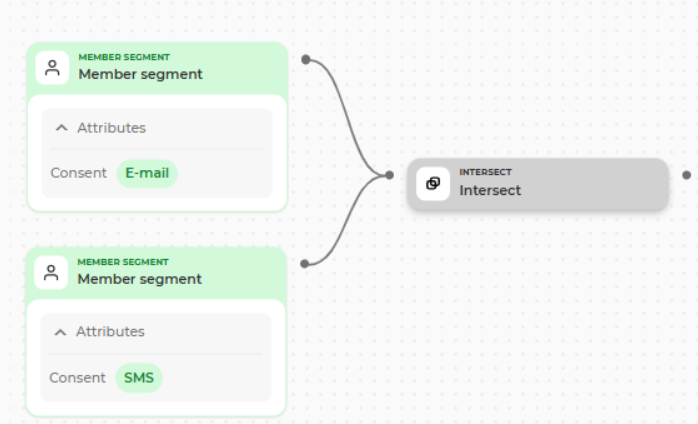
The expected outcome for the abovementioned configuration would be customers who have given both sms and email consents of specified versions. However due to the bug in the system the generated query for getting customers is invalid and won't return any customers. As a workaround you can use two segment blocks each containing one generic consent attribute and connect them using intersect block.
Next step
Continue to How to Manage Saved Segments.