Common Banner Configuration
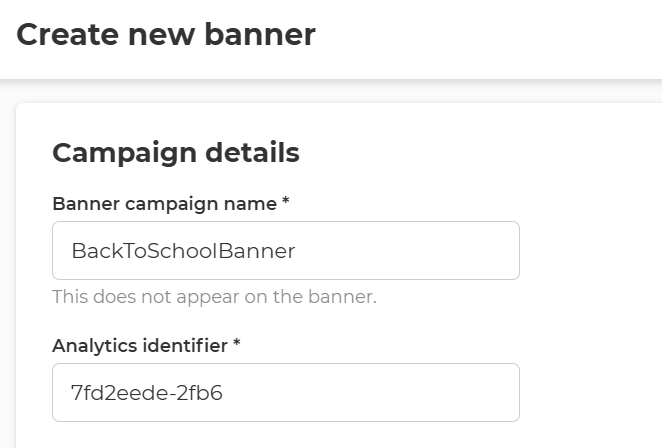
1. Banner details
-
Name
- Enter a recognizable name for your banner (e.g., BackToSchoolBanner).
- Maximum size: 100 characters
-
Analytics Identifier:
- Add a unique identifier to track analytics (e.g., feed-1234-5432).
- Maximum size: 50 characters
2. Placement
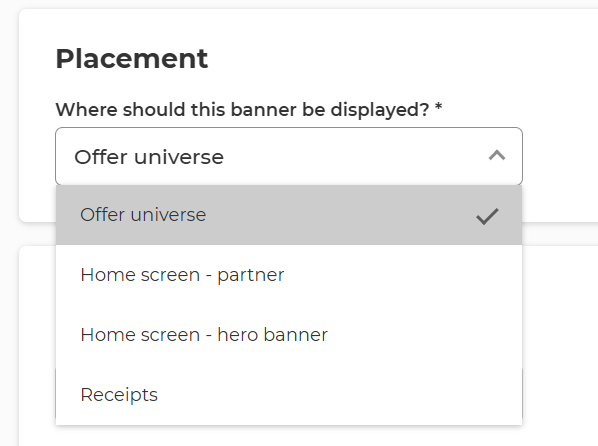
- Placement
- This banner placement is only an option if your application is running the new home screen.
- Based on the selection the configuration content will be different. Details for each options are described in a separate page for each
3. Banner content
- Based on the placement selection the configuration content will be different. Details for each options are described in a separate page.
4. Segmentation

-
By stores (All)
- When no stores are selected, banner is displayed for all customers from the selected chains (or from all chains depending on the chain configuration from before), taking in consideration the customer segmentation from below.
- When specific stores are selected, banner is displayed only for the customers bound to one of the stores selected, taking in consideration the customer segmentation from below.
-
All customers
- Display banner for all members.
- Audience
- Display banner for specific audience segments.
- When this option is chosen, additional settings appear to define the targeted audience.
- Select Audience Name
- Some customers have integration with Audience Service that allows the management of Member Segments in one centralized place and reuse throughout the other promotion and communication sections.
- Specify the audience segment to target.
- Select from list
- Select from list of predefined segments brings up a pop-up where all predefined audiences are listed. Based on the name and description the needed Audience can be selected as a target for this banner activity.
- Create new audience
- Create a new audience segment if the desired segment does not already exist.
- Select Snapshots
- Target specific snapshots of audience data.
4. Schedule
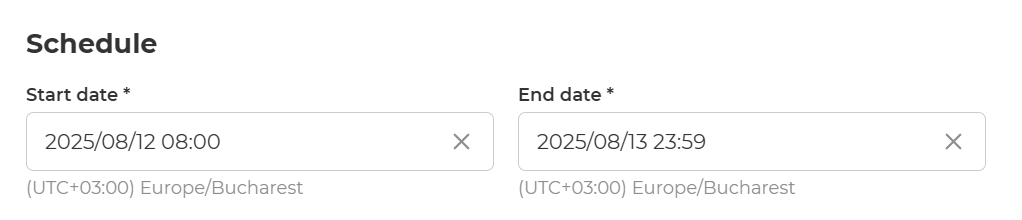
- Start date
- Local Date and time from which the banner will be displayed in the app
- If the start date is set to be in the past the banner will be directly published.
- If the start date is set to be in the future, the banner will be scheduled.
- End date
- Local Date and time until which the banner will be displayed in the app
- Date and time must be set to a future value and has to be after the start date
5. Save as draft, Schedule or Publish Banner

- Save as draft
- The banner is saved as draft and it's not displayed until it's published, regardless of the availability period set trough start and end dates. Draft banners can be updated.
- Schedule
- The banner is published and it will be displayed in the app based on the availability period set trough start and end dates.
- Publish
- Schedule button is replaced with Publish button when the Start Datetime is not or sooner than now.
- Close
- All changes are discarded, the banner or the updates on a banner are not saved.