Email Warm Up Guide
When introducing a new sending domain, a new dedicated IP, or reactivating a domain that has not sent emails recently, it is essential to warm it up gradually. Skipping this step can damage your sender reputation and lead to emails being marked as spam or blocked entirely.
Why Warm-Up Matters
Email providers (Gmail, Outlook, etc.) evaluate the reputation of a sending domain based on engagement signals — opens, clicks, and low spam complaints. A new or inactive domain has no reputation yet. Sending large volumes immediately raises red flags. Warming up gradually establishes trust with email providers before scaling to your full audience.
🛡️ Need support with reputation monitoring? We offer reputation monitoring and guidance as an additional service to help you track your sender reputation throughout the warm-up process and beyond.
Contact your Customer Success Manager for more details.
Warm-Up Guidelines
-
Start with small volumes — prioritize most engaged recipients first.
-
Increase volume gradually over 2–4 weeks or until the final volume of recipients is reached.
-
Maintain consistent daily sending — gaps can slow down reputation building.
-
Avoid sudden volume spikes — even mid-warm-up.
-
Do not send to inactive recipients during the warm-up phase.
Recommended Warm-Up Approach
A common approach is a 14-day warm-up period, during which sending volume is gradually increased by 20–30% from the previous day's volume. During this phase, send daily campaigns to a highly engaged and trusted segment of your existing audience — users who are most likely to open, click, and interact with your emails. This positive engagement helps establish a strong sender reputation before scaling to a broader audience.
Example 14-Day Warm-Up Schedule
The table below illustrates a warm-up starting at 500 emails per day, with a ~30% increase each day.
| Day | Batch Size |
|---|---|
| 1 | 500 |
| 2 | 650 |
| 3 | 845 |
| 4 | 1,100 |
| 5 | 1,430 |
| 6 | 1,859 |
| 7 | 2,420 |
| 8 | 3,150 |
| 9 | 4,100 |
| 10 | 5,330 |
| 11 | 7,000 |
| 12 | 9,100 |
| 13 | 11,830 |
| 14 | 15,200 |
ℹ️ The starting volume and increment rate can be adjusted based on your list size and sending history. The key is to keep the daily increase consistent.
Handling Gaps in the Warm-Up Process
Interruptions can happen. Here is how to handle them depending on the length of the gap:
| Gap Duration | Recommended Action |
|---|---|
| 1–2 days | No impact. Continue with the next scheduled volume increment. |
| 3–5 days | Resume from the last stable sending volume and continue with 20–30% daily increments. |
| ~1 week (5–7 days) | Restart from the last stable volume, then continue with 20–30% daily increments. |
| ~2 weeks | Restart at approximately 50% of the previous volume, then continue with 20–30% increments. |
| 1 month or more | Restart the full warm-up process from a lower baseline to re-establish sender reputation. |
How to Split Audiences in Nexus Portal
To control sending volume during warm-up, you need to split your audience into smaller groups and send to one group per day. There are two ways to do this in Nexus.
Option A — Split via Orchestration Canvas (Recommended)
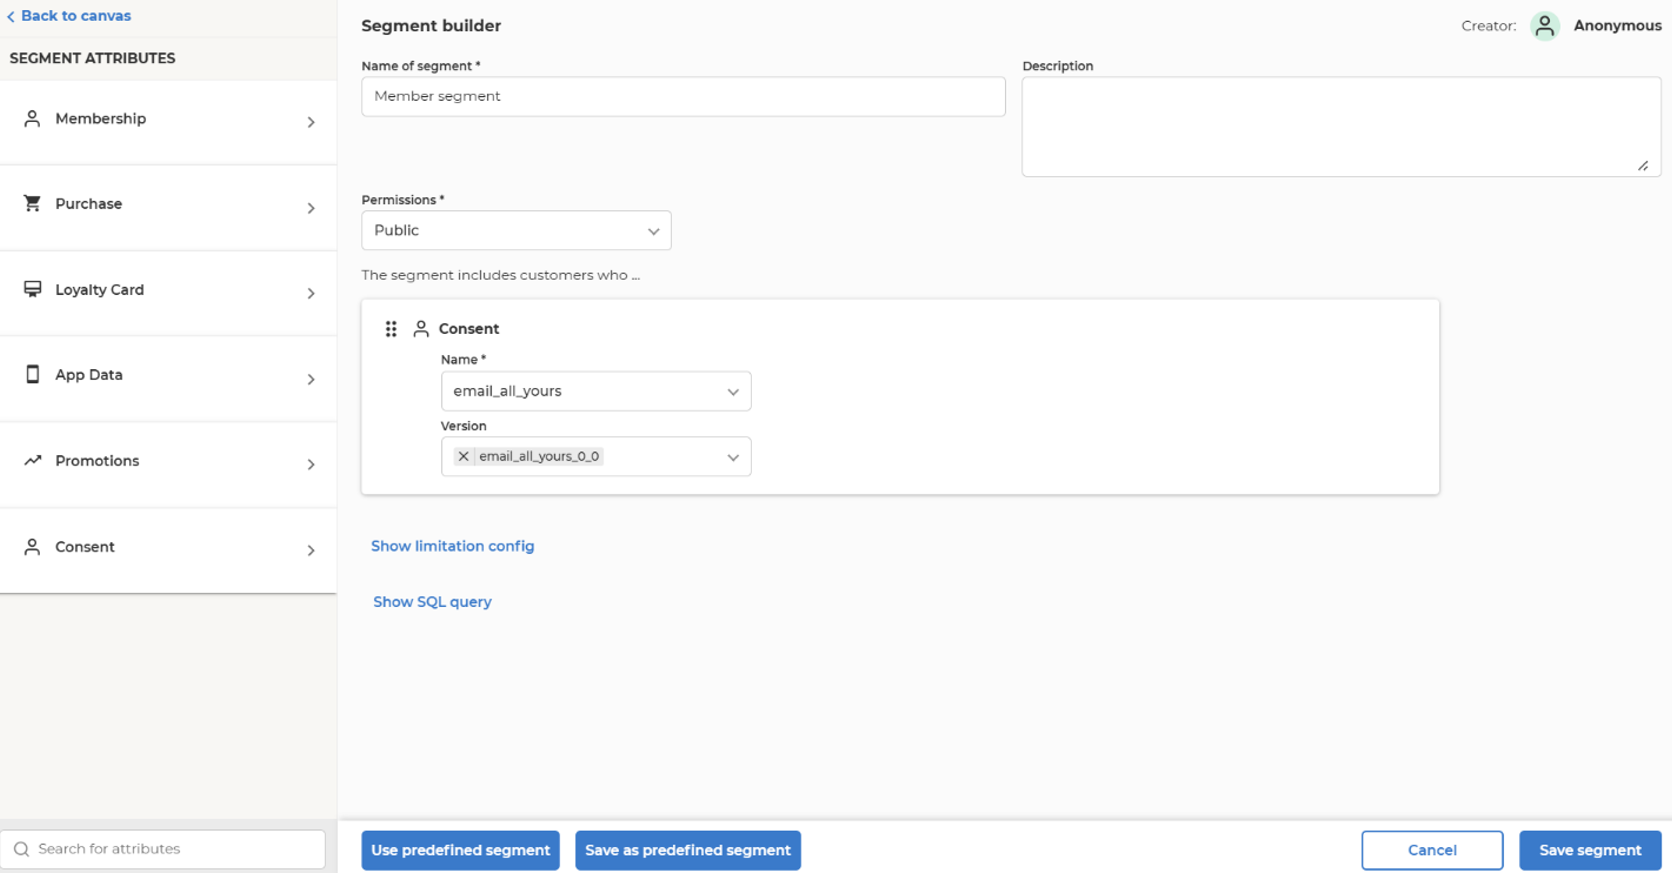
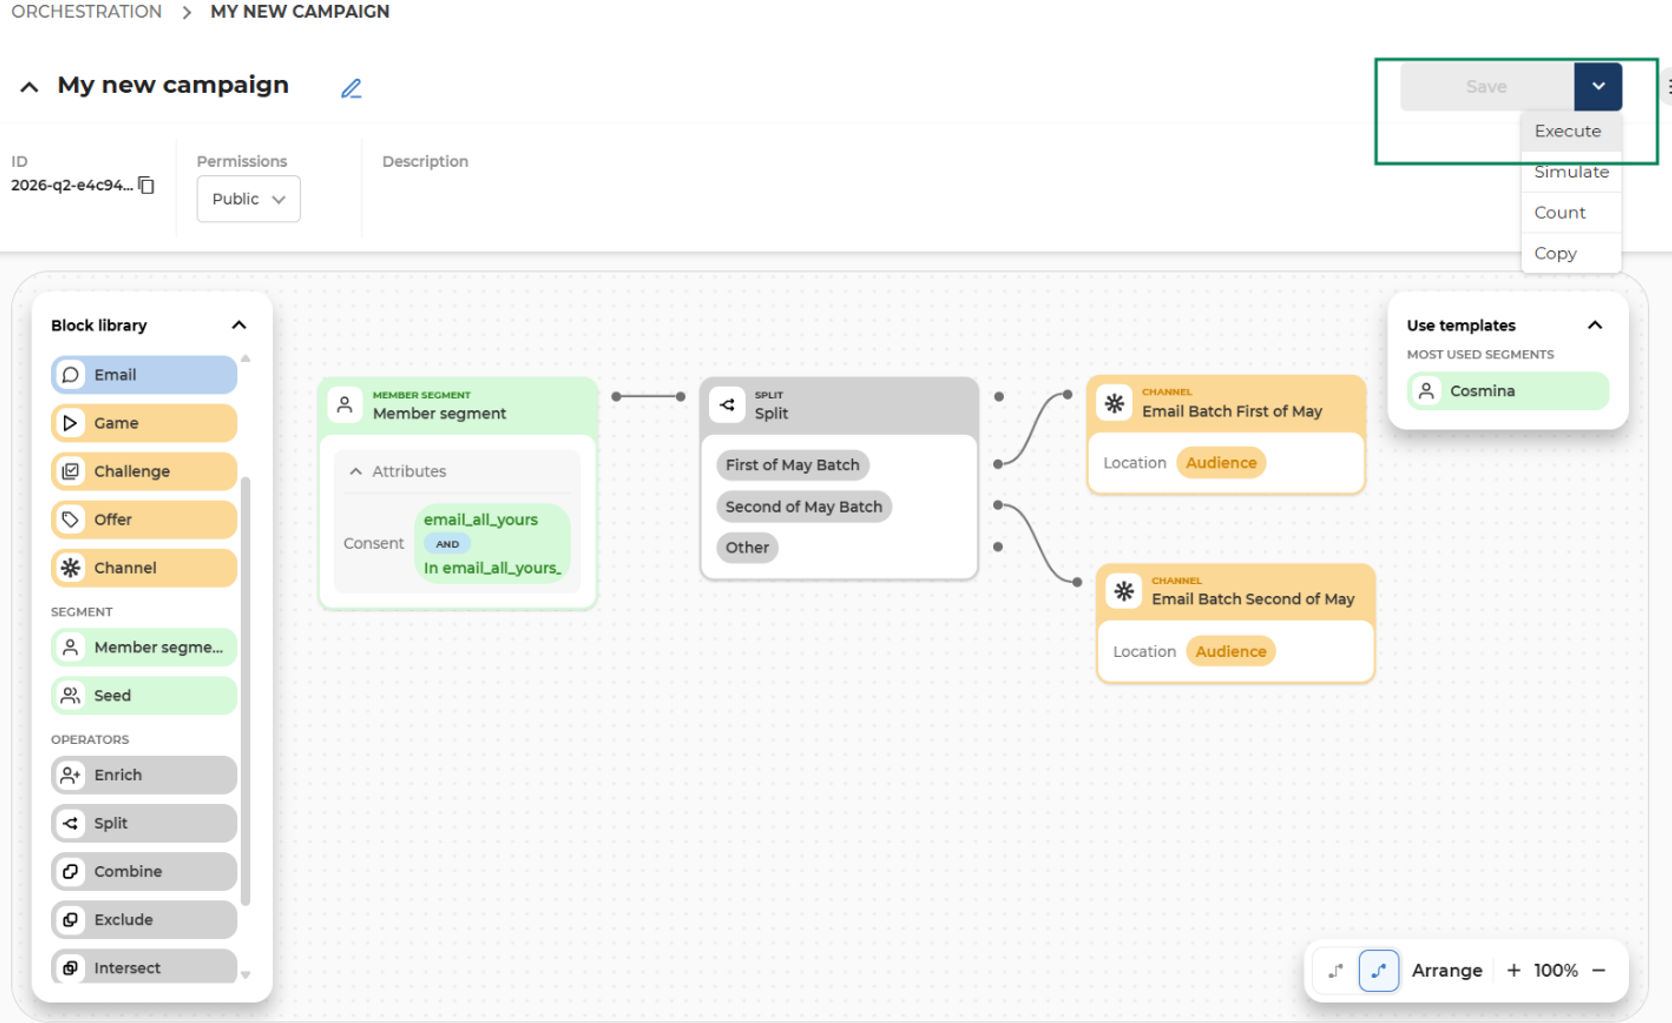
1. Segment members based on consent
-
Add the Consent attribute to your segment.
-
Select the relevant consent type and consent version(s).
-
Save the segment.
2. Add a Split block
-
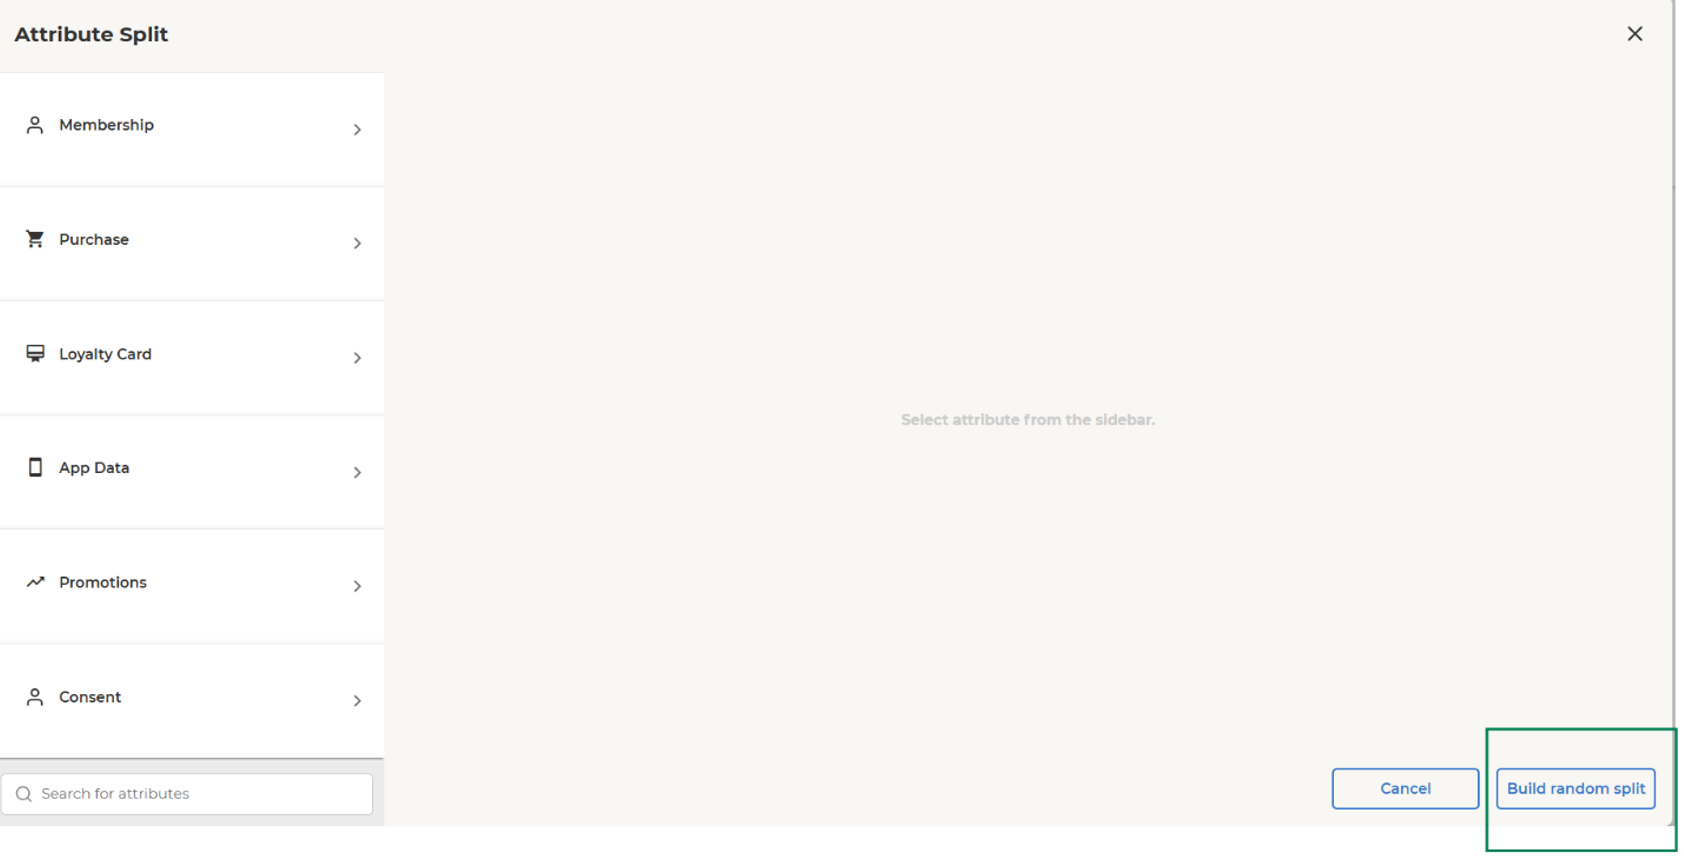
Insert a Split block into the canvas.
-
Choose Split type: Random split.
-
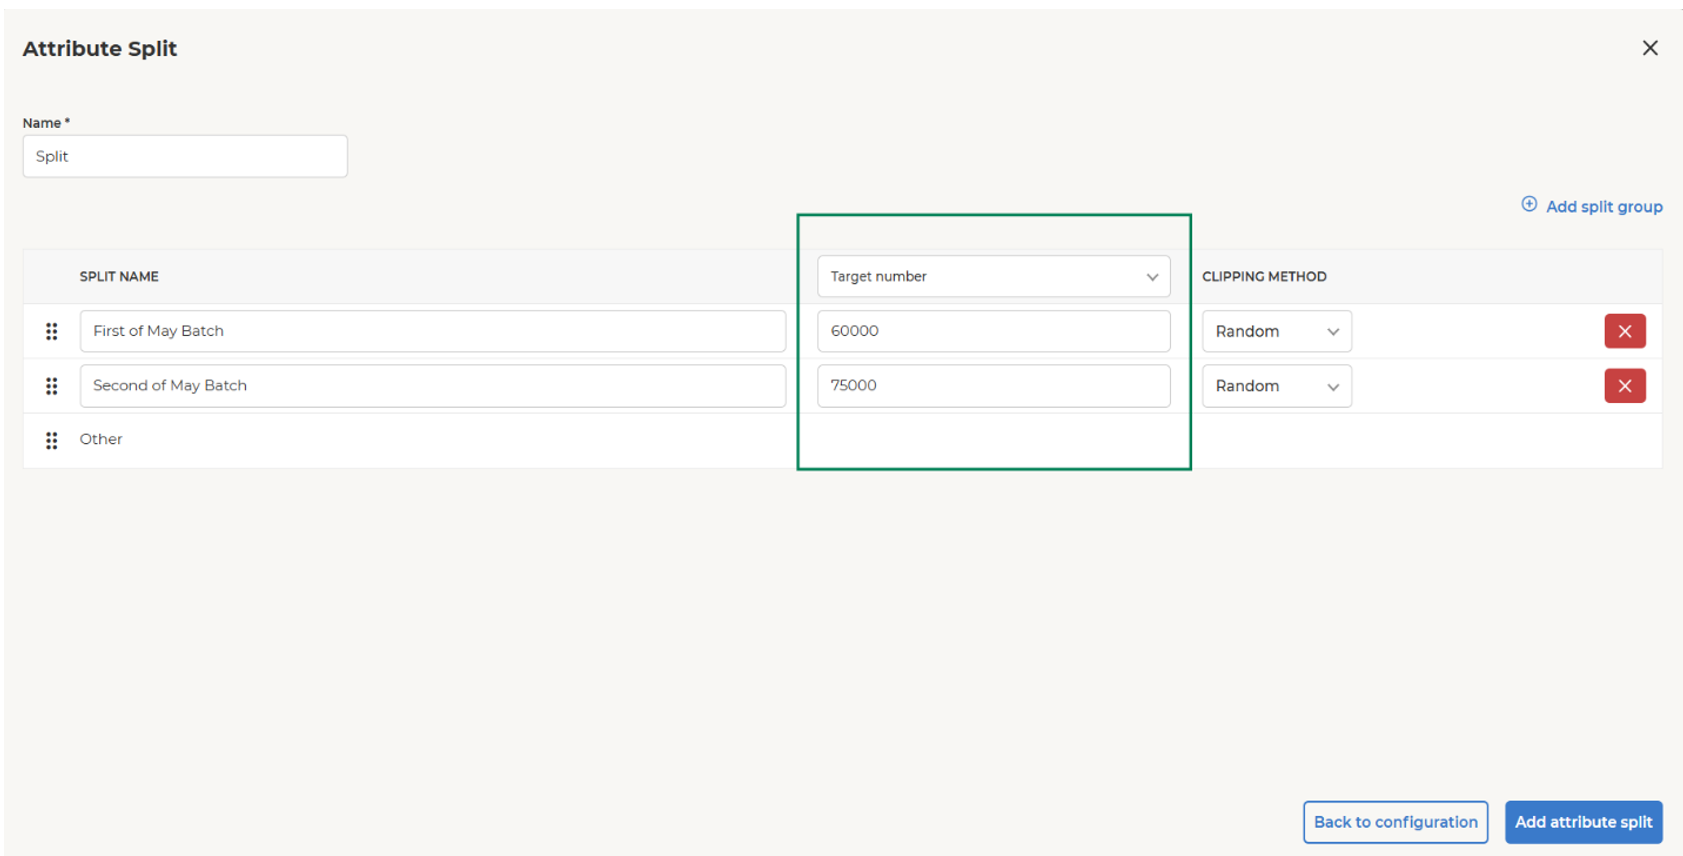
Select Split method: Target number.
-
Define the number of members for each split group.
-
Save the split configuration.
3. Create audiences via Channel blocks
-
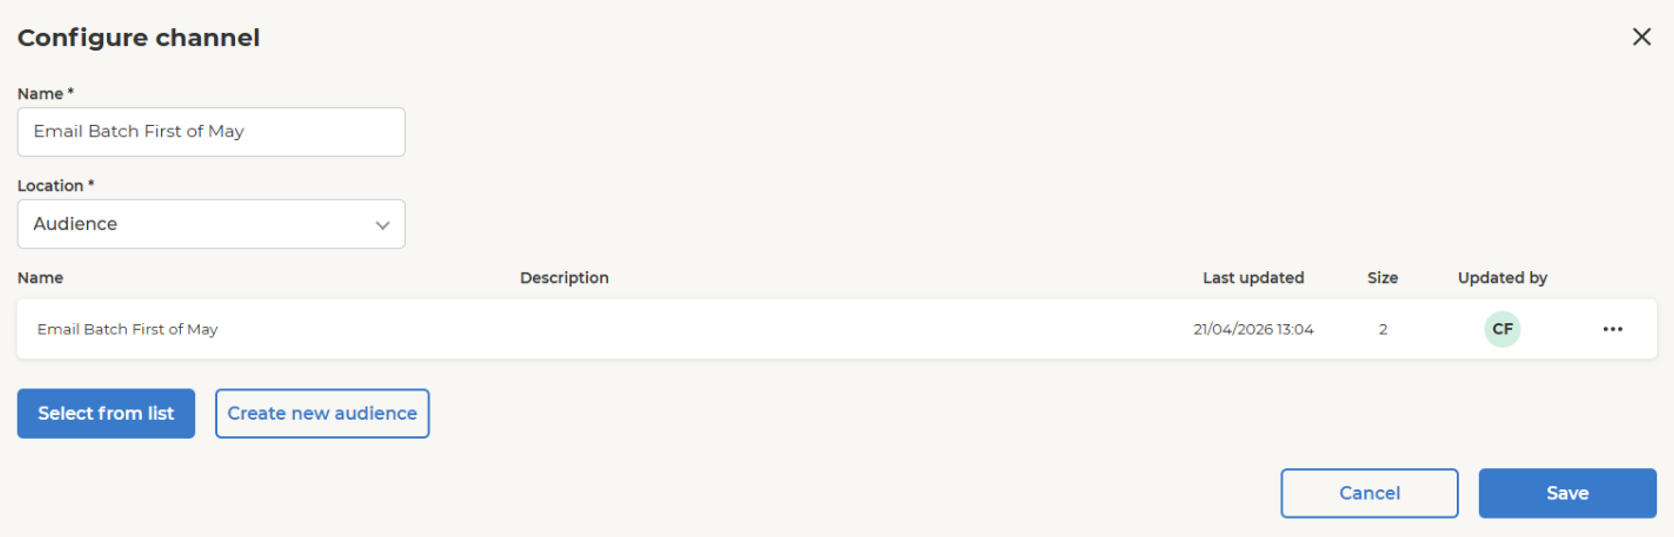
Add one Channel block for each split group.
-
In each Channel block:
-
Set Location to Audience.
-
Provide a name, select the Email destination, and save the audience.
-
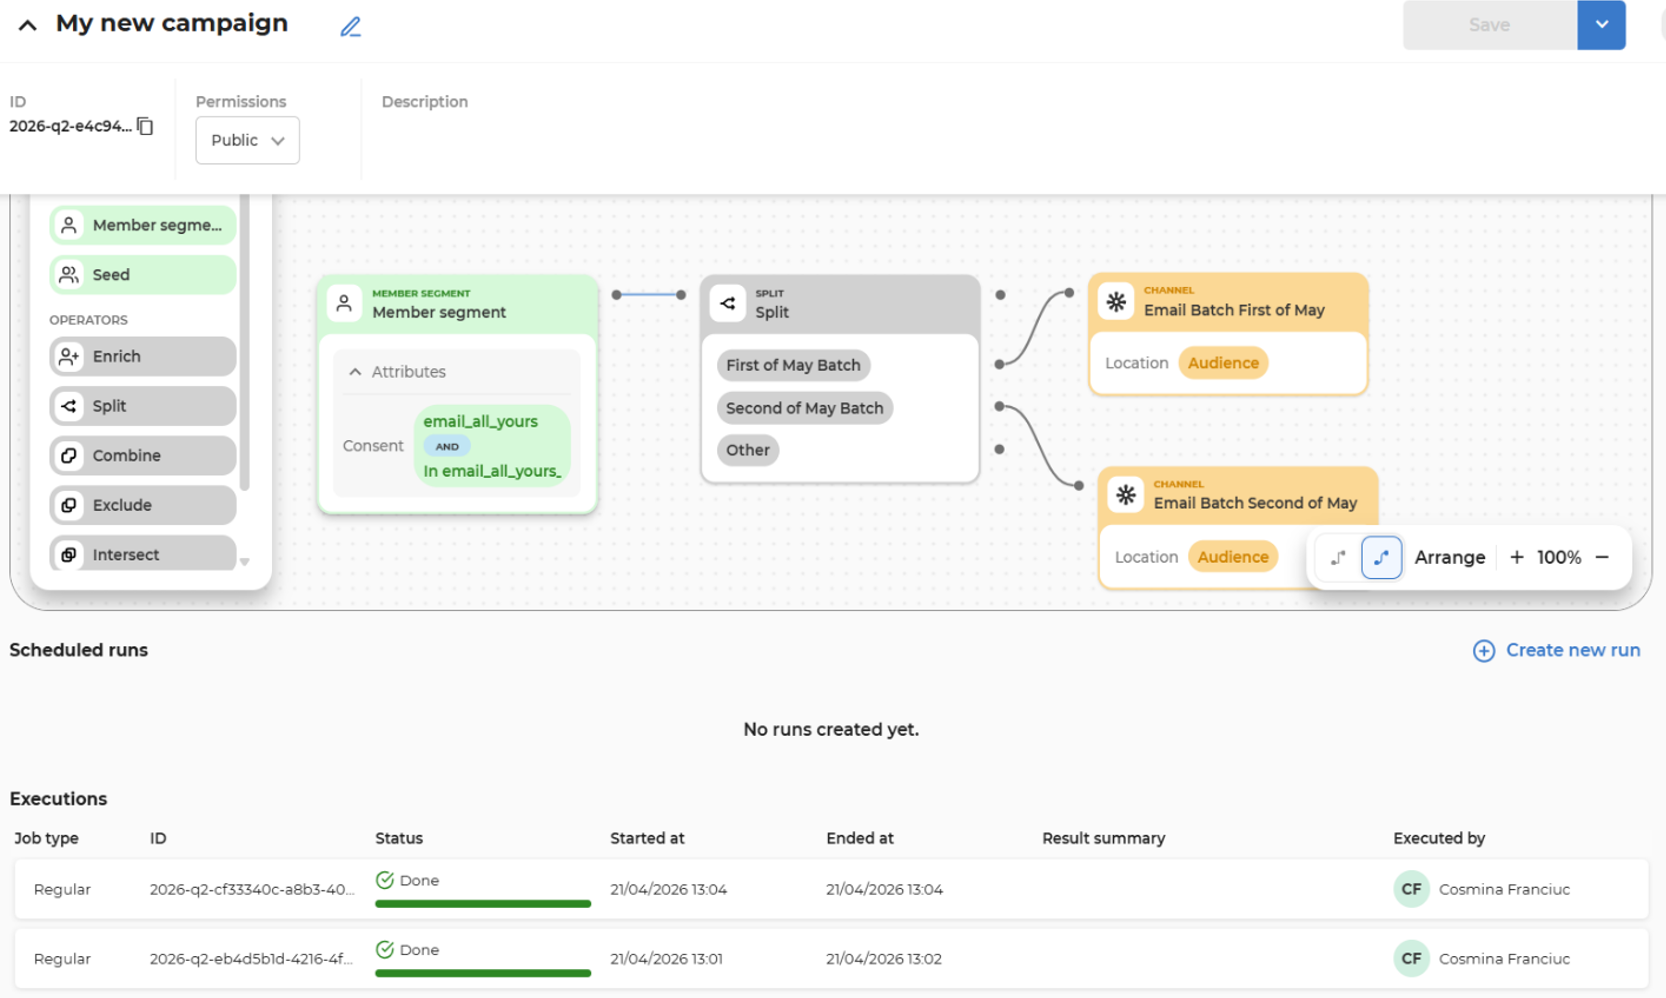
4. Save and execute the campaign
-
Check the execution status on the Executions list.
-
Once execution is complete, the audiences will be available to use in Email activities.
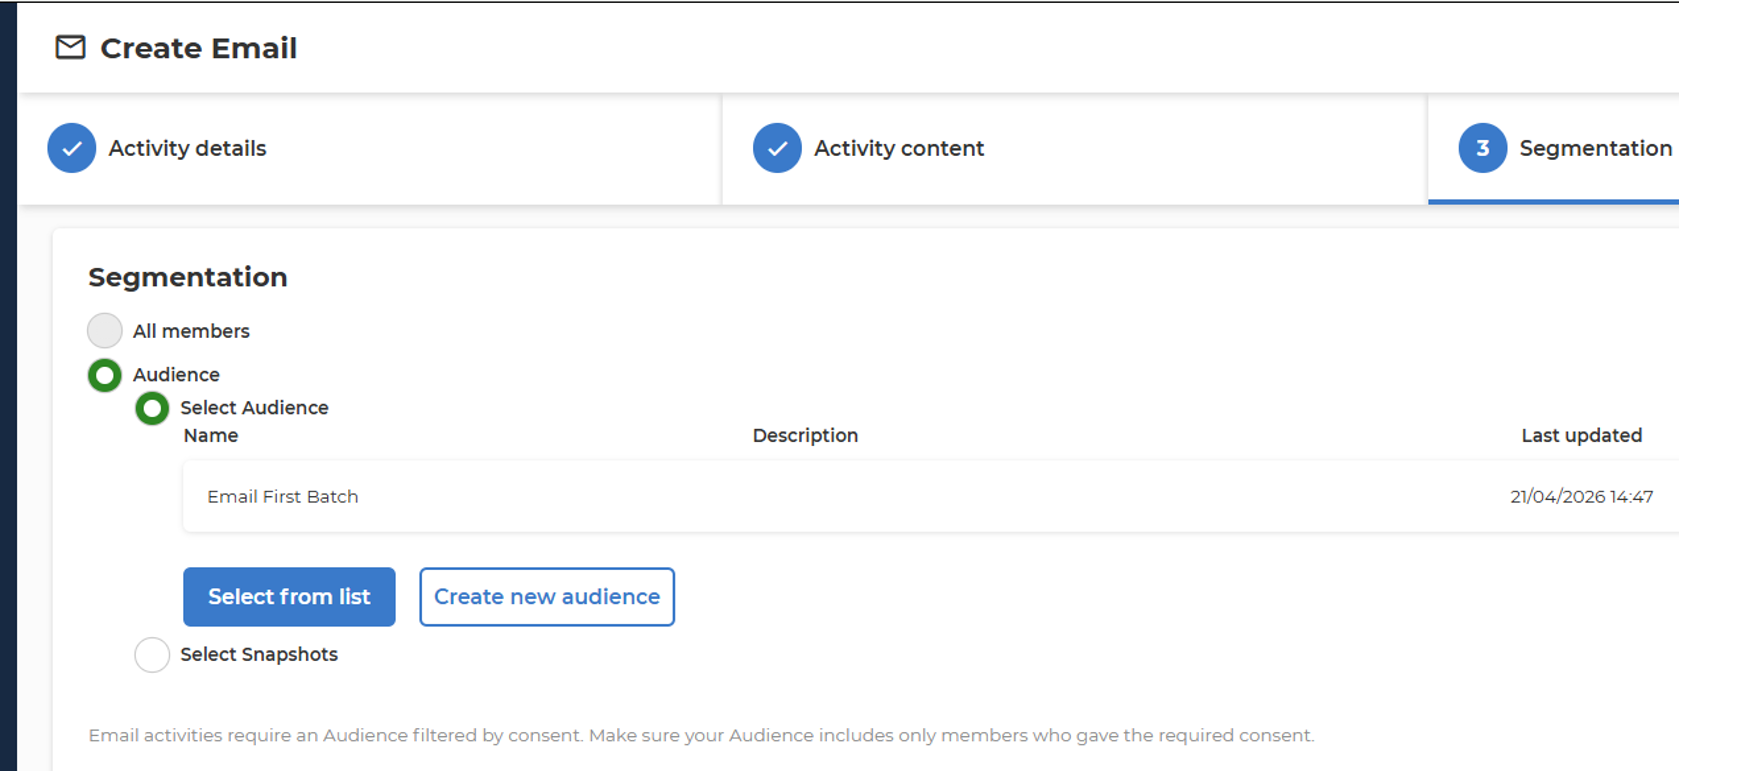
5. Use audiences in email activities
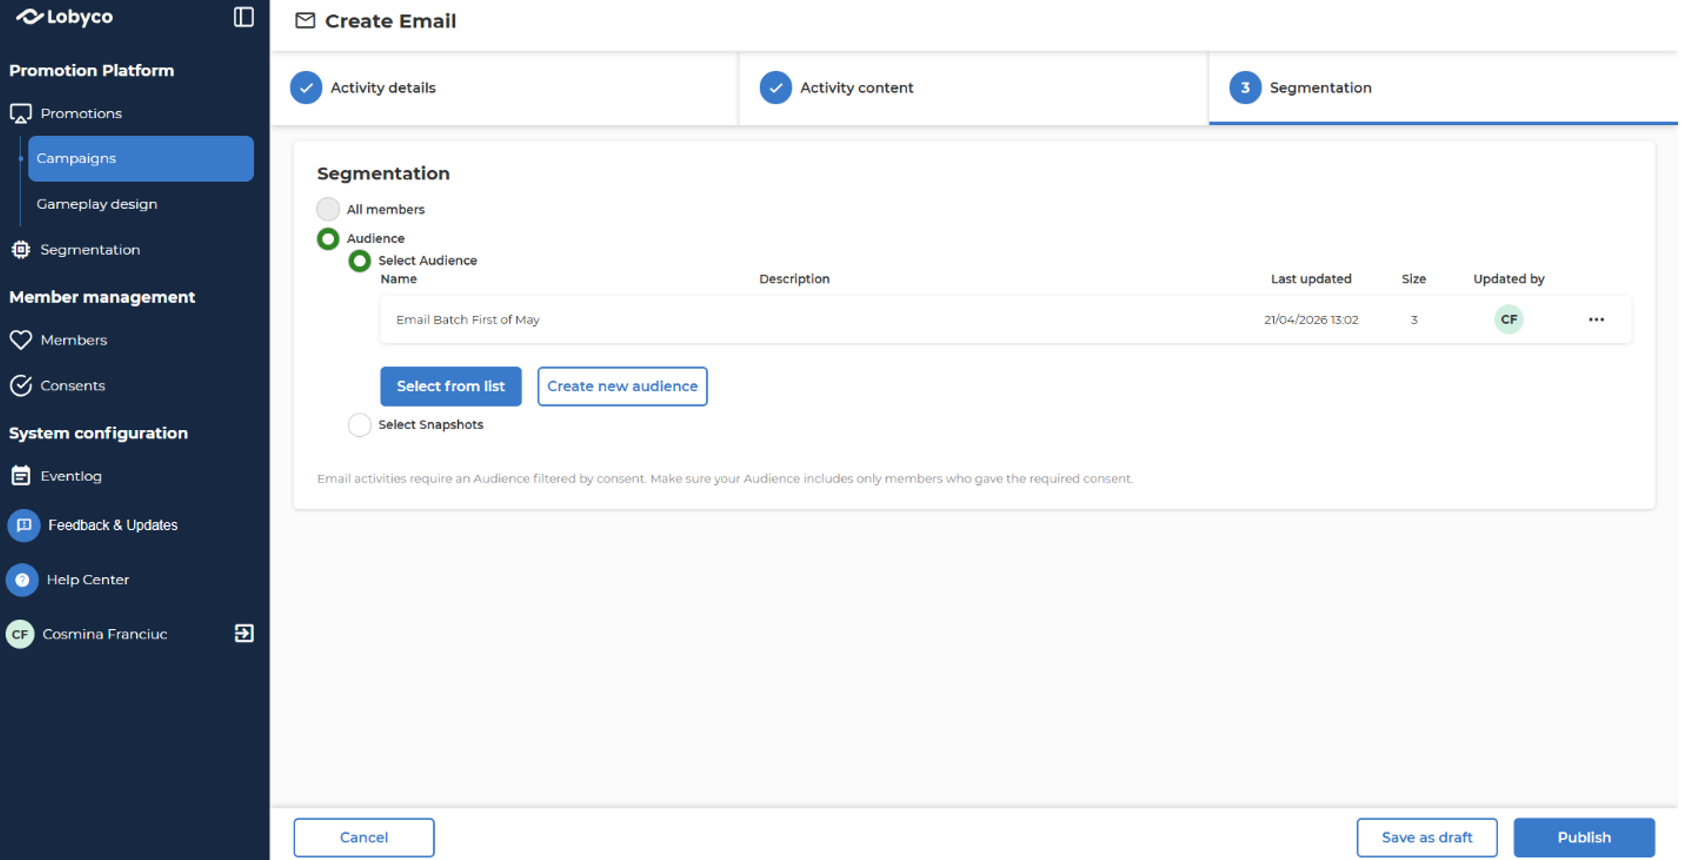
-
Schedule one email activity per day.
-
Make sure that multiple email activities with large audiences are scheduled to start on different days.
-
Assign the corresponding audience to each email activity.
Option B — Split via CSV File Upload
-
Export the members who should receive the email as a CSV file.
-
Split the CSV into multiple smaller files (one per sending day).
-
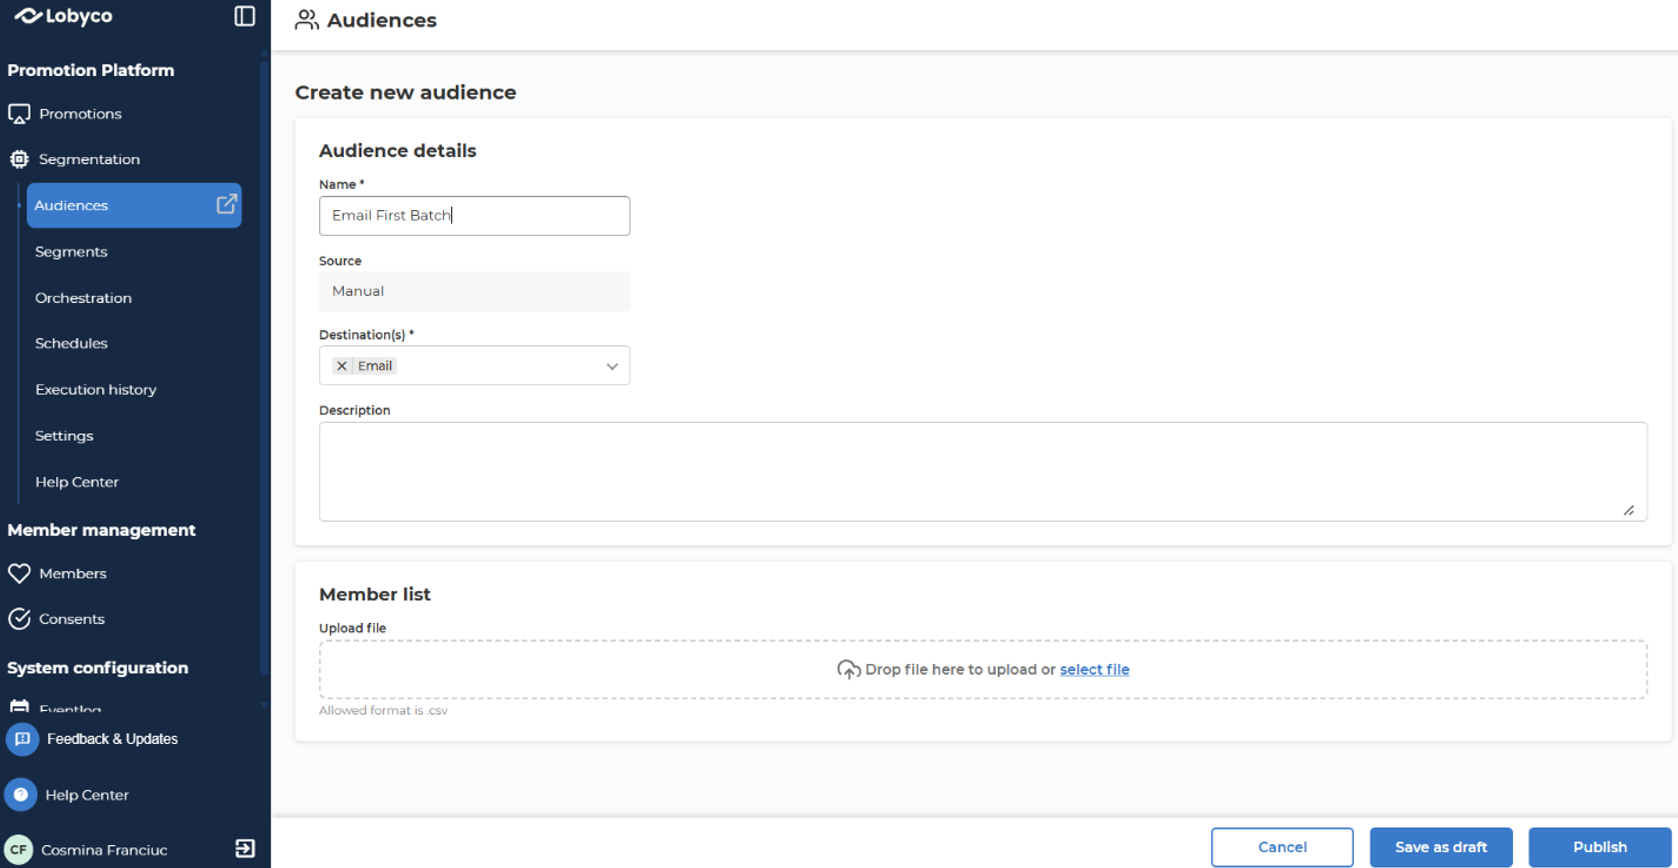
Create audiences in Nexus using each CSV file.
-
Assign the corresponding audience to each email activity.
Summary
| Phase | Action |
|---|---|
| Before sending | Identify most engaged segment for warm-up |
| Week 1–2 | Start low, increase by 20–30% daily |
| Week 3–4 | Continue scaling, monitor engagement and spam rates |
| Continue warm-up | Gradually expand to your full audience |
| After a gap | Follow the gap recovery table above before continuing |