How to trigger personalized feeds
Let's walk through an example: sending personalized communications for each customer's birthday.
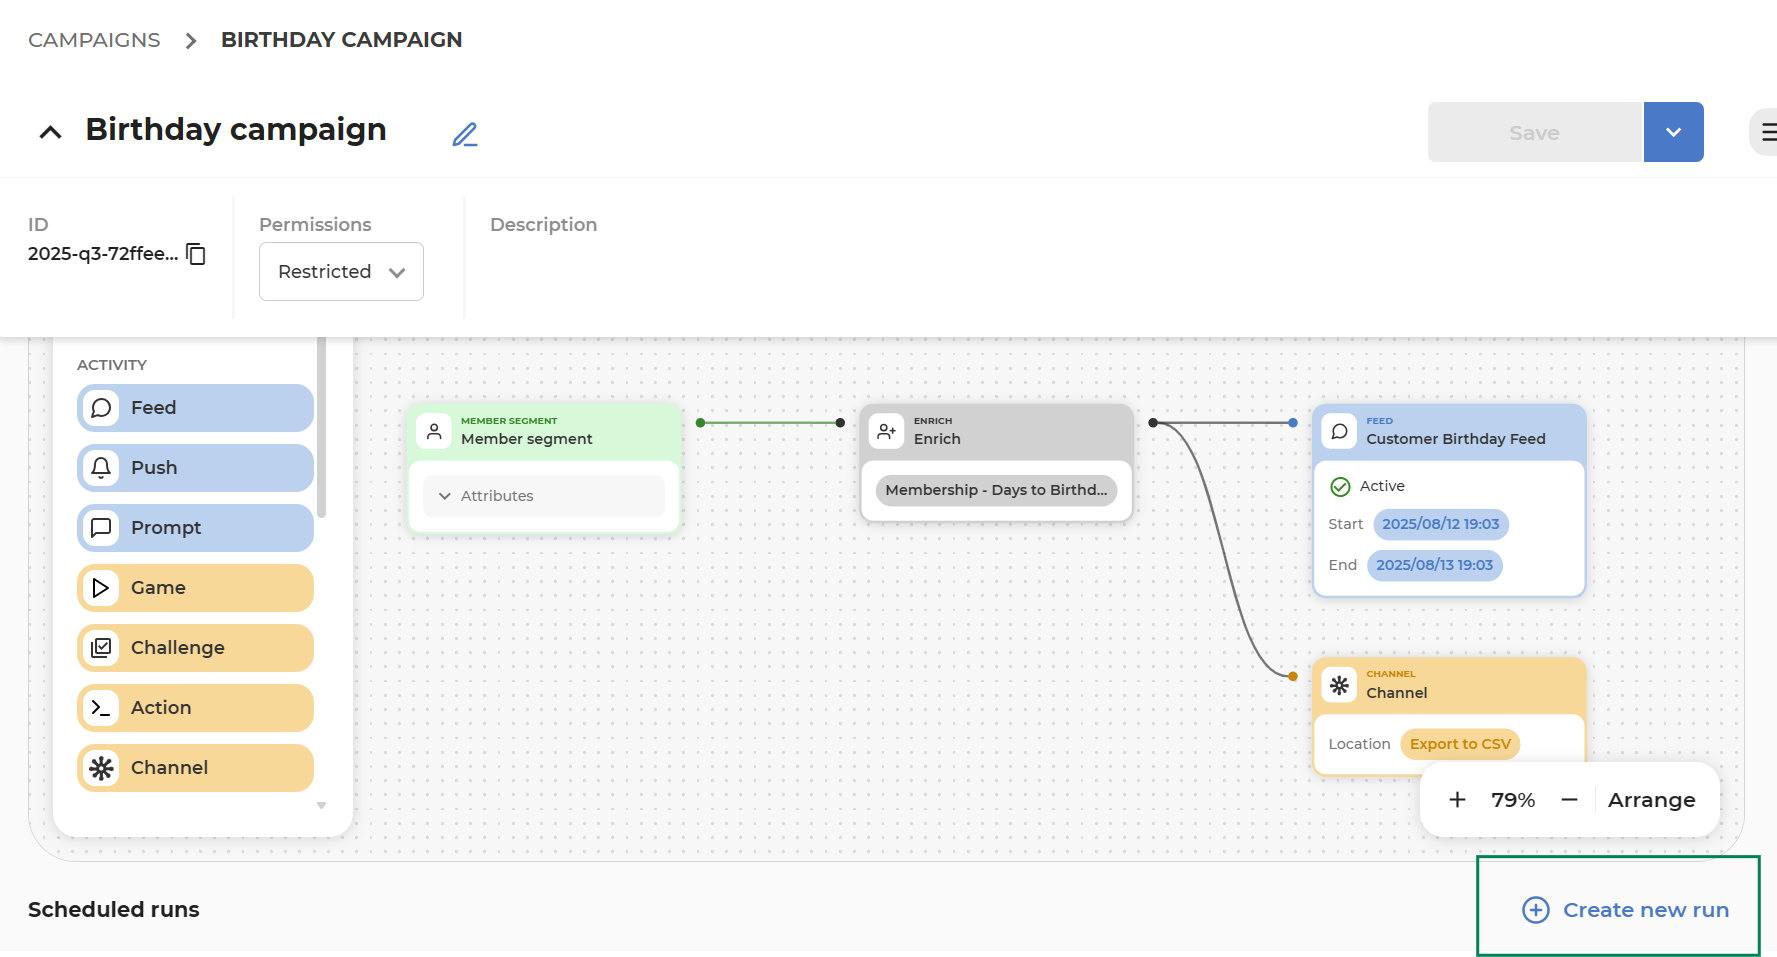
To achieve this we will set up an Orchestration Campaign that runs daily, segments customers with birthdays today, retrieves additional details about the customers and triggers a personalized Feed communication for them.
Follow these steps:
1. Create an Orchestration Campaign
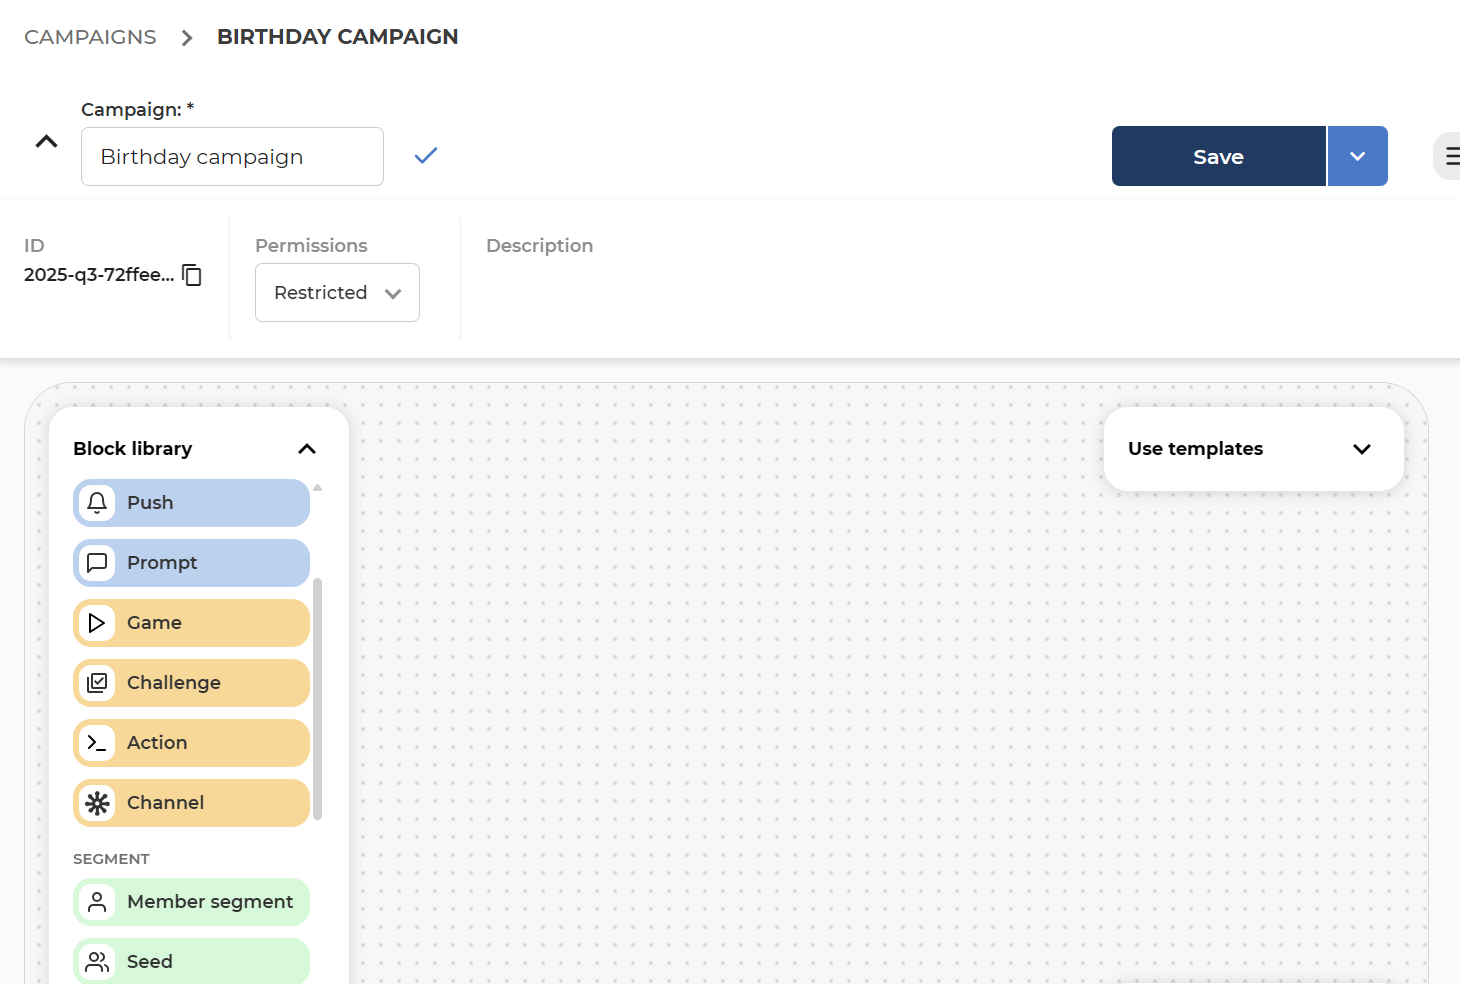
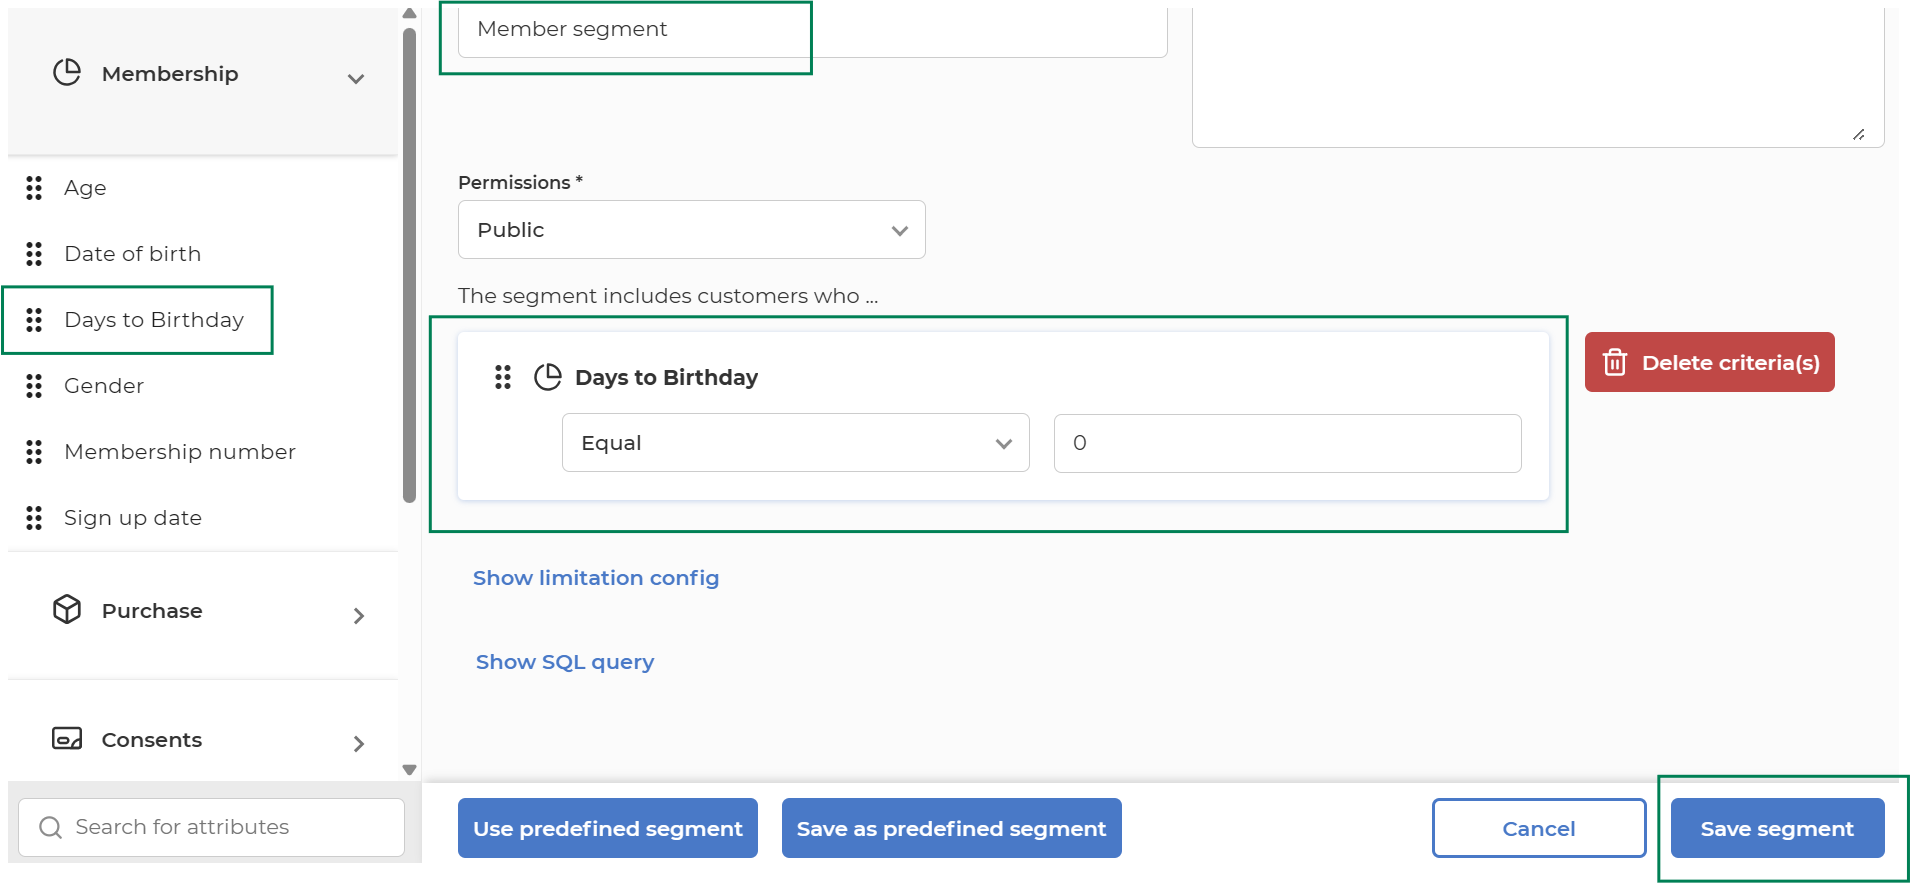
2. Segment: Fetch all Customers whose birthday is today
-
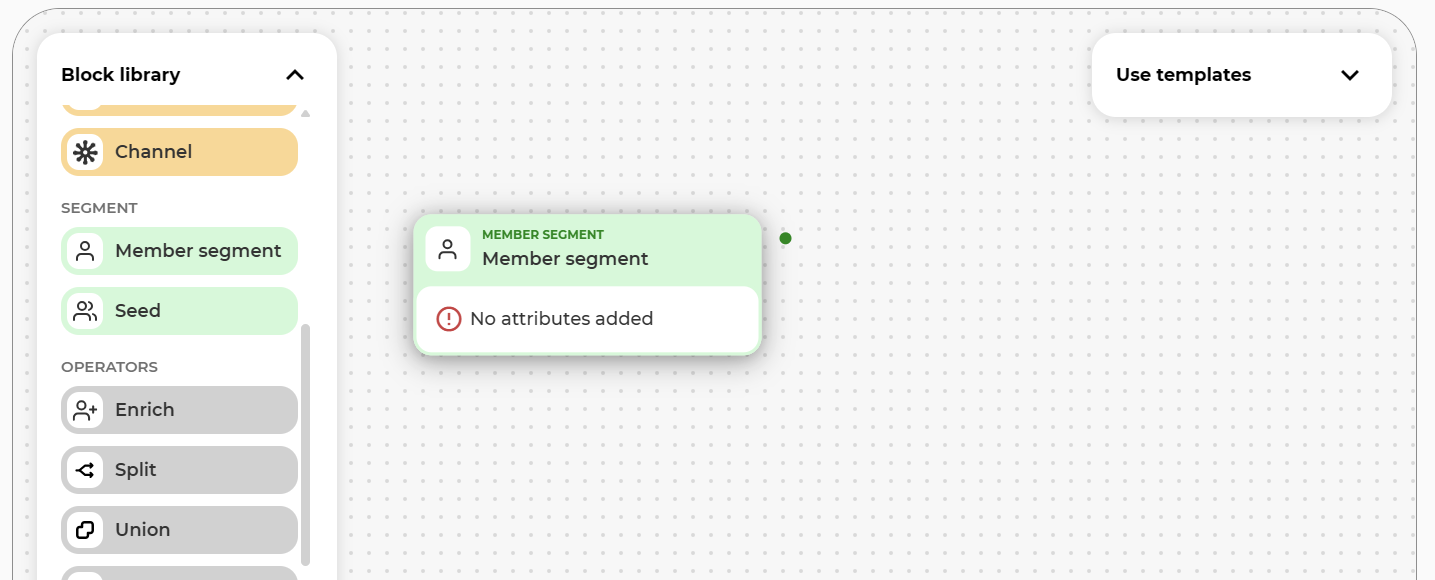
Drag Segment block on the canvas.
-
Enter the segment block (double click) and configure the criteria for segmentation.
3. Enrich details: Get more details about the customers so we can use them in the personalized communication
-
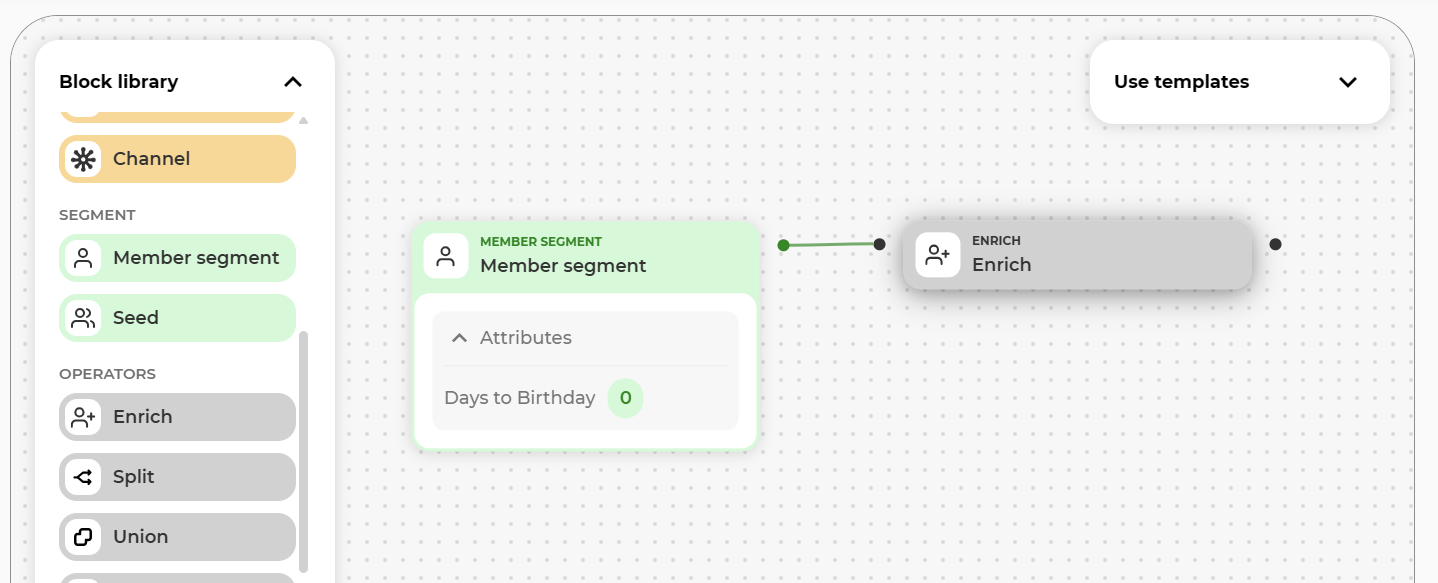
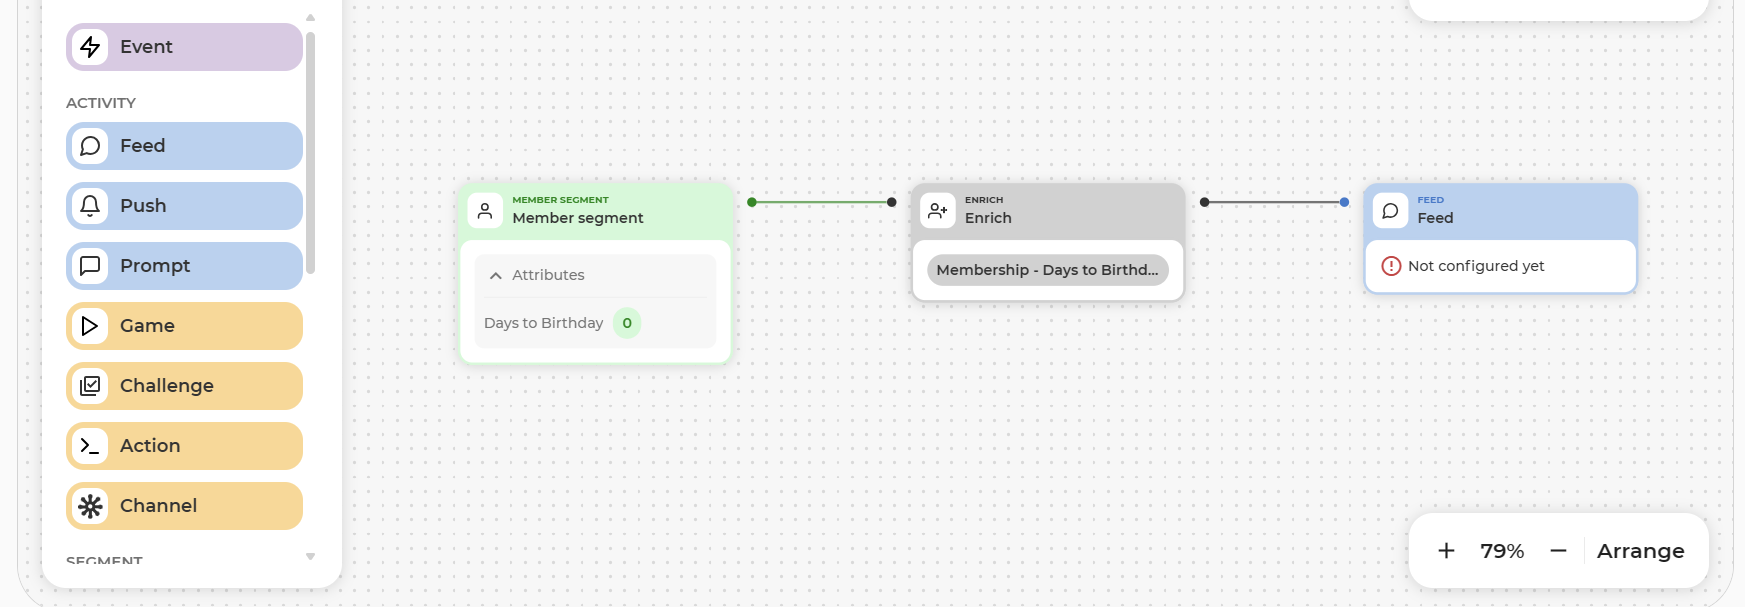
Drag Enrich block on the canvas, and connect it to the Segment block so it enriches that result.
-
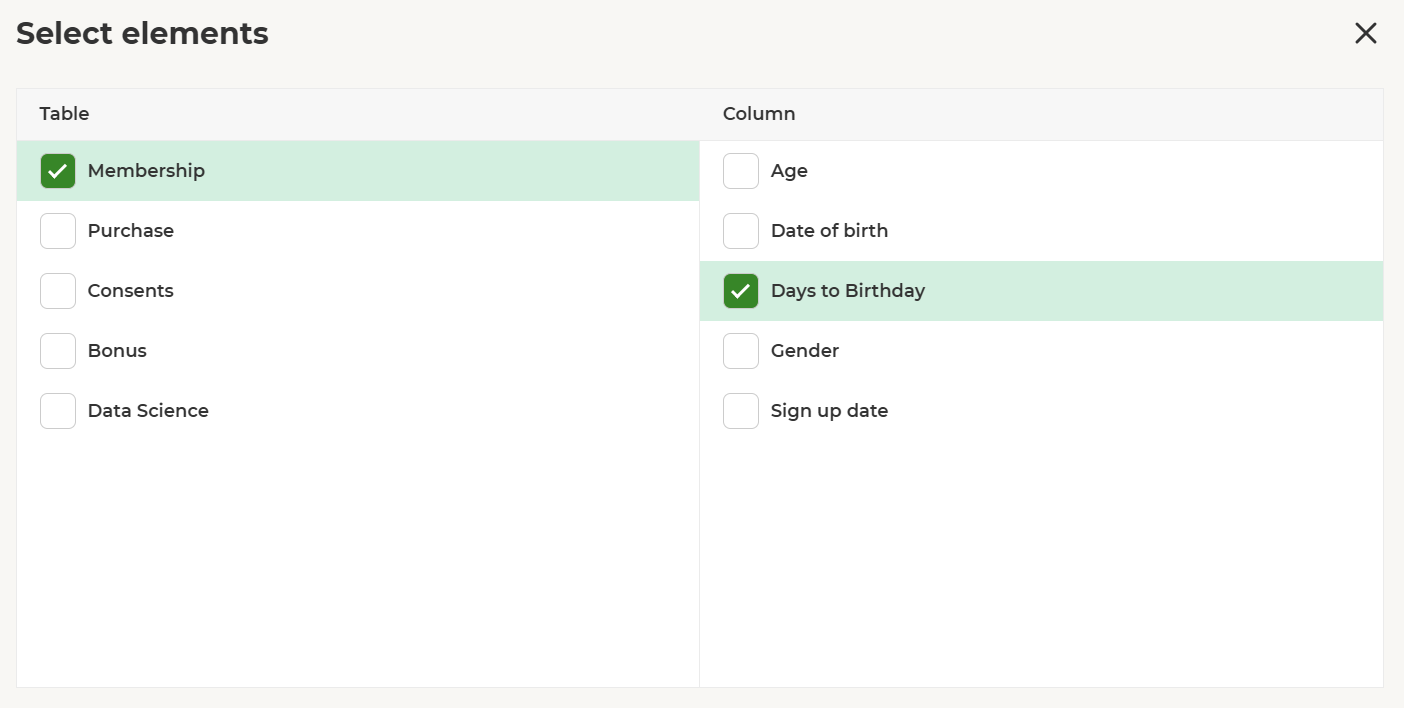
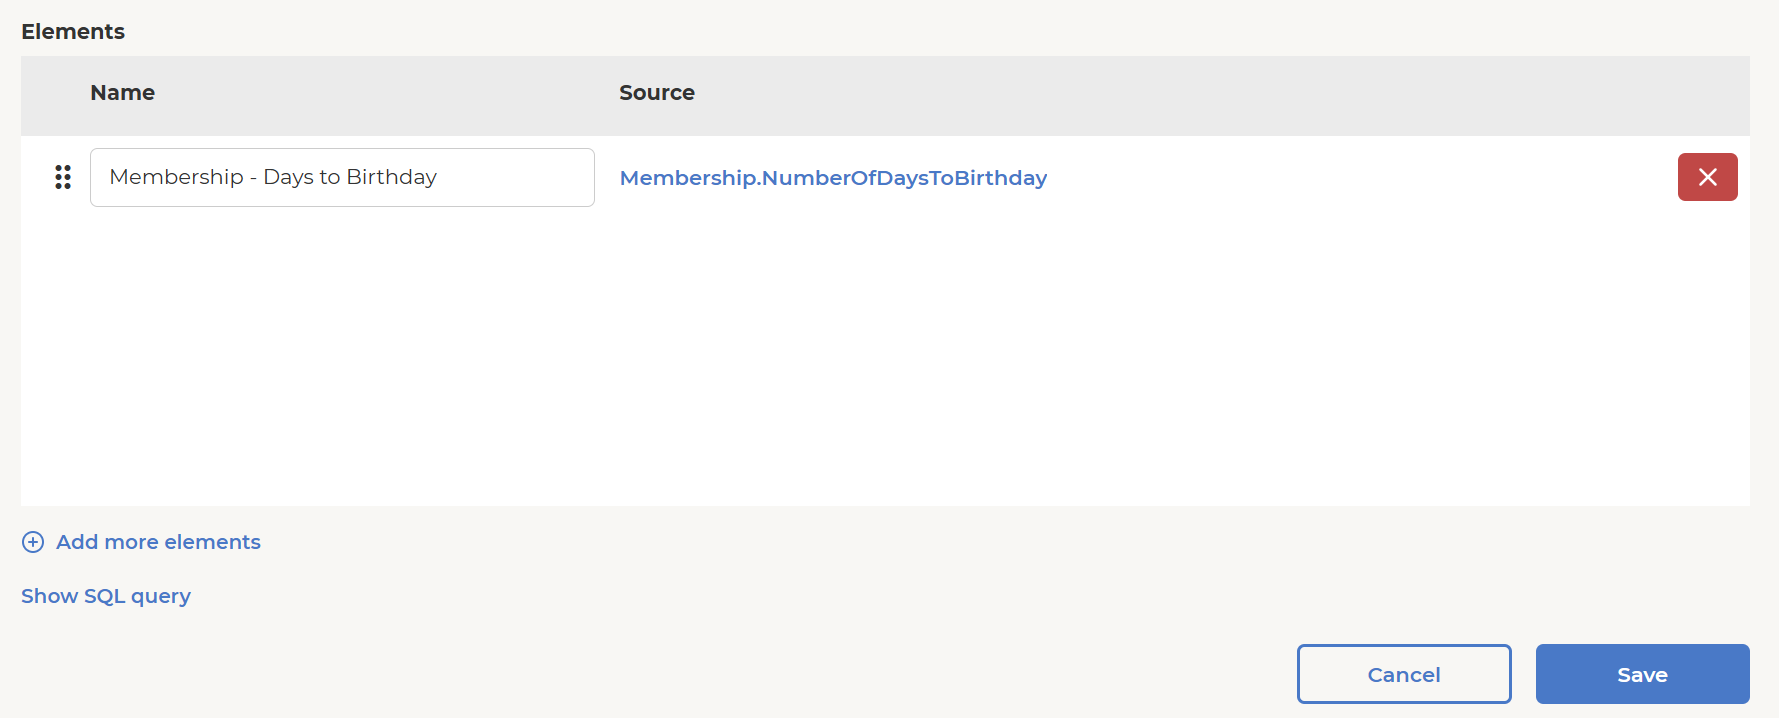
Enter the block and configure what other data you want to know about each customer.
4. Create communication activity: Connect a Feed activity in the campaign and design its content.
-
Drag the Feed block on the canvas, and connect it to the flow so it receives the result of the Enrich block.
-
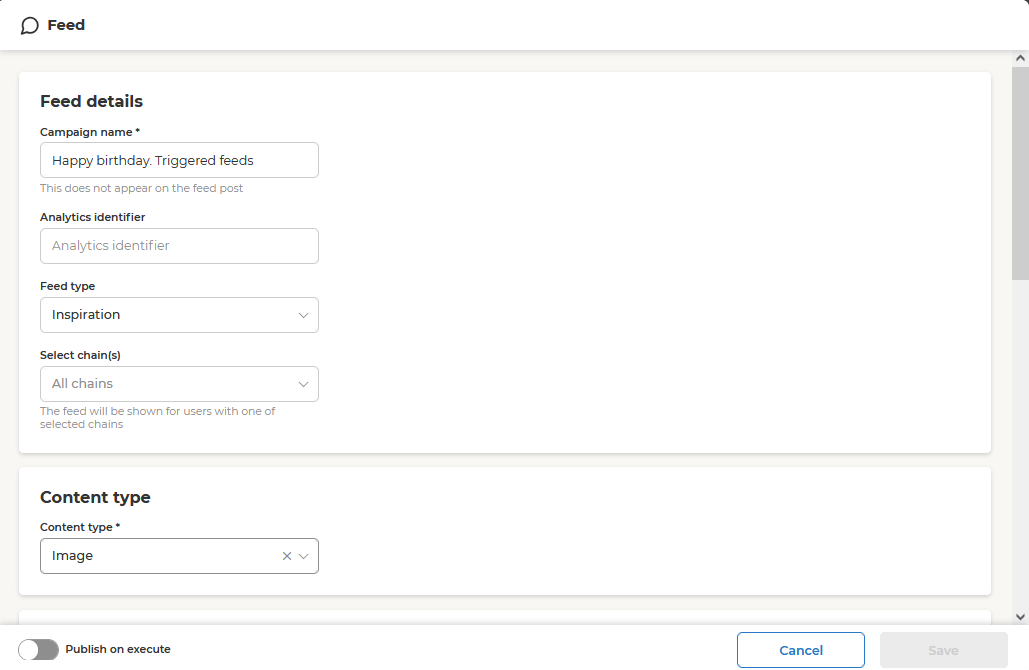
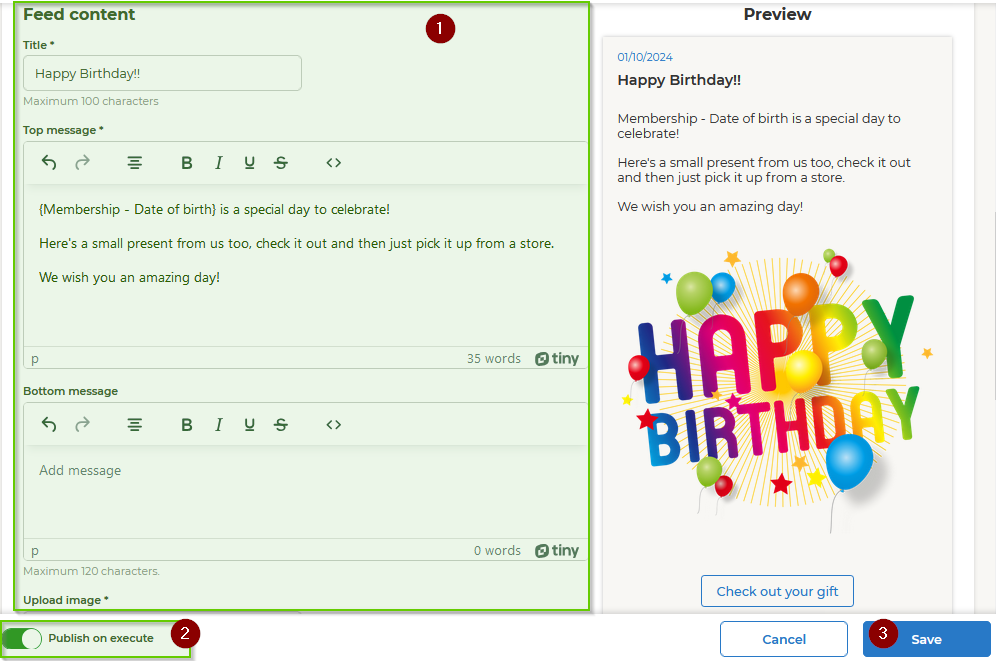
Enter the block, design the Feed activity, and save it.
-
Pay special attention to the following details, which differ from 'normal' non-triggered Feed communications:
-
Making content personalized with member attributes:
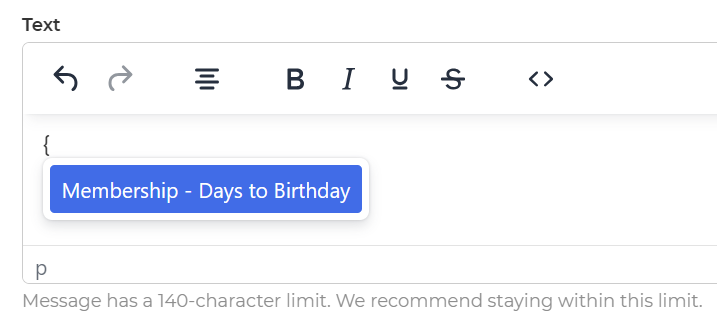
Start typing "{" in the feed message to get a list of the member attributes made available via the previous Enrich block in Orchestration. Use these attributes to personalize the message for each member. -
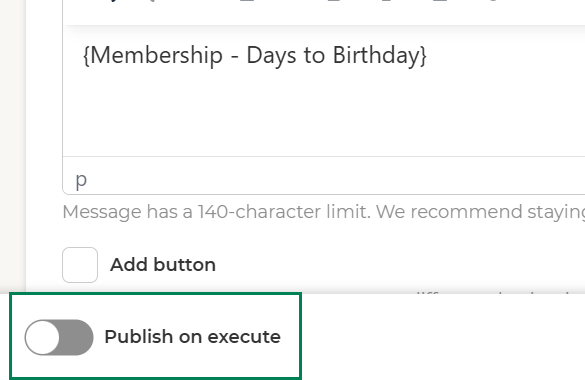
Publish on execute:

-
When Publish on execute is turned on and the Orchestration Campaign, including this Feed block, runs successfully, a new Feed activity will be created and scheduled for publication. This can either make the Feed visible instantly to App members or at a later date, depending on the start date set on the Feed activity.
-
Each successful Orchestration Campaign run will create a new Feed activity. Be mindful of when and how to run these campaigns to avoid creating unwanted duplicate communications.
-
Any newly created Feed activity will appear in the Admin Tool, allowing the Marketing Admin to review and edit it.
-
With Publish on execute turned off, a successful Orchestration Campaign will create a new Feed activity in Draft state. From there, the Marketing Admin can review it and decide whether to publish or delete it. This method is recommended during testing phases and for better control when starting with automated triggered communications.
-
-
5. Test and execute
Test and iterate until the desired result is achieved.
-
As mentioned above, during testing, we recommend setting the Feed setting Publish on execute to off.
-
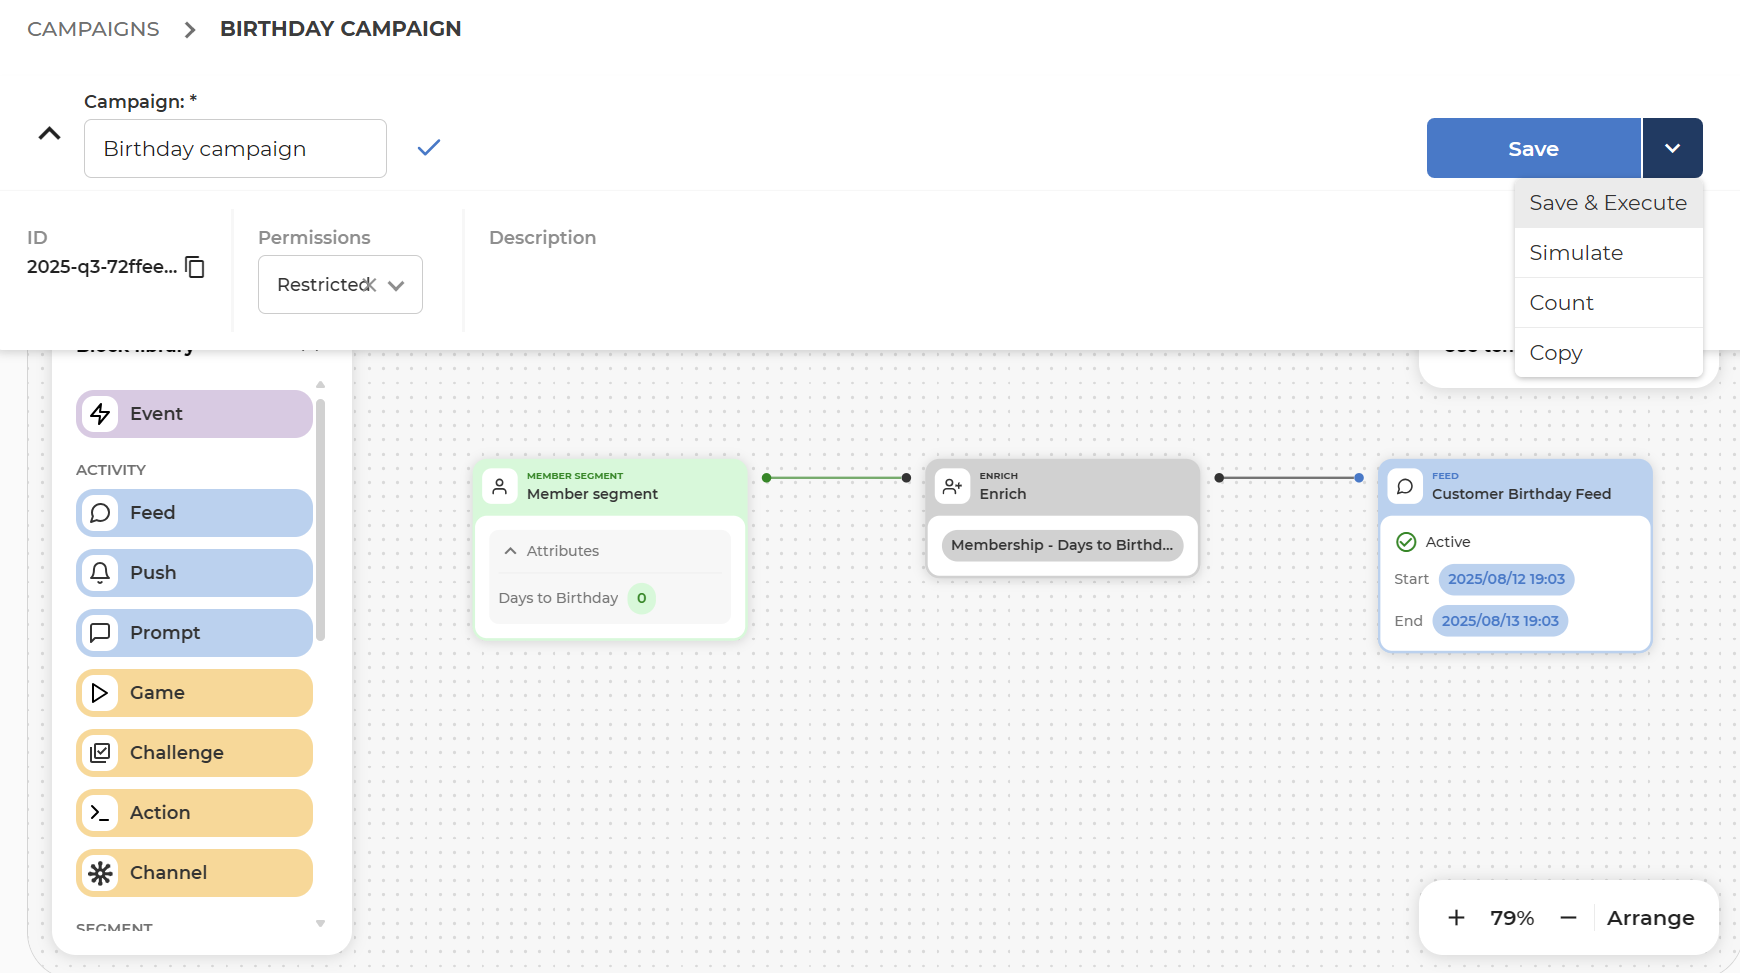
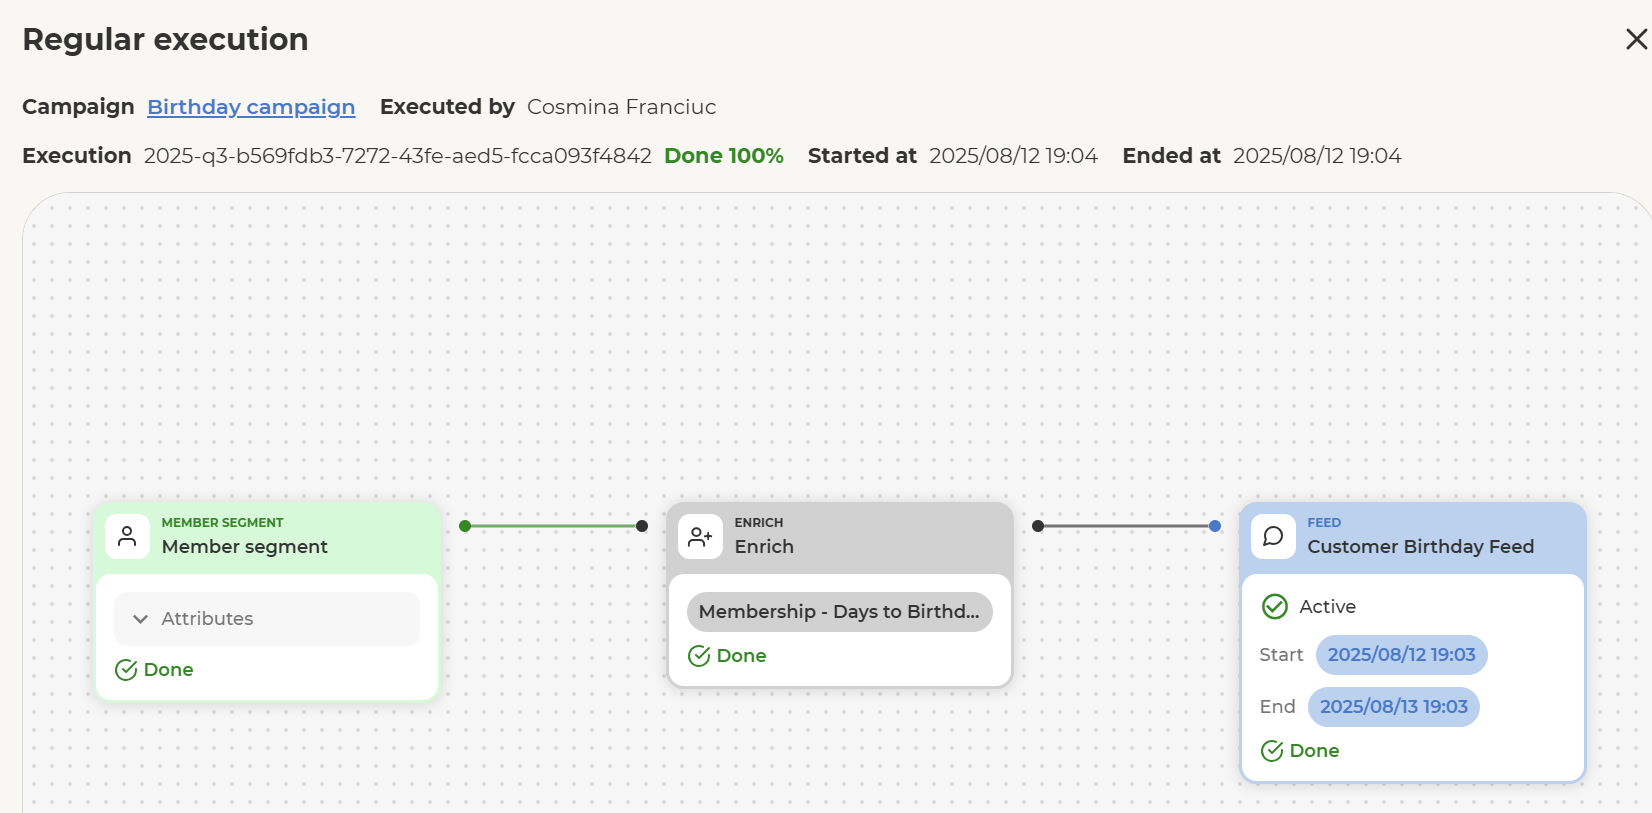
Save and execute. Then, check the results in Orchestration: Did it run successfully? Are there members in the segment?
-
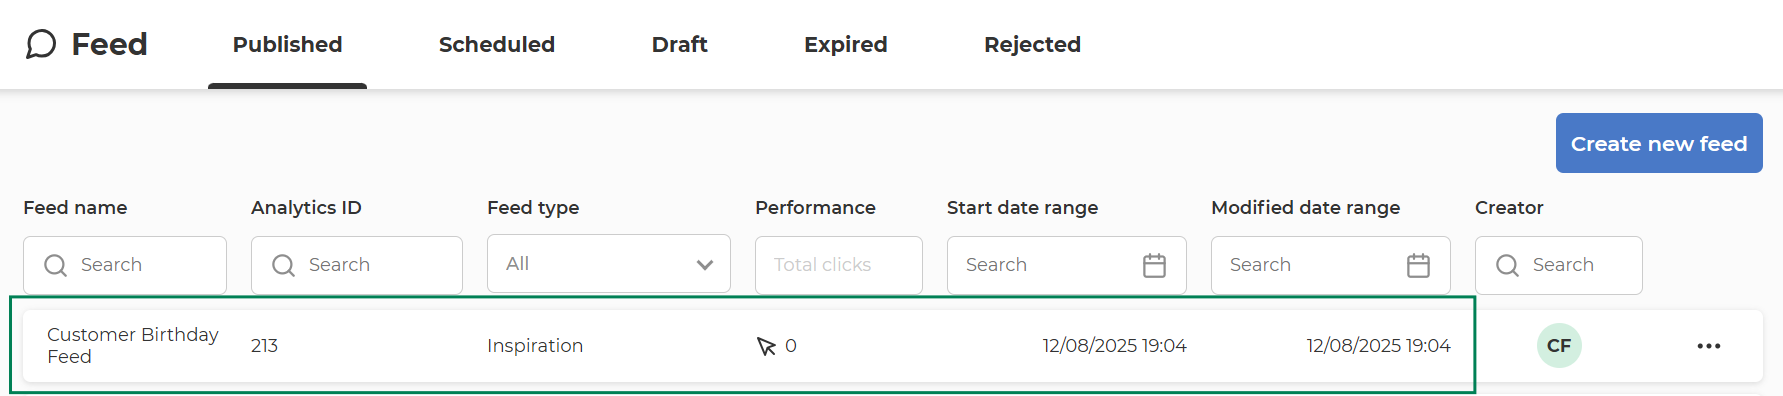
Check the result in the Feed Admin Tool: Was the Feed activity created and shown correctly?
-
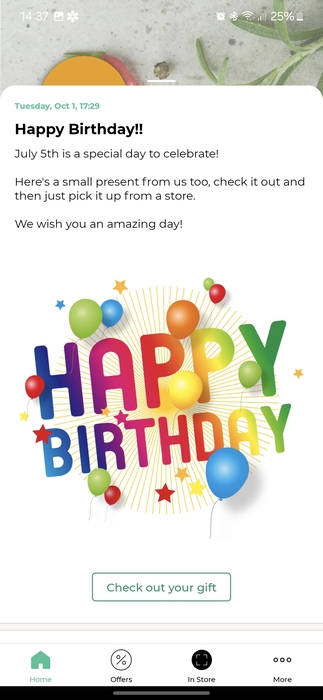
Check the app: If the Feed activity is published now, does the Feed appear as expected in the app?
-
Here are two ways to check which customers were segmented and which attributes were loaded for them:
-
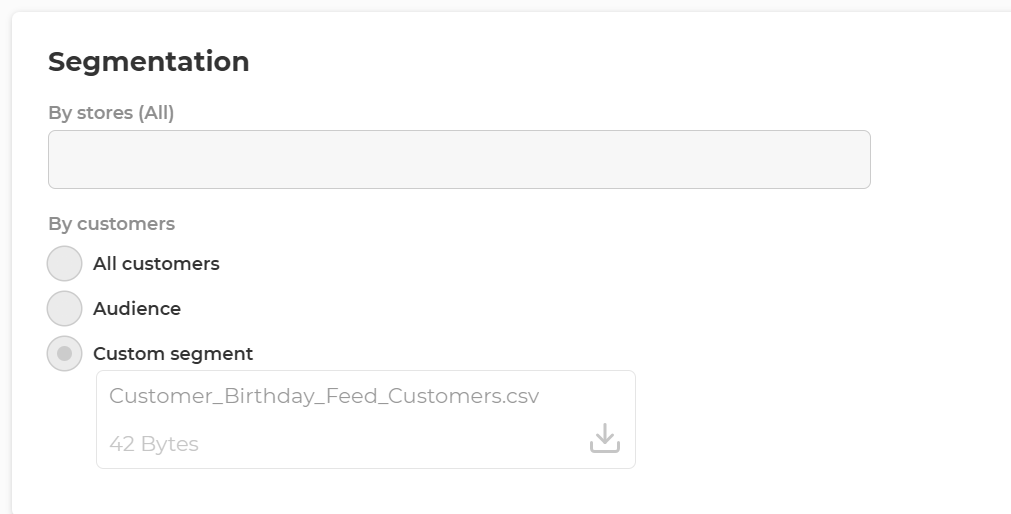
From the Feed activity in the Admin Tool: Find the newly created Feed activity, check the Segmentation section, and download the list of customers and attributes used for this specific Feed.
-
From the Orchestration Campaign directly, by attaching another block to export to CSV. Then, on every run, the data will be exported to CSV for a quick check inside the Orchestration Campaign.
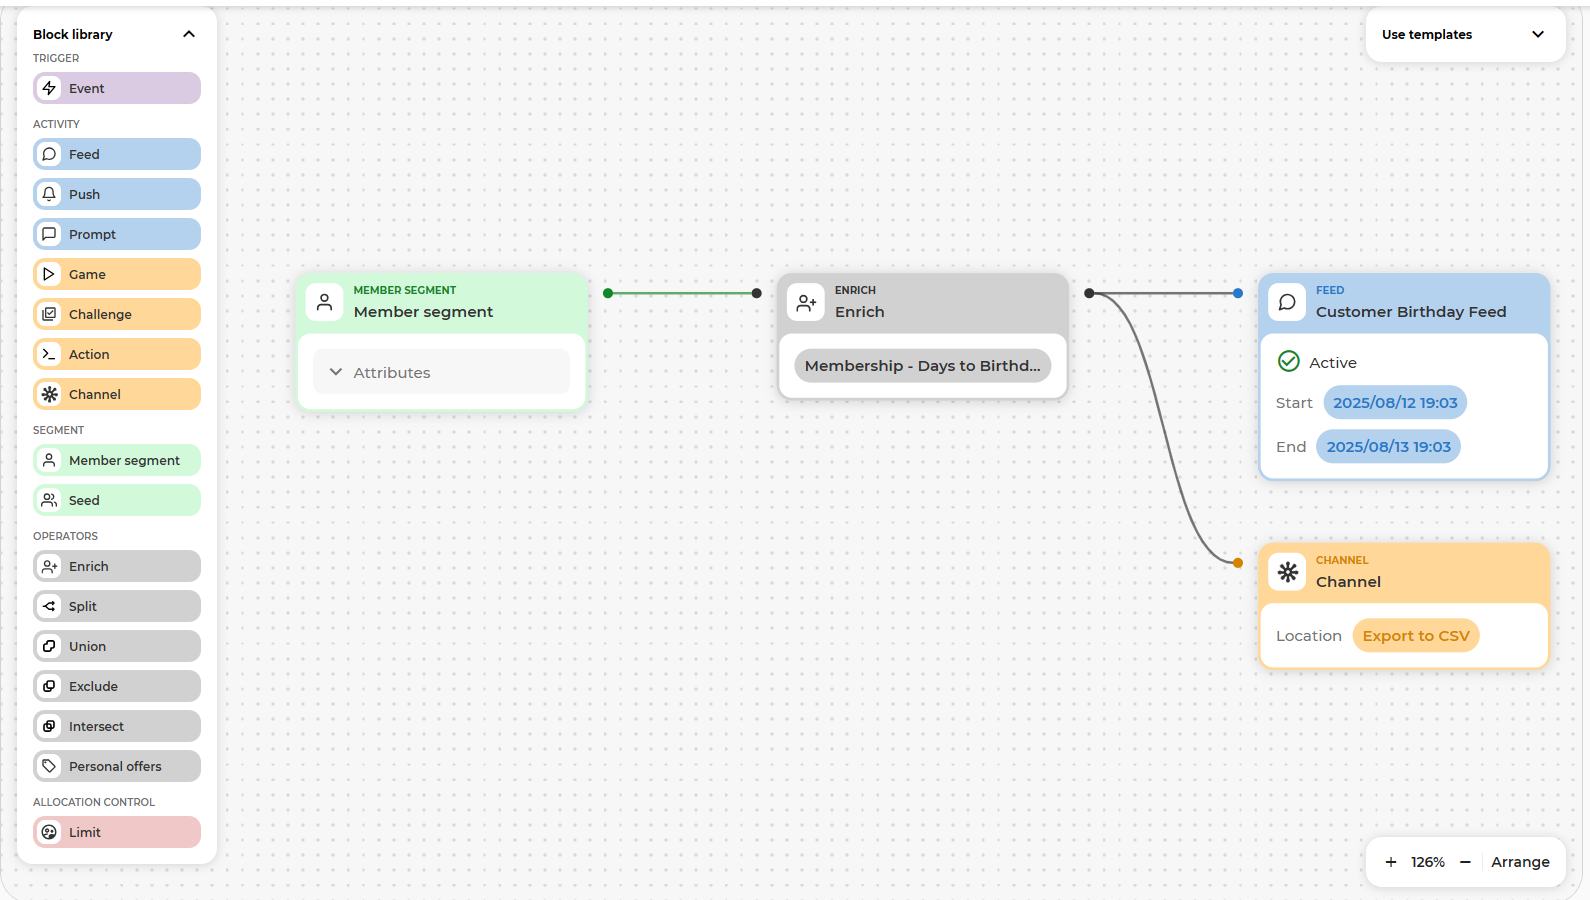
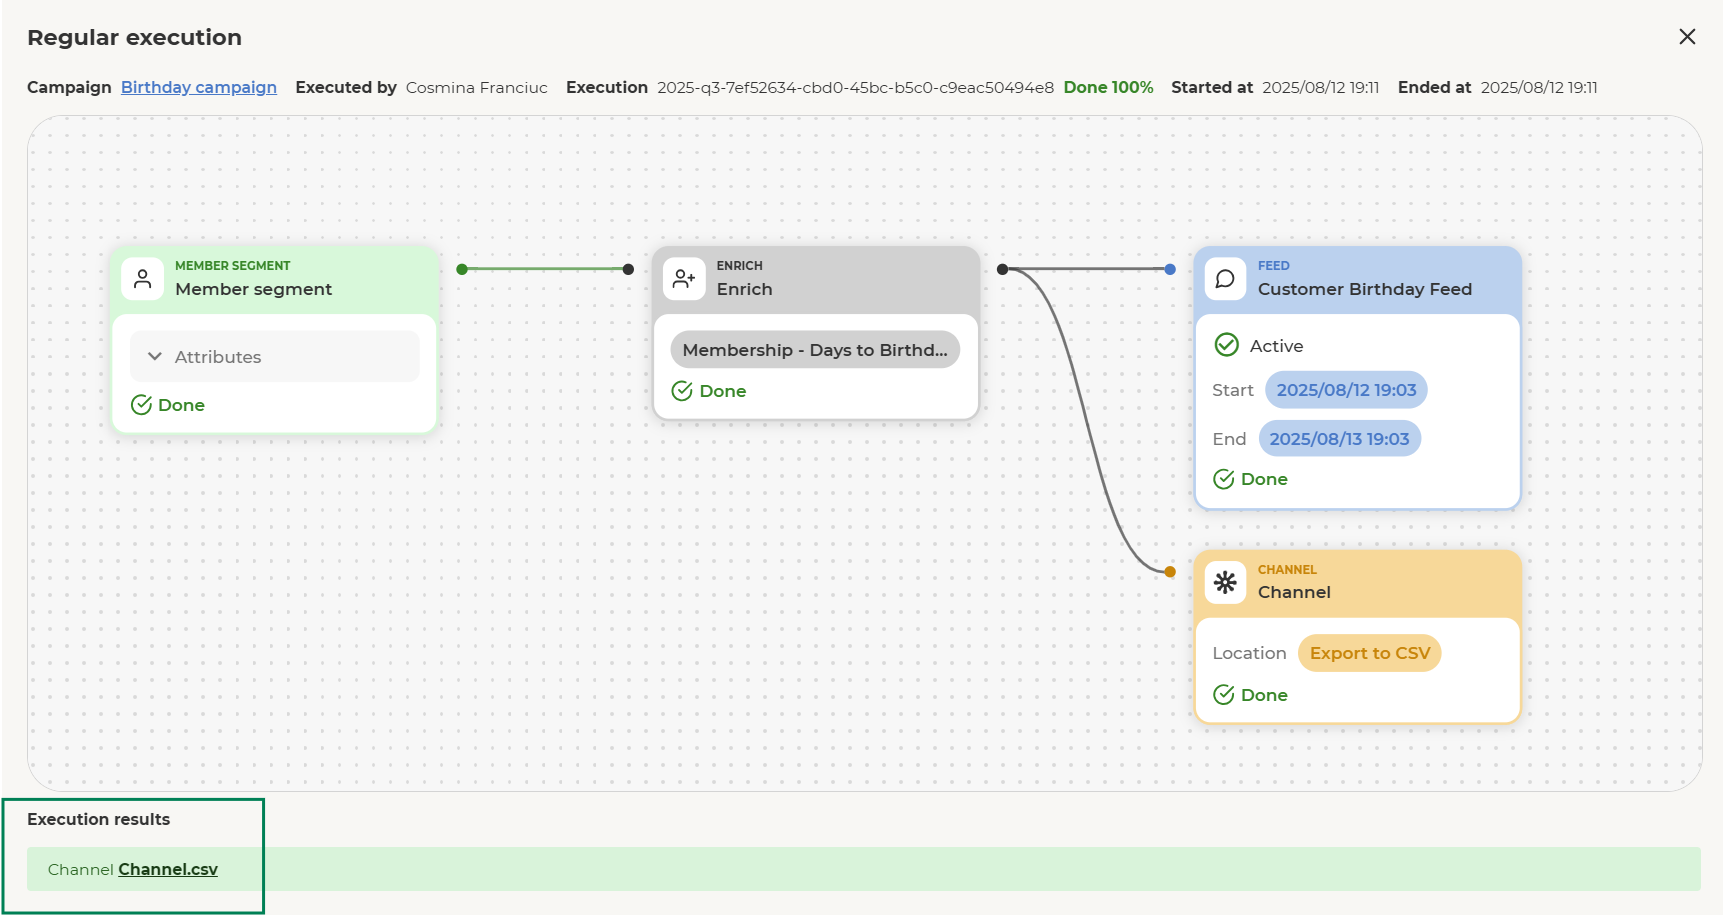
Run the campaign again and check the CSV in the results.
-
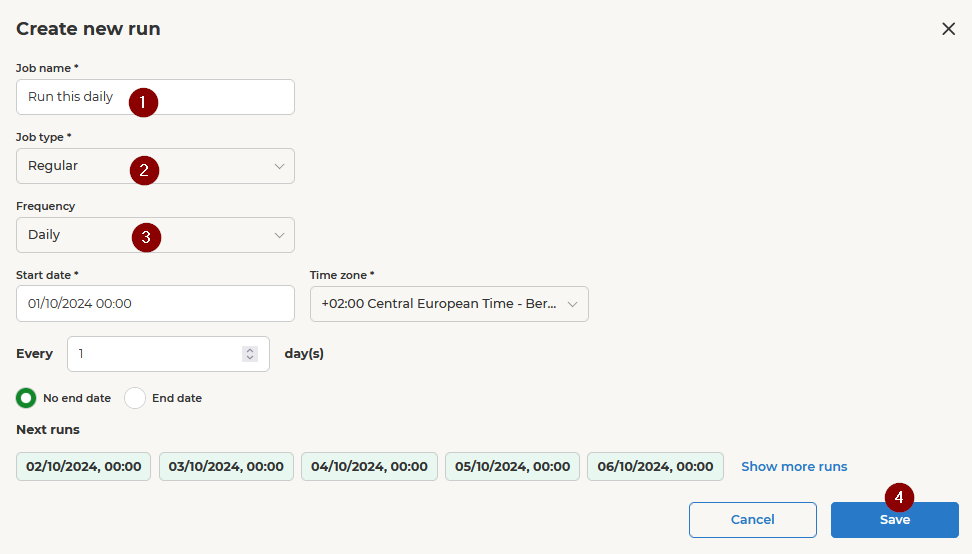
6. Run campaign regularly
Decide how often to run the Orchestration Campaign automatically and configure it accordingly. In this case, for a birthday message, we will run it daily to fetch customers with birthdays today and send them the message.
Remember to save the changes made.