Campaign canvas
This section provides information about campaign details which is displayed when you click on any campaign from the campaign list or click 'Add new campaign' button.
Basic campaign information
You can rename your campaign by clicking on the 'pencil' icon to the right of campaign name.
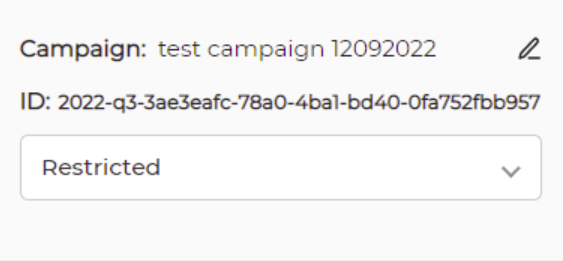
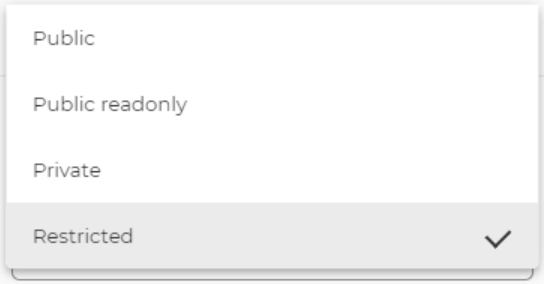
You can set campaign permissions that will define who can see and edit your campaign:
- Public: Segment is available for anyone.
- Public readonly: Segment is available to all users, but they cannot edit it.
- Restricted: Segment is available to users of your department only (represented by Azure Active Directory Group).
- Private: Segment is available to you only.
Top menu
The top menu of the campaign canvas page provides you following functionality:
- Copy: Creates new campaign from the current one with same configuration and access level.
- Arrange: Reorganizes campaign blocks and their connections to look nicer.
- Count: Executes campaign in 'Count' mode, see execute flow for details.
- Simulate: Executes campaign in 'Simulate' mode, see execute flow for details.
- Execute: Executes campaign in 'Regular' mode, see execute flow for details.
- Save: Saves current campaign configuration.

Canvas
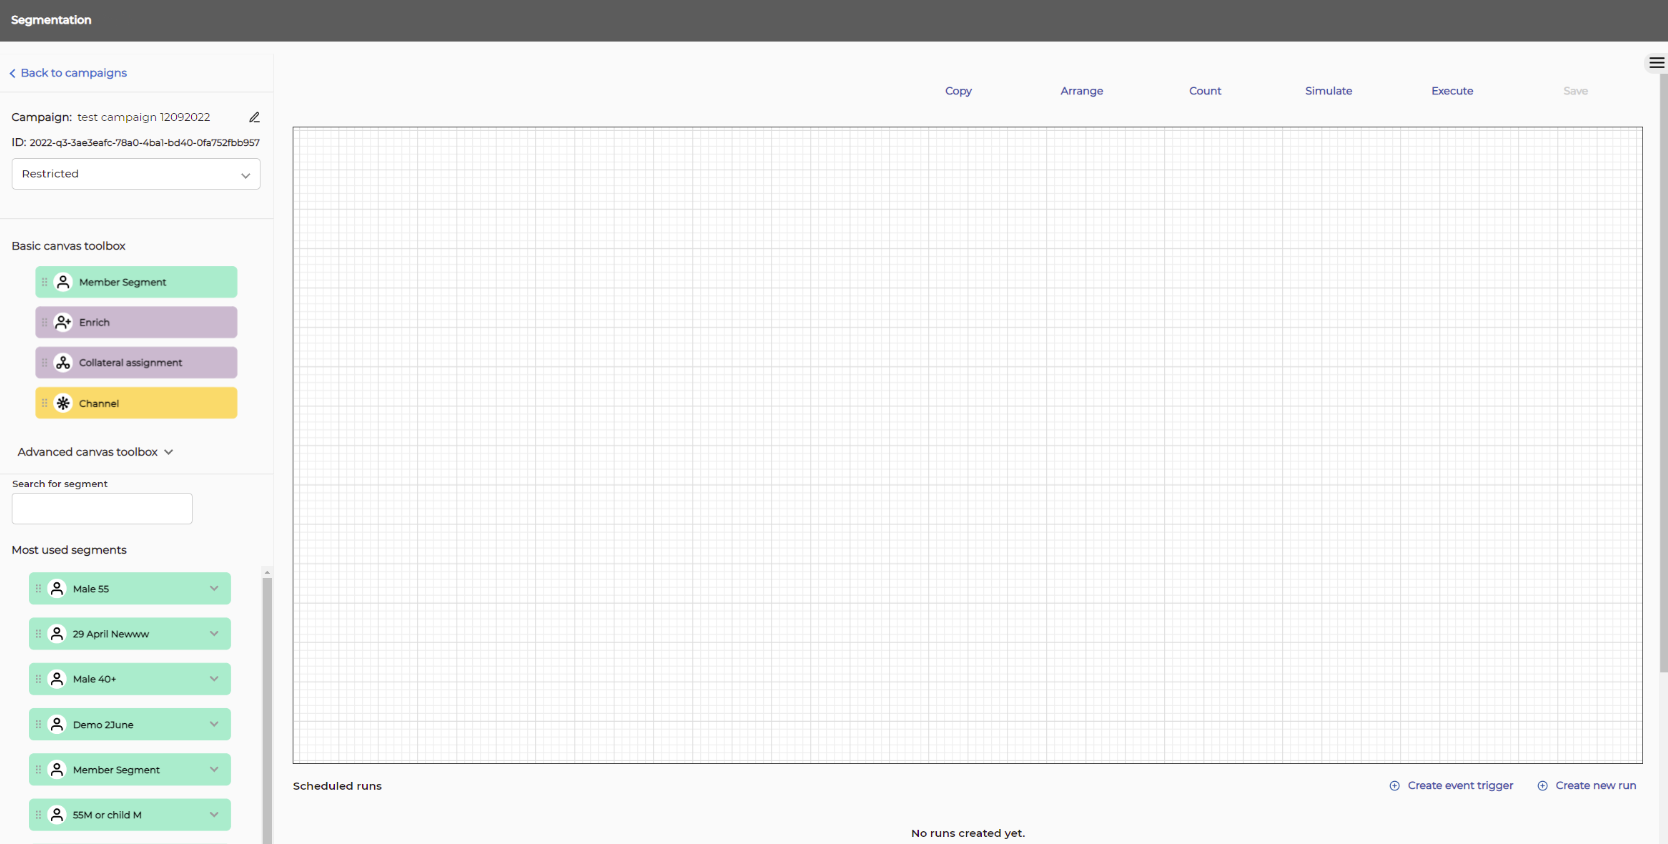
The Canvas is the central place where the campaign definition and logic is created. Left of the canvas you find two different toolboxes which holds the blocks used to create your campaign. The upper "Basic toolbox" holds the most common used blocks, while the bottom one "Advanced toolbox" holds blocks for more advanced campaign operations.
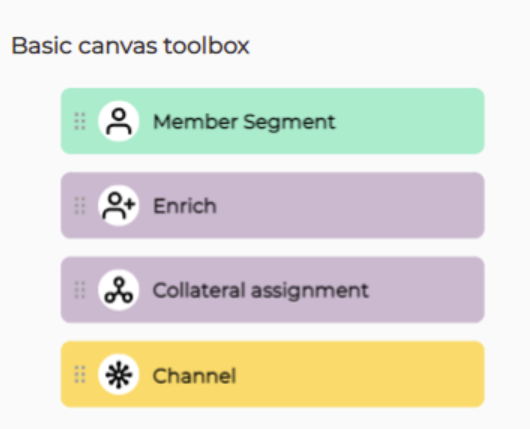
Basic toolbox
You can find following action block in the basic toolbox:
- Segment: Provide you list of membership numbers of those members who match your segmentation criteria defined in form of rules and rulesets. See segment block for more information about segment block configuration.
- Enrich: Takes list of membership numbers as an input and adds additional membership information to it as an output. See enrich block for more information about enrich block configuration.
- Collateral assignment: this block is used to assign tags or offers such as gifts or prizes to the segmented members. See Collateral assignment block for more information about collateral assignment block configuration. @
[we need to be sure if Profi have gifts available] - Personal offers: assign personalized offers to members within connected segments. See Personal offers block for more information about collateral assignment block configuration.
- Channel: This block defines a destination where the results of campaign execution is sent to. See channel block for more information about channel block configuration.
Advanced toolbox
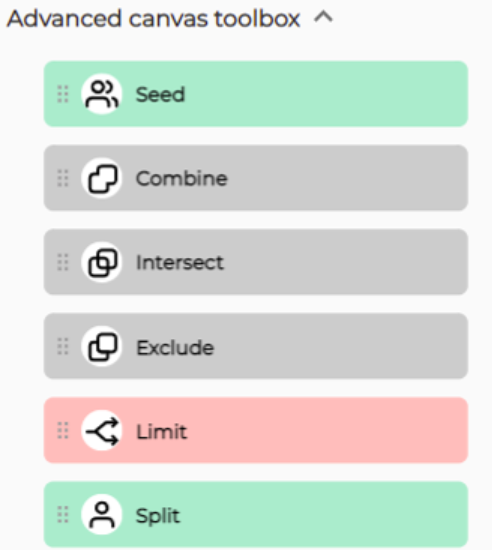
You can find following action block in the advanced toolbox:
- Seed: This block allows you to use existing list of membership numbers that you can either upload from your PC or use from another campaign execution. See seed block for more information about seed block configuration.
- Combine: This block allows you to combine segmentation results from all blocks connected to it, meaning that members are added together. See combine block for more information about combine block configuration.
- Intersect: This block allows you to intersect segmentation results from all blocks connected to it so only those results which are present in all connected blocks will be returned as the output of intersect block. See intersect block for more information about intersect block configuration.
- Exclude: This block allows you to exclude segmentation results of one connected block from another connected block. See exclude block for more information about exlude block configuration.
- Limit: This block allows you to configure limit segmentation results of another block connected to it, meaning reducing the member list using specific configuration. See limit block for more information about limit block configuration.
- Split: This block allows you to split segmentation results of another block into several groups defined by a split configuration. See split block for more information about split block configuration.
Campaign canvas
You can drag&drop blocks from the basic and advanced toolboxes to the campaign canvas. This is the canvas that holds all actions that will be executed when you start campaign execution.
How to navigate on the canvas?
- You can drag the canvas and move around.
- You can hold the Ctrl key and use your mouse wheel to zoom in and out.
- To add a block from the toolboxes you need to drag it to the canvas holding down the left mouse button.
- If you want to delete a block then you can left click the block and simply hit the Del key.
- If you want to delete a connection between two blocks then left click the line between the blocks and hit Del.
- To edit a block you need to double click it.
- To duplicate a block you can use "Ctrl + C" and "Ctrl + V" keyboard shortcuts.
To save the modifications you need to click Save button from the top menu. Changes are not auto saved.
Execute flow
To start campaign execution you need to press one of three buttons: "Count", "Simulate" or "Execute".
- Count: Starts campaign execution without exporting campaign results.
- Simulate: A simulation is a limited execution in comparison to regular execution. Simulation restricts data receiving to end customers by skipping 'data distribution' block in flow. Data distribution block can be channel block with specific locations such as Audience, App, Game, Voucher, and other locations depending on retail-customer integrations. Prompt, Feed and Push blocks will be skipped in flow. Thus prompt, feed or push content won't be created after the simulation run.
- Execute: Starts campaign execution with no restrictions. This is also called a Regular execution.
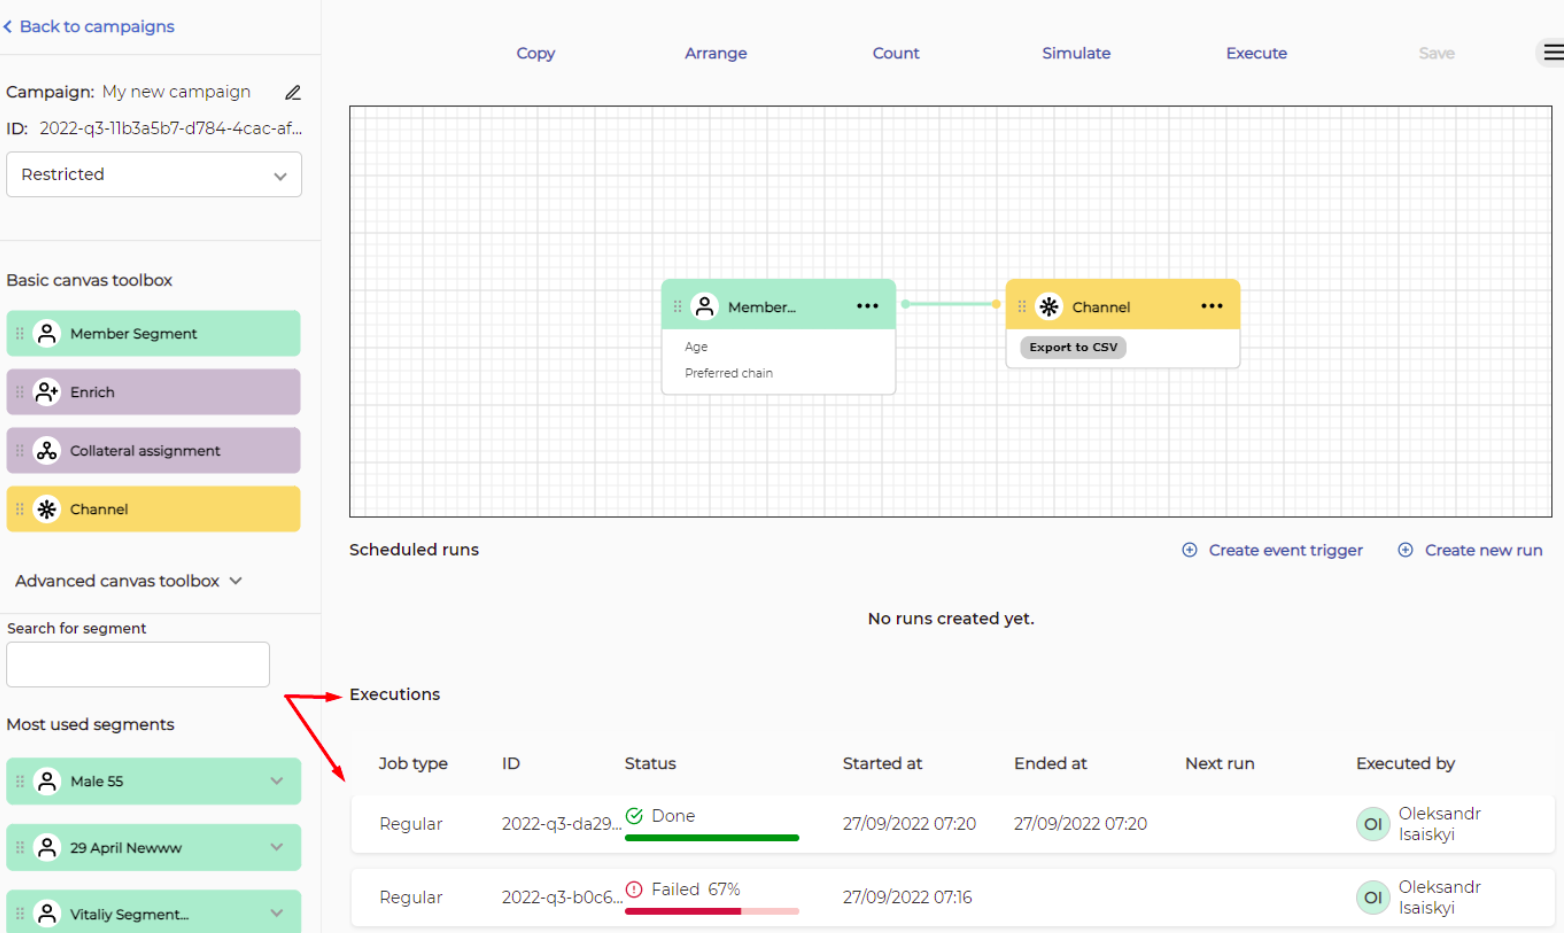
Executions section
You can see Executions section below the canvas and Scheduled runs section. The Execution section shows a table containing all executions of the campaign. The table has following columns:
- Job type: Show campaign execution mode (Count, Simulation, or Regular).
- ID: Shows campaign execution id.
- Status: Shows execution status (In Progress, Done, Failed, Terminated, Cancel Requested, Scheduled).
- Started at: Shows date and time of the started execution.
- Ended at: Shows date and time of the completed execution.
- Next run: If execution is controlled by a recurring scheduler then next execution date and time is displayed in this column.
- Executed by: Shows icon with initials and name of who triggered execution.
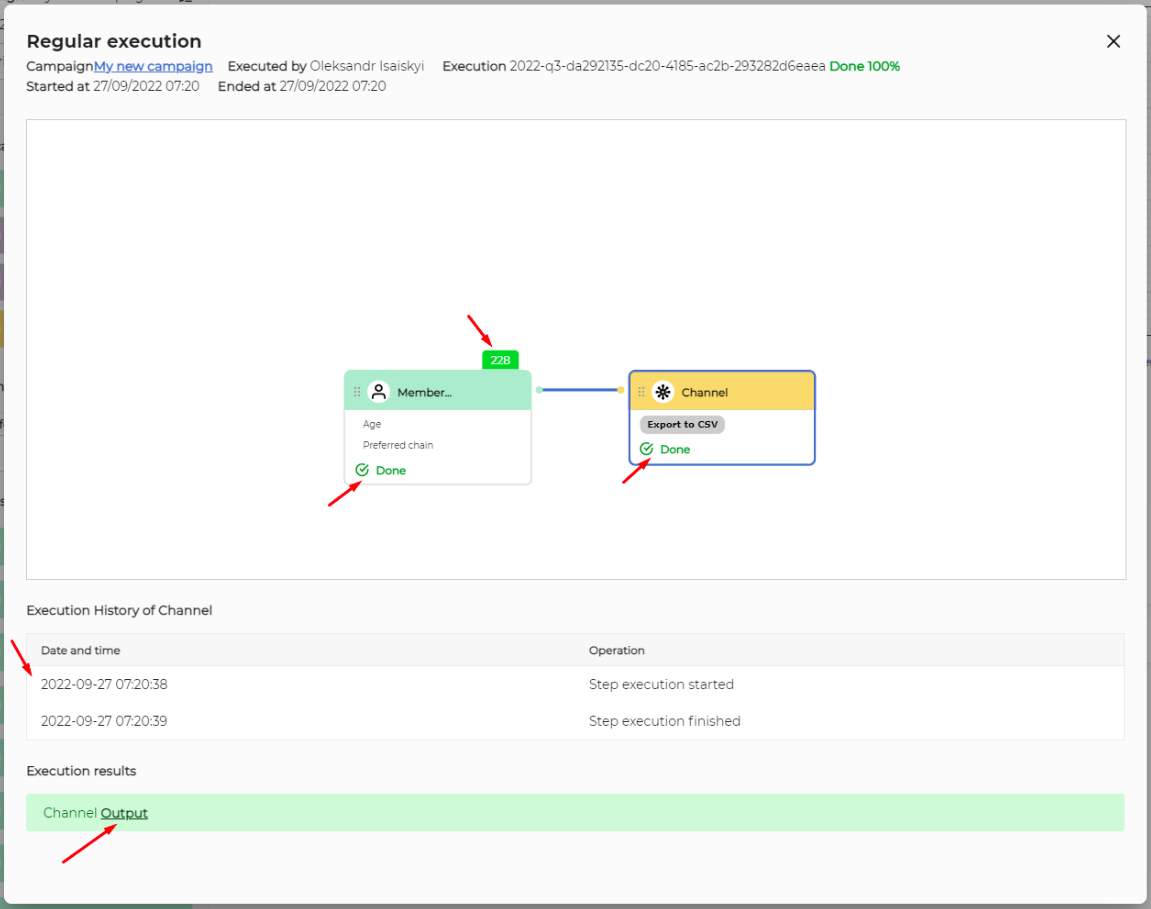
If you click on any execution a popup with execution details will appear. Here you can see information about date and time each step (action block) started and completed during execution.
If execution contains any steps that provide ability to download results they will be available by clicking 'Output' link
Schedule flow
As some campaign should be run in the weekends or after normal working hours Orchestration allow for execution scheduling.
To create a scheduled execution you should open the campaign you want schedule and click on the "Create new run" link.

After clicking on the 'Create new run' link you'll see the schedule configurator wizard appeared.
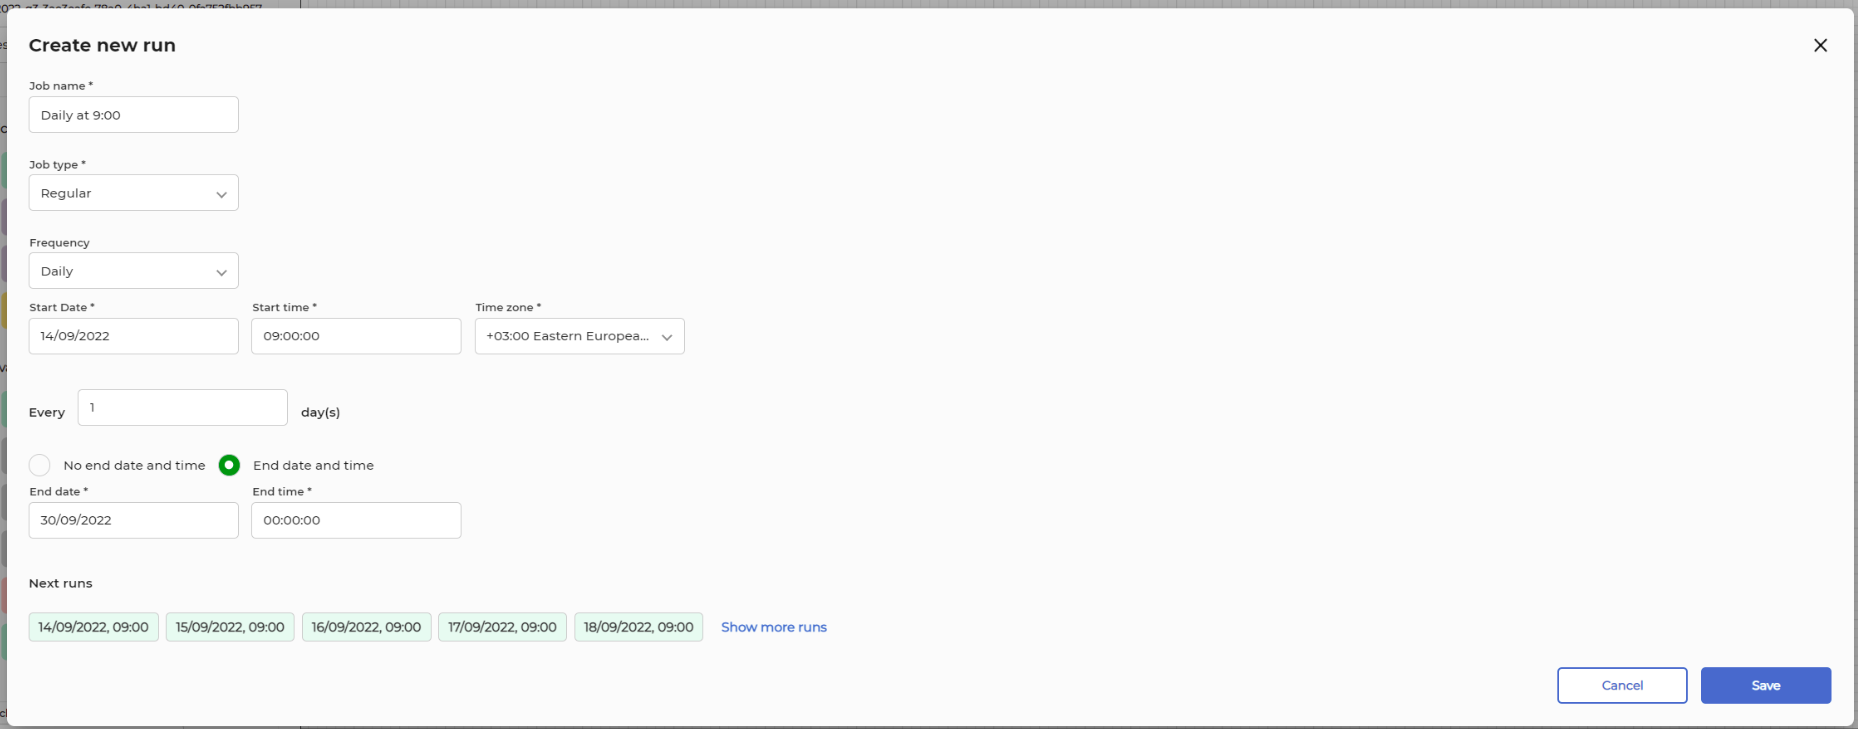
Job type
Orchestration has several execution modes ("Count", "Simulate" or "Execute") and you can choose each of these when scheduling a campaign execution. By default it has type Regular.
- Count: Starts campaign execution without exporting campaign results.
- Simulation: Starts campaign execution without exporting campaign results to services that are in charge of interaction of members (shops buyers). [ @
would it maybe be easier to describe this by listing the exact channels which are not executed)] - Regular: Starts campaign execution with no restrictions. This is also called a Regular execution.
Frequency
Executions can be scheduled on a one-off or recurring basis. From the "create new run" wizard you can select the frequency from a drop down with the following options:
- Run Once: The campaign only run one time at the defined time.
- Daily: Runs the job every x day, like 1 = every day, 2 = every second day, etc.
- Weekly: Runs the job on specific day(s) of the week, like Mo-Tu-We-Th-Fr-Sa-Su.
- Monthly: Runs the job monthly, like:
- on specific day of the month, like x = 10, every 10th of the month.
- run every x month, like 1 = every month, 2 = every second month.
- run on First/Second/Third/Fourth/Fifth/Last Monday/Tuesday/Wednesday/Thursday/Friday/Saturday/Sunday.
- Yearly: run on First/Second/Third/Fourth/Fifth/Last Monday/Tuesday/Wednesday/Thursday/Friday/Saturday/Sunday of
January/February/March/April/May/June/July/August/September/October/November/December.
- Intraday: (multiple runs same day) like every X hours and/or Y minutes.
Timing
You can specify one time or recurring execution.
- Start date: Input allows you to specify the start date for the scheduled job.
- Start time: Input allows you to specify the start time for the scheduled job.
- Time zone: Input allows you to specify the time zone for the scheduled job.
- No end date and time: If this is selected then it's an infinite schedule job.
- End date and time: If this is is selected then you can specify end date and end time for the schedule job.
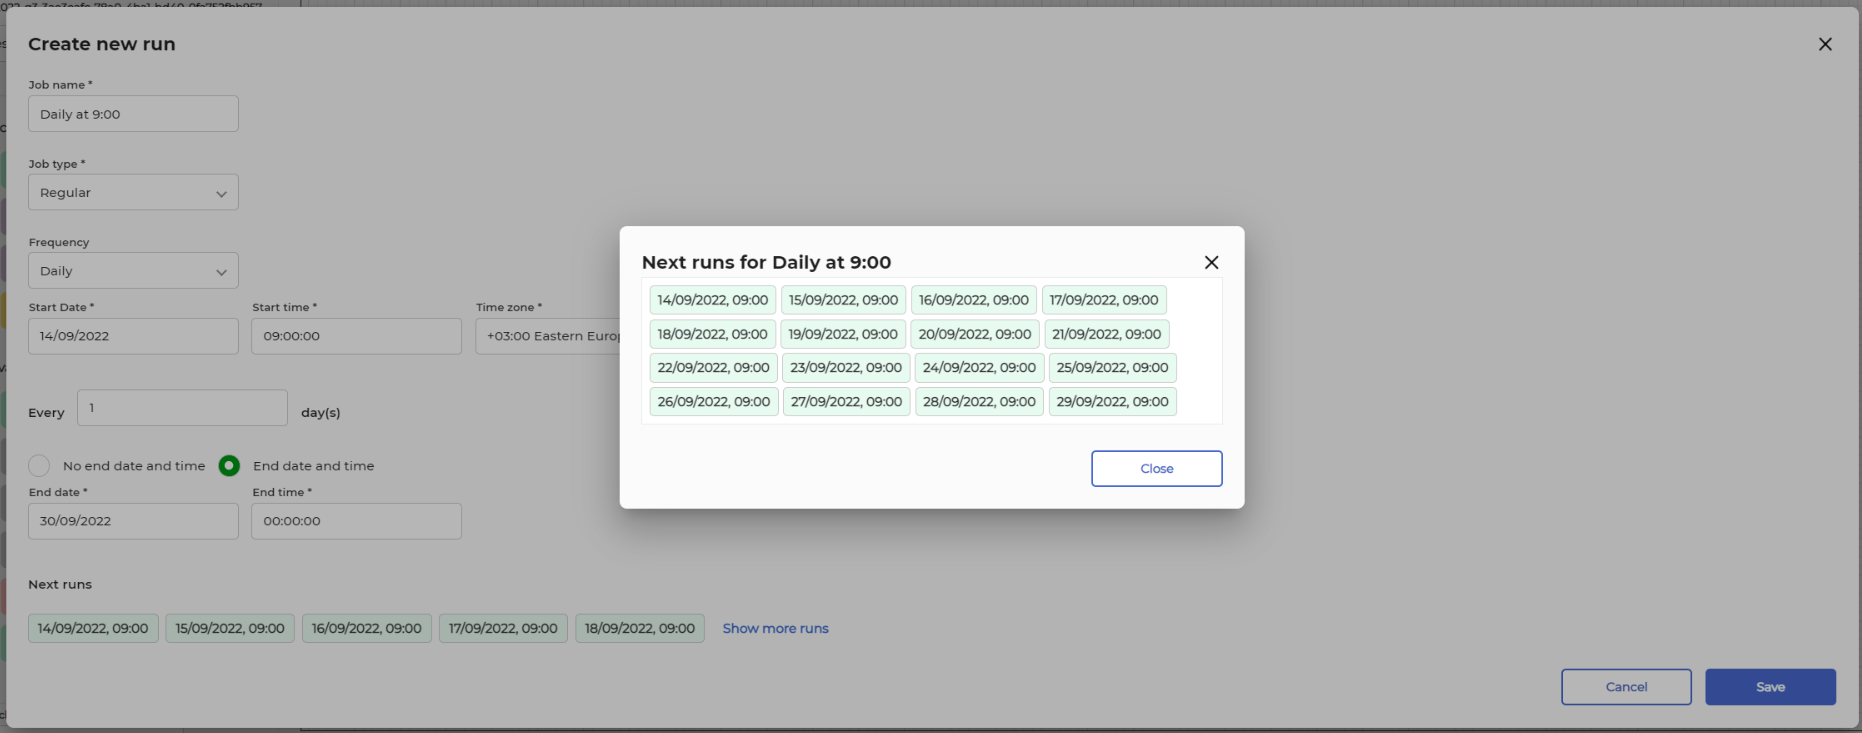
Next runs
You can see the date and time of the next runs.
Schedules table
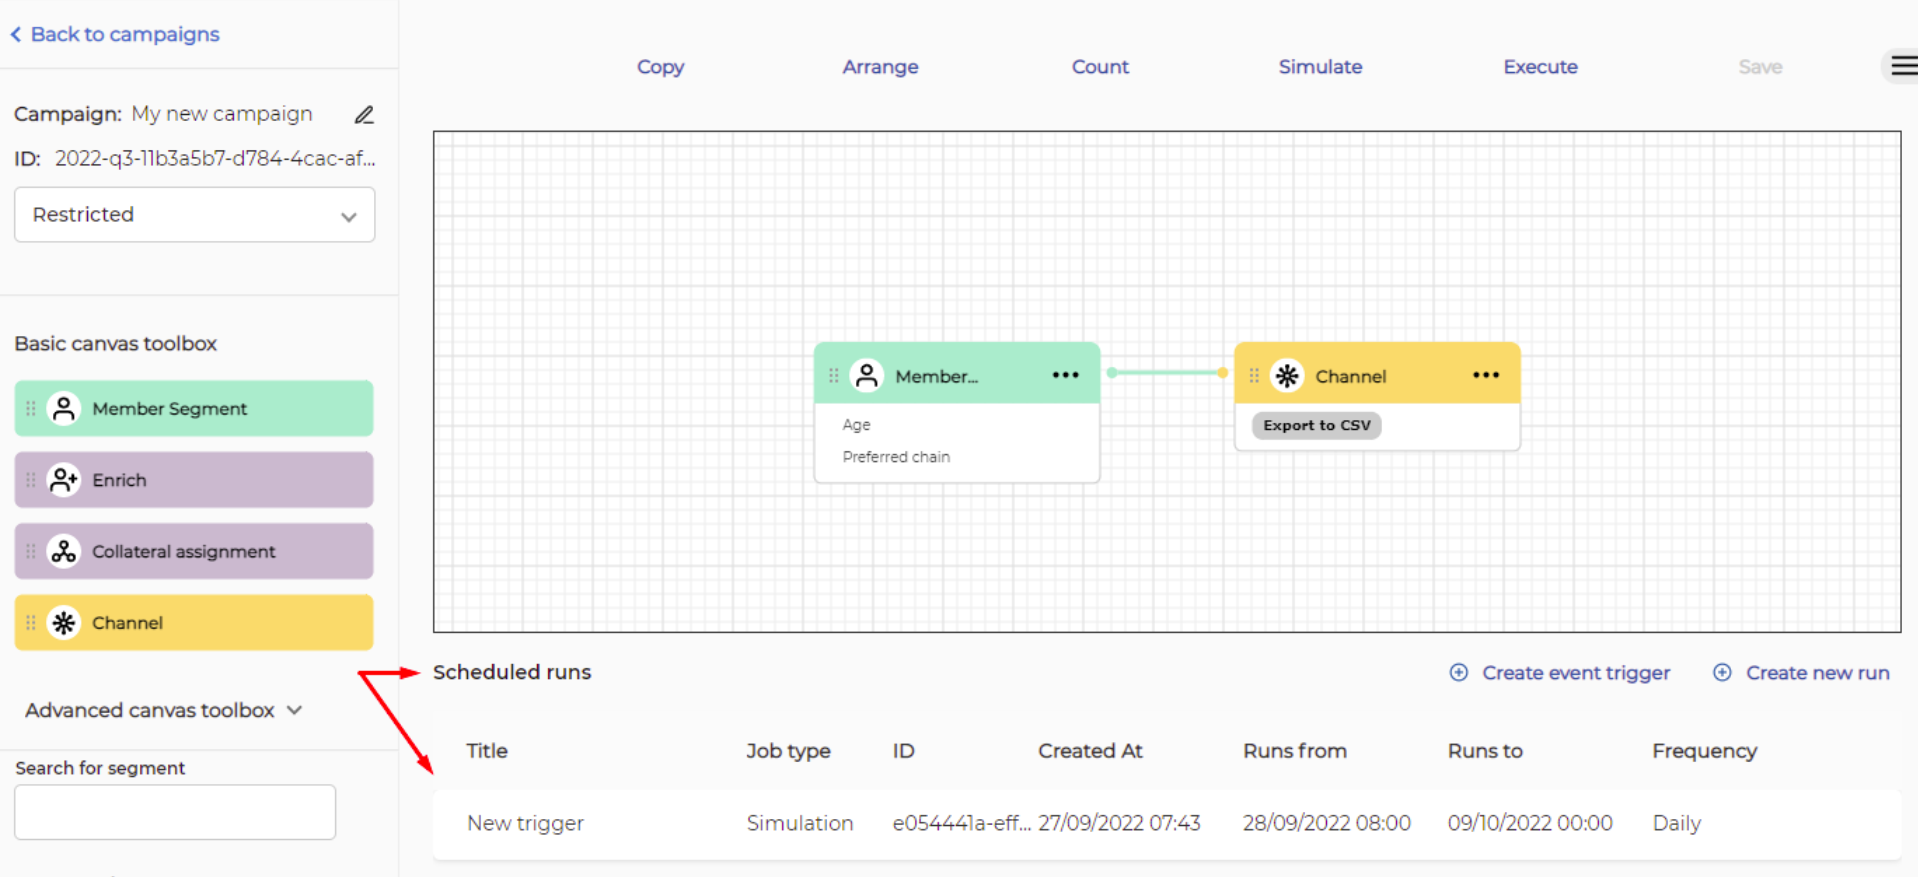
You can see Schedules section below the canvas. This section shows table containing all scheduled executions of the campaign. The table has following columns:
- Title: Shows name of scheduled execution.
- Job type: Shows campaign execution mode ("Count", "Simulate" or "Execute").
- ID: Shows scheduled execution id.
- Created at: Shows date and time when the schedule job was created.
- Runs from: Shows date and time when the schedule job start it's first execution.
- Runs to: Shows date and time when the schedule job start it's last execution.
- Frequency: Shows how frequent the schedule execution will be done (Run once, Intraday i.e. multiple times per day, Daily, Weekly, Monthly, Yearly).
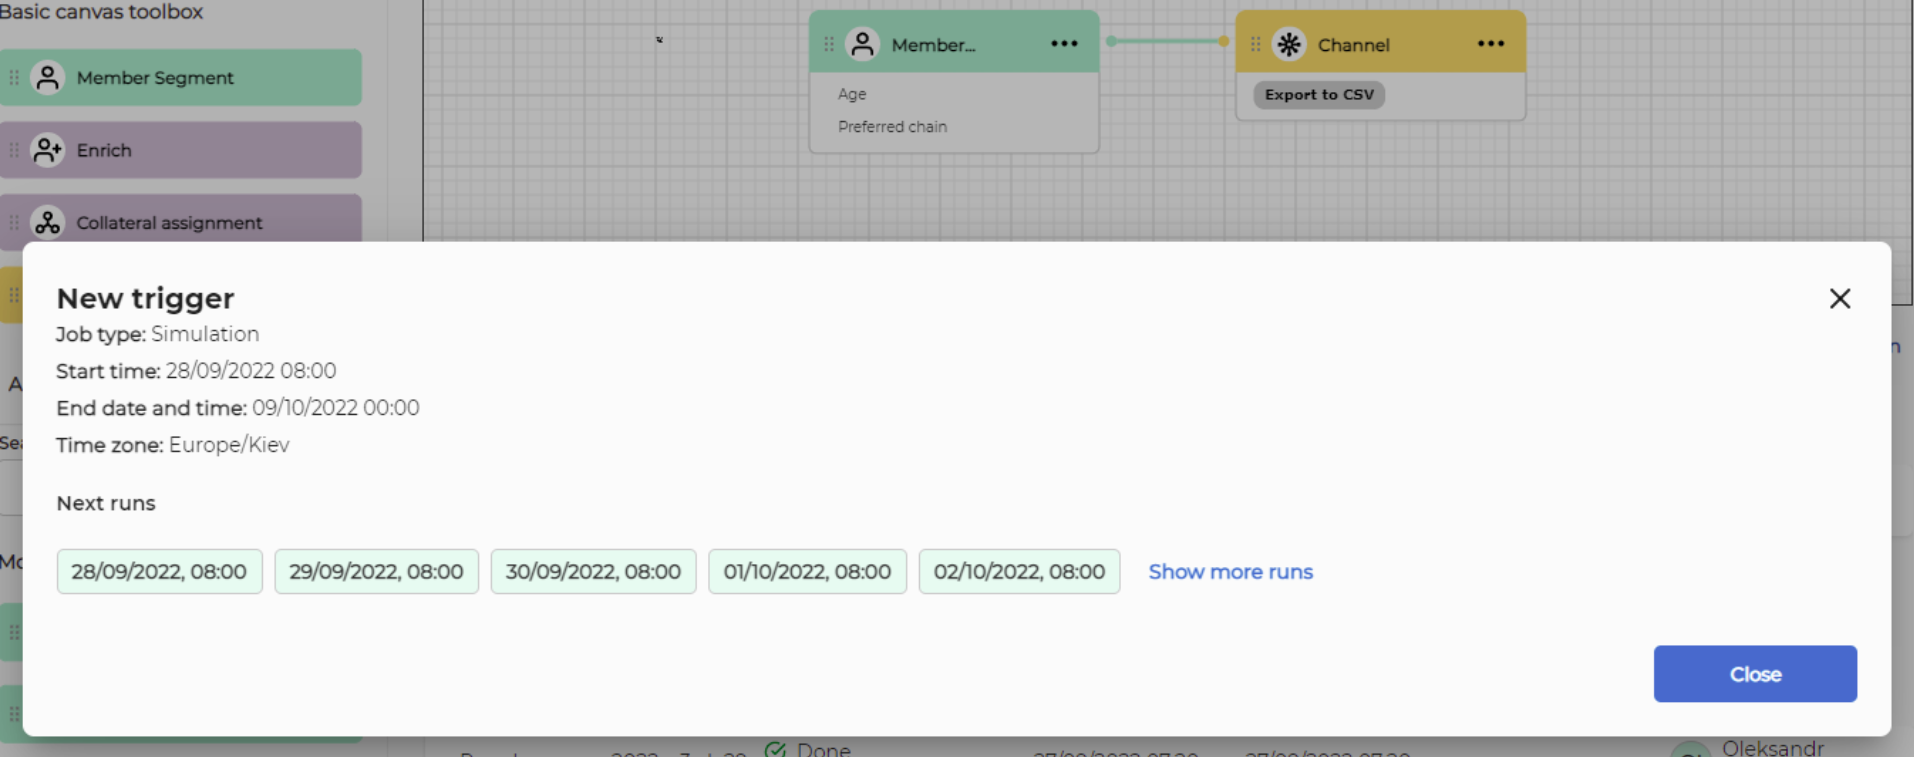
If you click on the schedule job from the table, then a popup will appear displaying information about scheduled execution and when the next executions will happen.
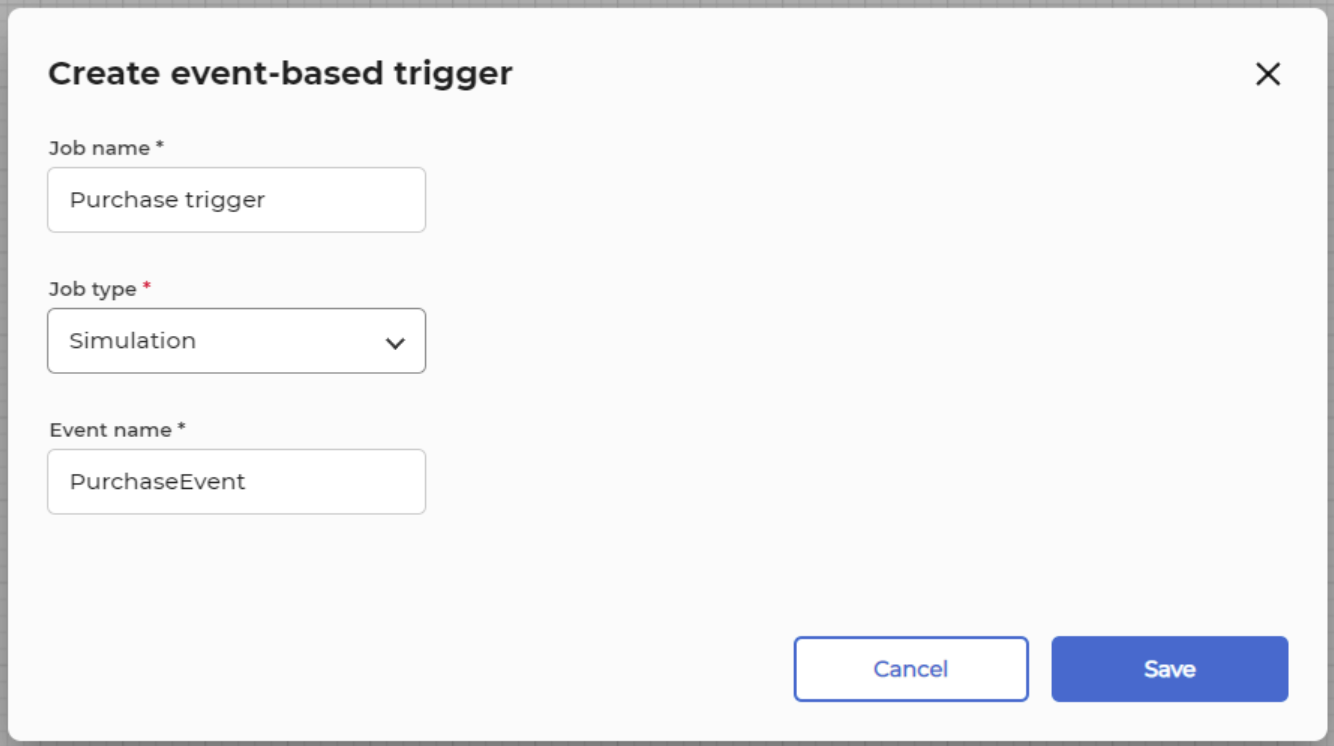
Creating event based trigger
As of now there is a basic support of the event based triggers which are triggers that start you campaign when receiving a specific event that is being monitored. Warning: This feature is currently in a beta stage.
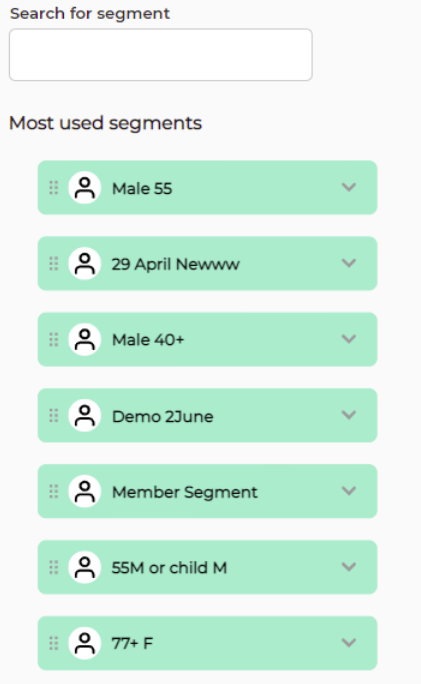
Most used segments
The "most used segments" section displays list of most used member segments created by other users, which are available for you to use in your campaign.
You can use 'Search for segment' input to search for a specific segments among the collection of most used ones.