10 Tips to Instantly Create Engaging Games
1. Engagement: Create animation effects with Transitions
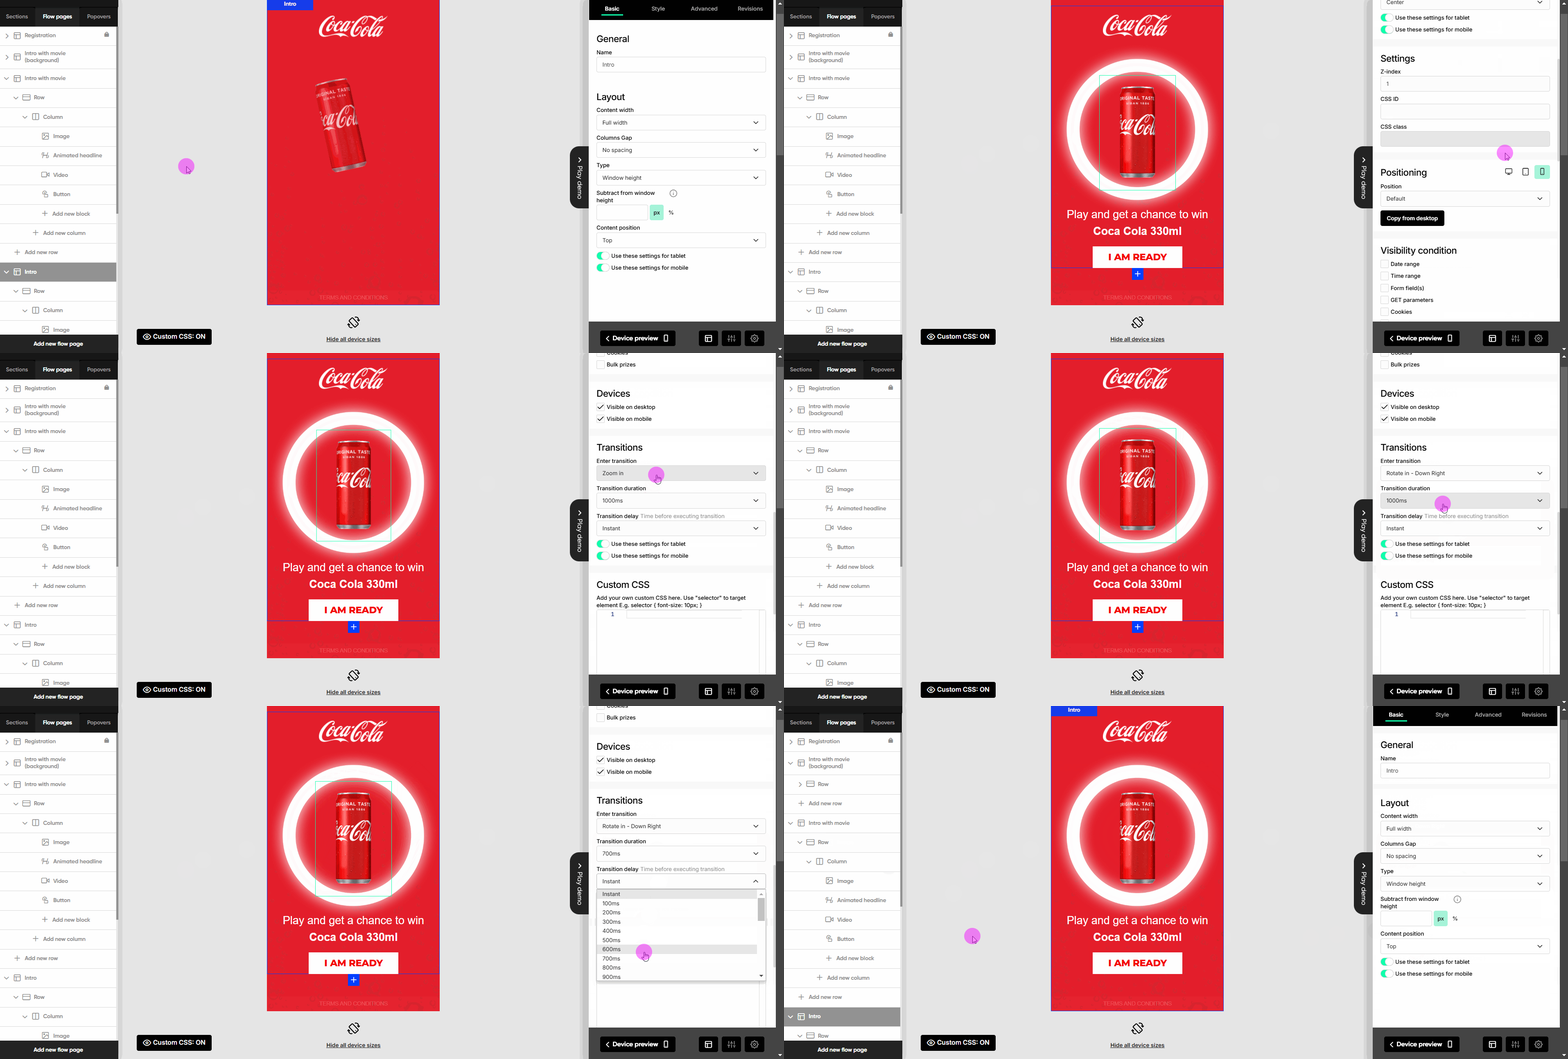
Enhance your game design by adding smooth, eye-catching transitions to its elements. Transitions not only make your game visually appealing but also help guide players’ attention. Here's how to get started.
- Select an element.
- Go to the Advanced tab in the game menu (right).
- Scroll down to Transition section.
- Select an Enter transition: fade, zoom, rotate, flip, or bounce.
- Configure Transition duration with the speed of the animation.
- Configure Transition delay to have the element transition in with a specific delay.
Experiment with these effects to make your game flow smoother and more dynamic. With just a few clicks, you can add a polished touch that elevates the overall feel of your game!
Pro Tip: Use transitions strategically to guide your players’ attention. For instance, delay the appearance of a “Continue” button to give players time to absorb important content, such as rules or branded visuals. This not only ensures they stay engaged but also enhances the overall gameplay experience.
2. Engagement: Use Add-ons to enhance interaction
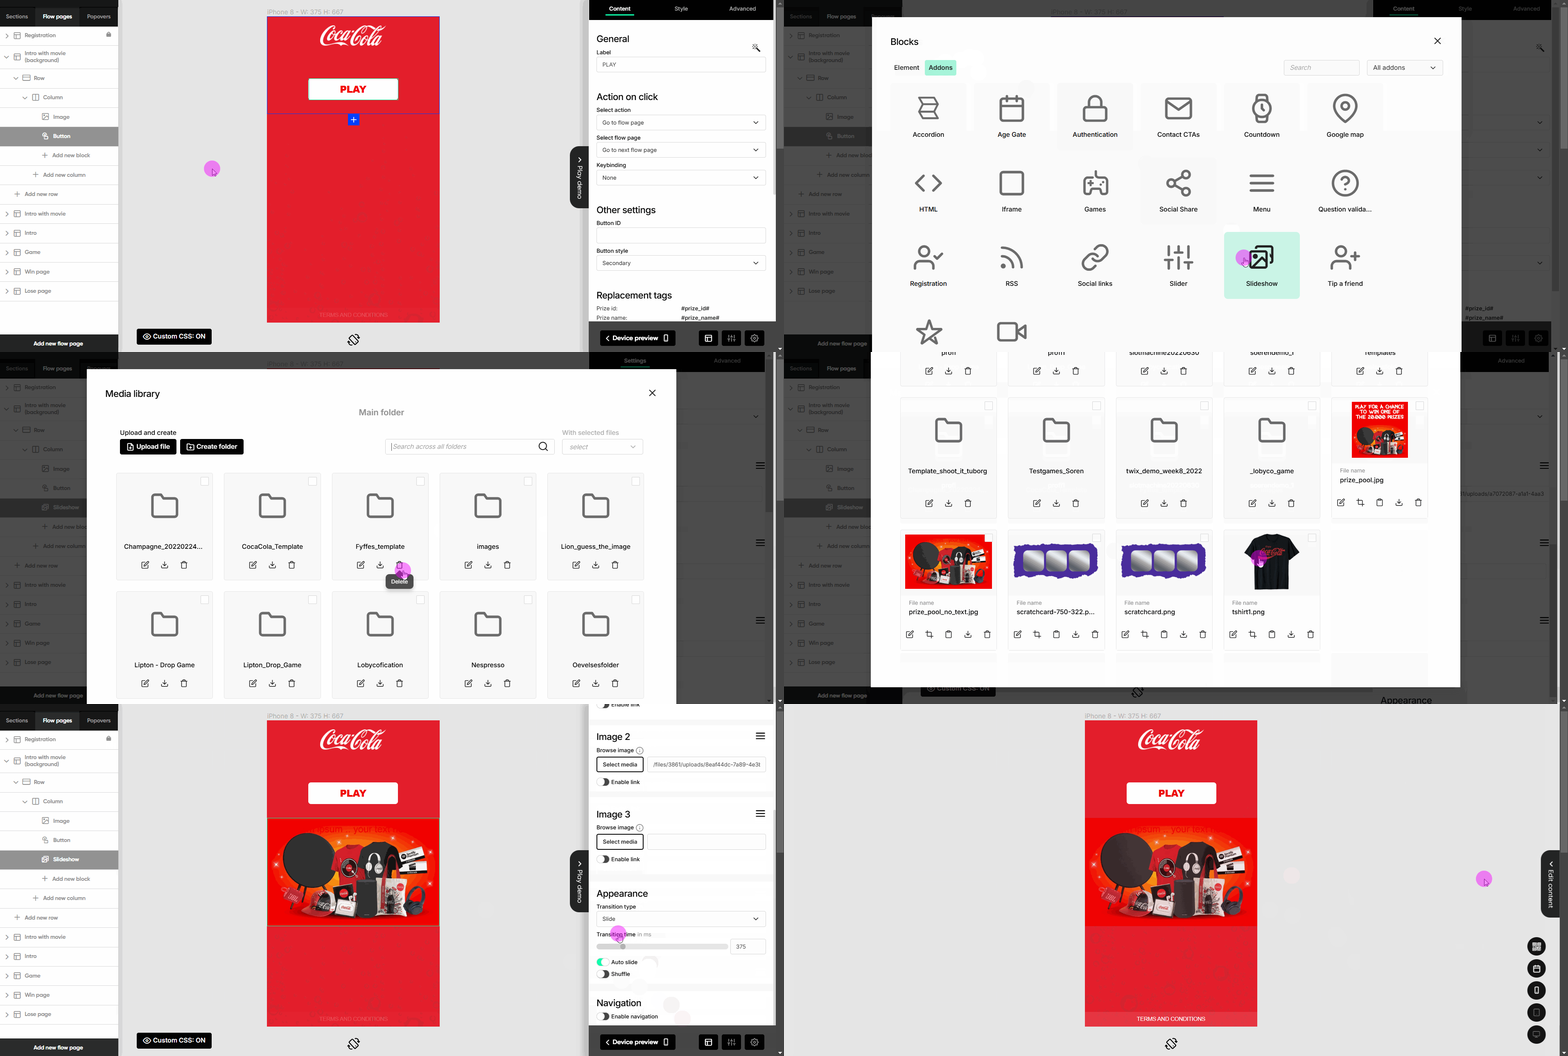
Take your game to the next level by incorporating addons that expand functionality and boost engagement. Addons are an easy way to introduce more interactivity and tailor your game to specific needs. Some examples are:
- Age Gate Addon is ideal for games with age restrictions (e.g., alcohol-related prizes). This add-on ensures users confirm their age before playing the game.
- HTML Addon embeds custom HTML code directly into your game. Use this to include iframes for external content, beautifully formatted HTML5 animations, or other creative elements.
- Question Validation Addon adds an interactive twist by asking users a question during the game. For example, start with an intro question that tests their knowledge of the brand or theme, helping them feel more immersed in the experience.
- Slideshow Addon adds sliding images that can present content to the user in a dynamic way.
Pro Tip: Strategically use add-ons to match your game’s objectives. Whether it’s compliance with age restrictions, enriching visuals, or engaging players with thought-provoking questions, these help create a more dynamic and memorable game experience.
3. Engagement: Use Videos and Animations
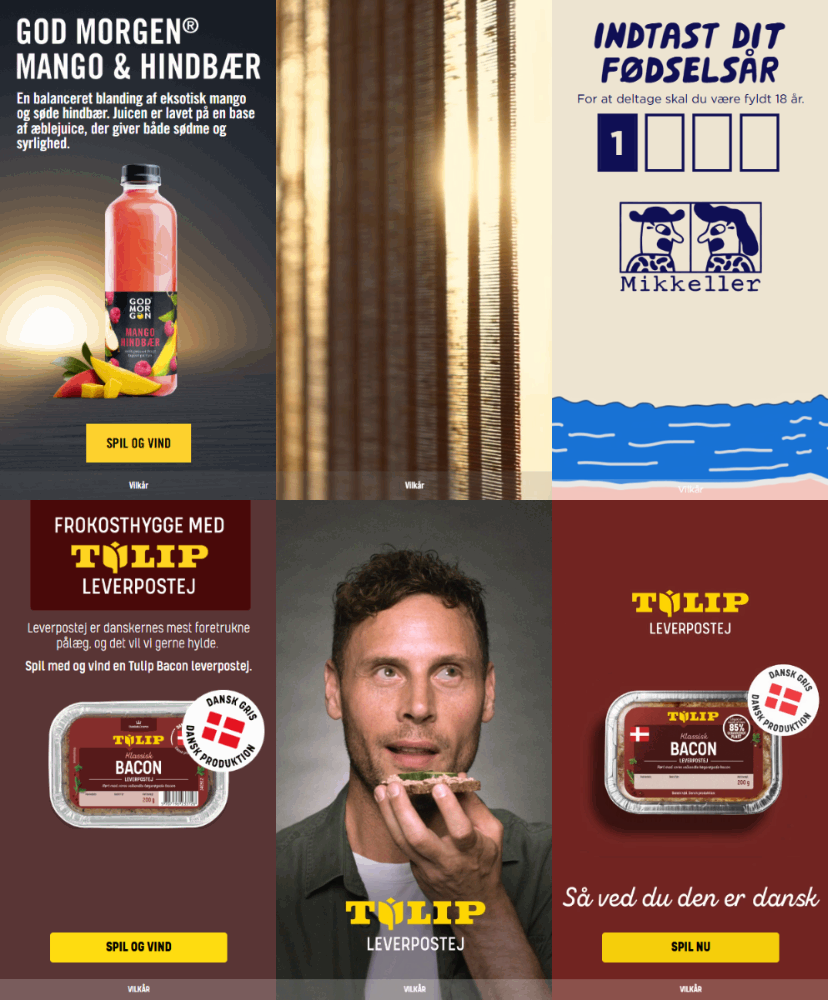
Enhance your game’s appeal by incorporating videos or GIF animations. These dynamic elements can be used in various ways, including as eye-catching backgrounds, to boost player engagement and make your campaigns more immersive. Read the videos documentation for more details on how to use them.
Pro Tip: Check with your suppliers for media packages. They often provide branded videos or GIFs that seamlessly align with your campaign theme, saving you time and adding a professional touch.
4. Engagement: Keep it fresh with a variety of Game Types
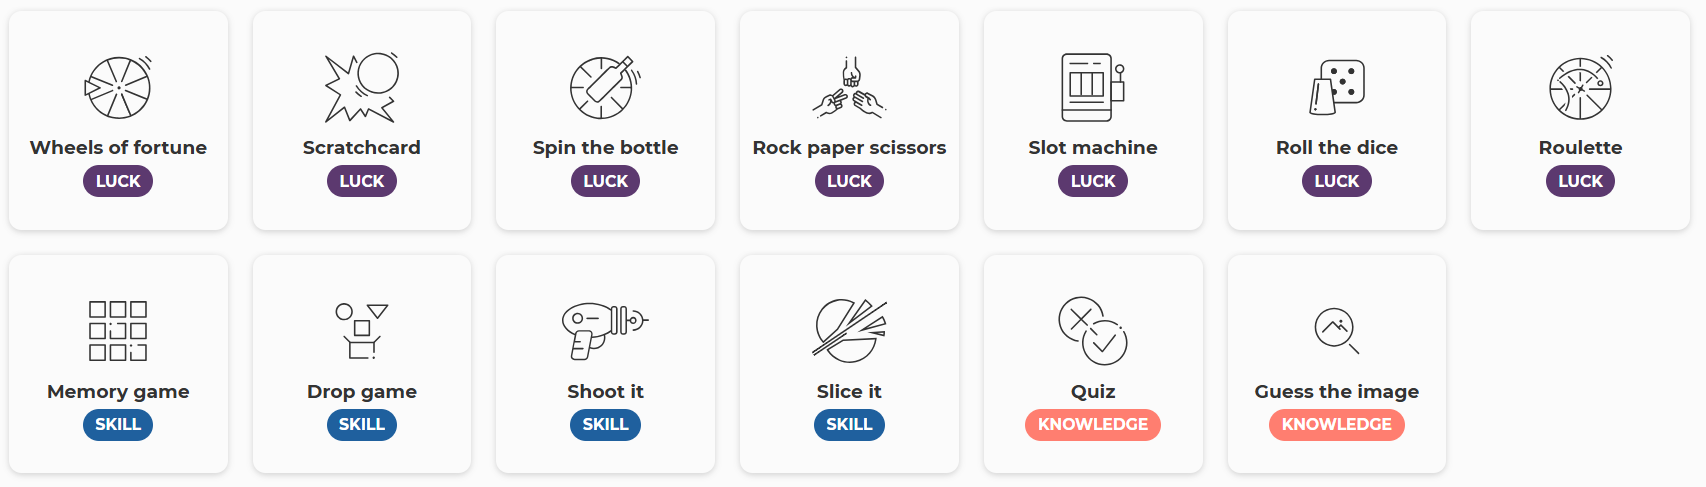
Keep your audience engaged by exploring the variety of available game types within each category (knowledge, game, skill). While starting with a single game type is a great way to begin, rotating between different types adds excitement and keeps your players coming back for more.
The design process remains largely the same across game types, with only minor adjustments needed for specific game screens and a few graphics. This makes it easy to diversify your offerings without significantly increasing your workload.
Pro Tip: Experiment with different game types to see what resonates best with your audience. By mixing things up, you maintain their interest and create a richer, more dynamic gaming experience.
5. Productivity: Start from preloaded Templates
You will always start a gameplay from an existing template. Each game type comes with a recommended template that provides a simple but effective flow, perfect for beginners to get started quickly with a good flow.
As you become familiar with the game designer, you can expand your games by adding more components and pages to suit your needs.
Pro Tip: In time, identify the layouts and concepts that work best for your projects. Save these as your own custom templates to speed up your future game development even more.
6. Productivity: Simplify design with Layout Settings
Streamline your game design process by using general layout settings to control the page backgrounds and fonts across all game pages simultaneously. This feature saves you time by applying consistent styles globally, while still allowing individual pages to be customized as needed.
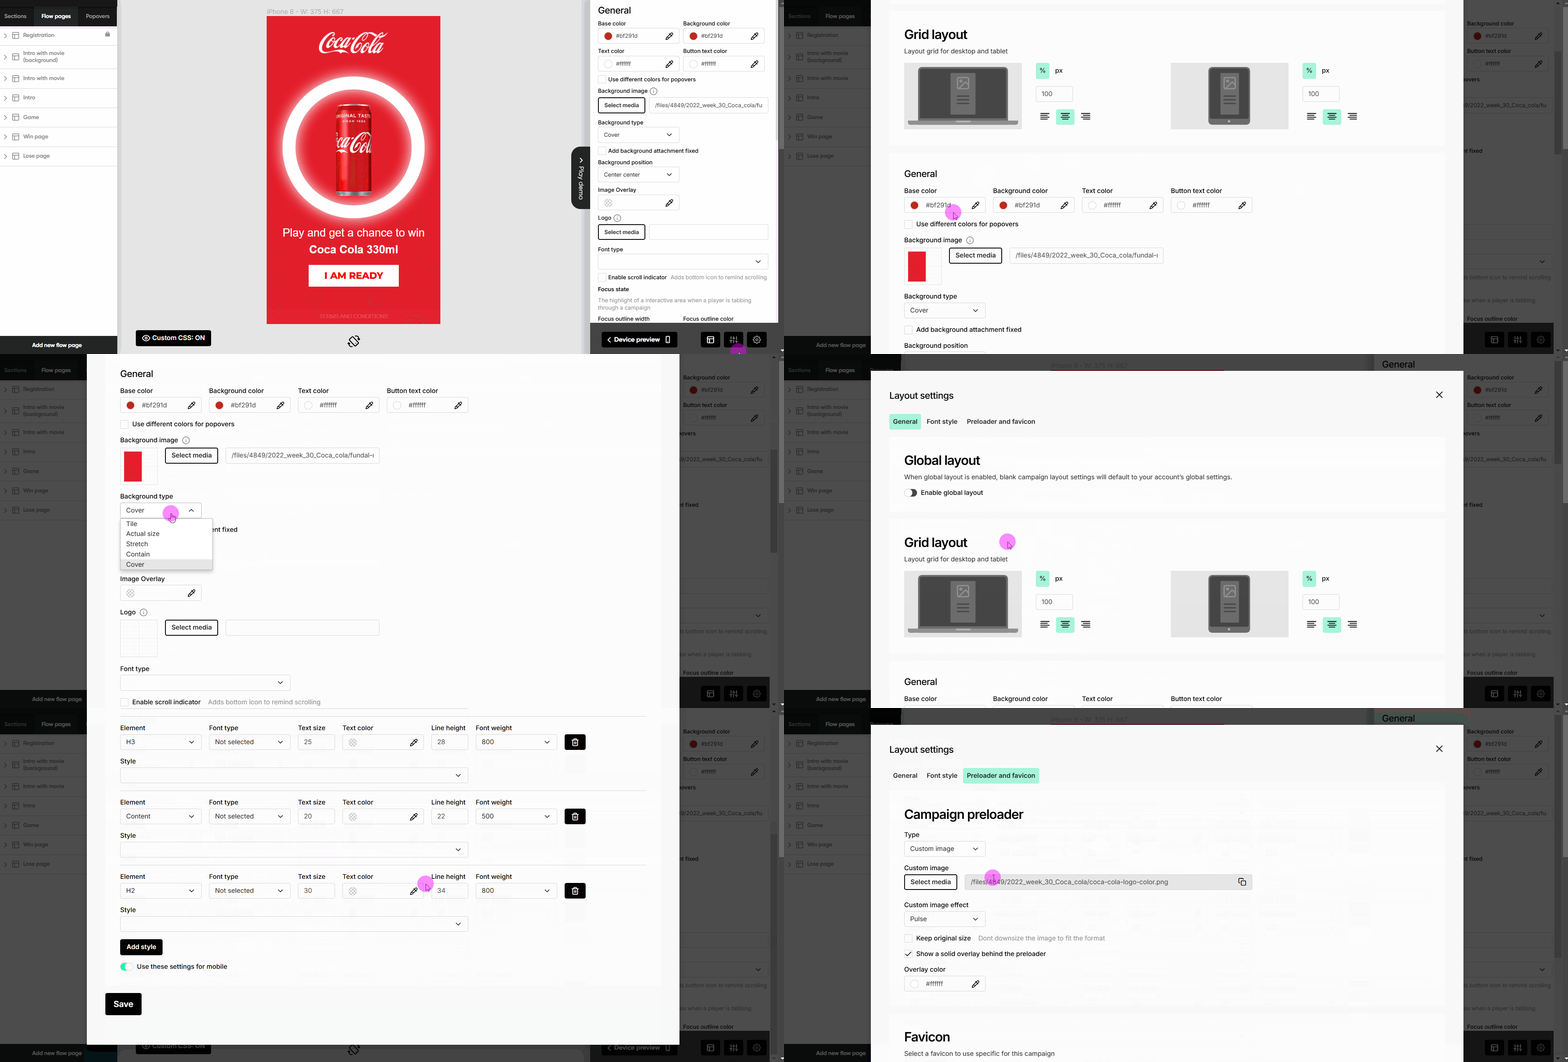
Go the the Layout Settings (CTRL+L) to adjust the general game layout..
- General Tab: Define the background color, background image, and default button styles.
- Font Style Tab: Set up consistent font styles to maintain a unified text appearance.
- Preloader and Favicon Tab: Customize the preloader image and animation. The preloader is a lightweight, animated image displayed for 1–2 seconds while the game loads. (Note: Favicon settings are not applicable for the Mobile App.)
Pro Tip: Start by setting fonts, colors, and sizes in one place, you can focus on refining your game without repeating the same adjustments on every page.
7. Productivity: Use page Revisions to undo changes
Mistakes happen, but with page revisions, you can easily roll back to a previous version of your game.
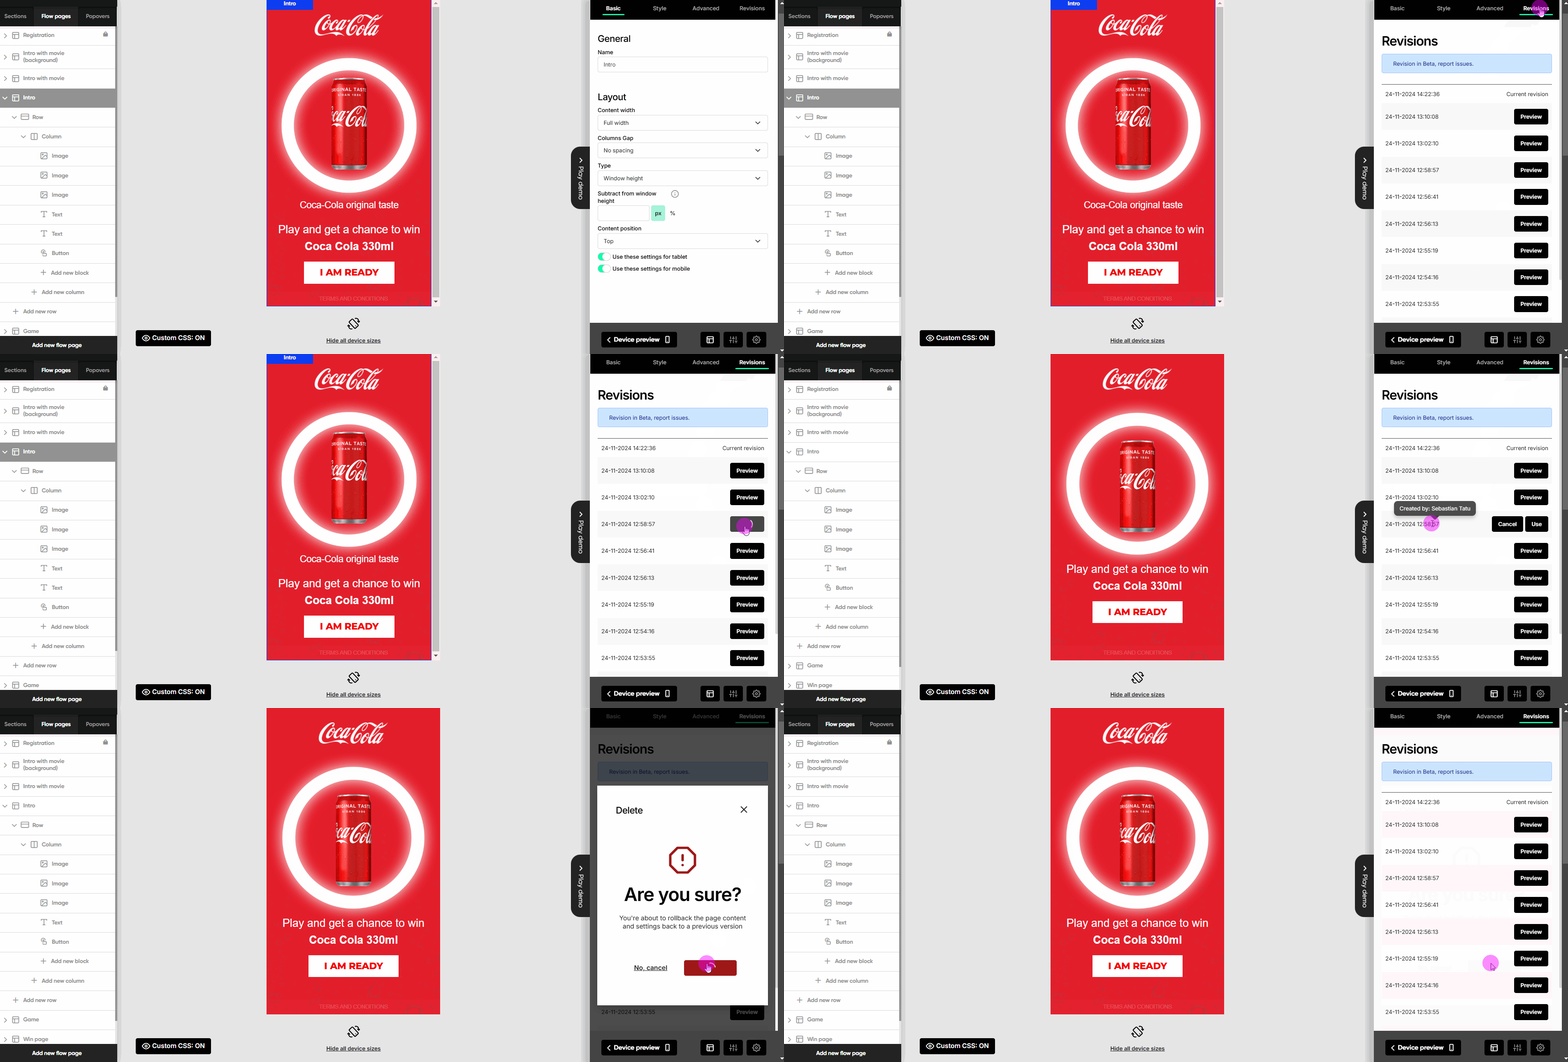
- Select the page you want to adjust.
- Go to the Revisions tab in the Game Menu on the right.
- Choose a revision and click Preview to review the changes.
- If it’s the one you need, click Use to restore that exact version.
- You can freely switch between revisions without any hassle, no revision will be lost while using them
Pro Tip: Hover over the timestamp in the Revisions tab to see who made the changes and when. This makes tracking edits and maintaining version control a breeze.
8. Productivity: Maximize efficiency with the Media Library
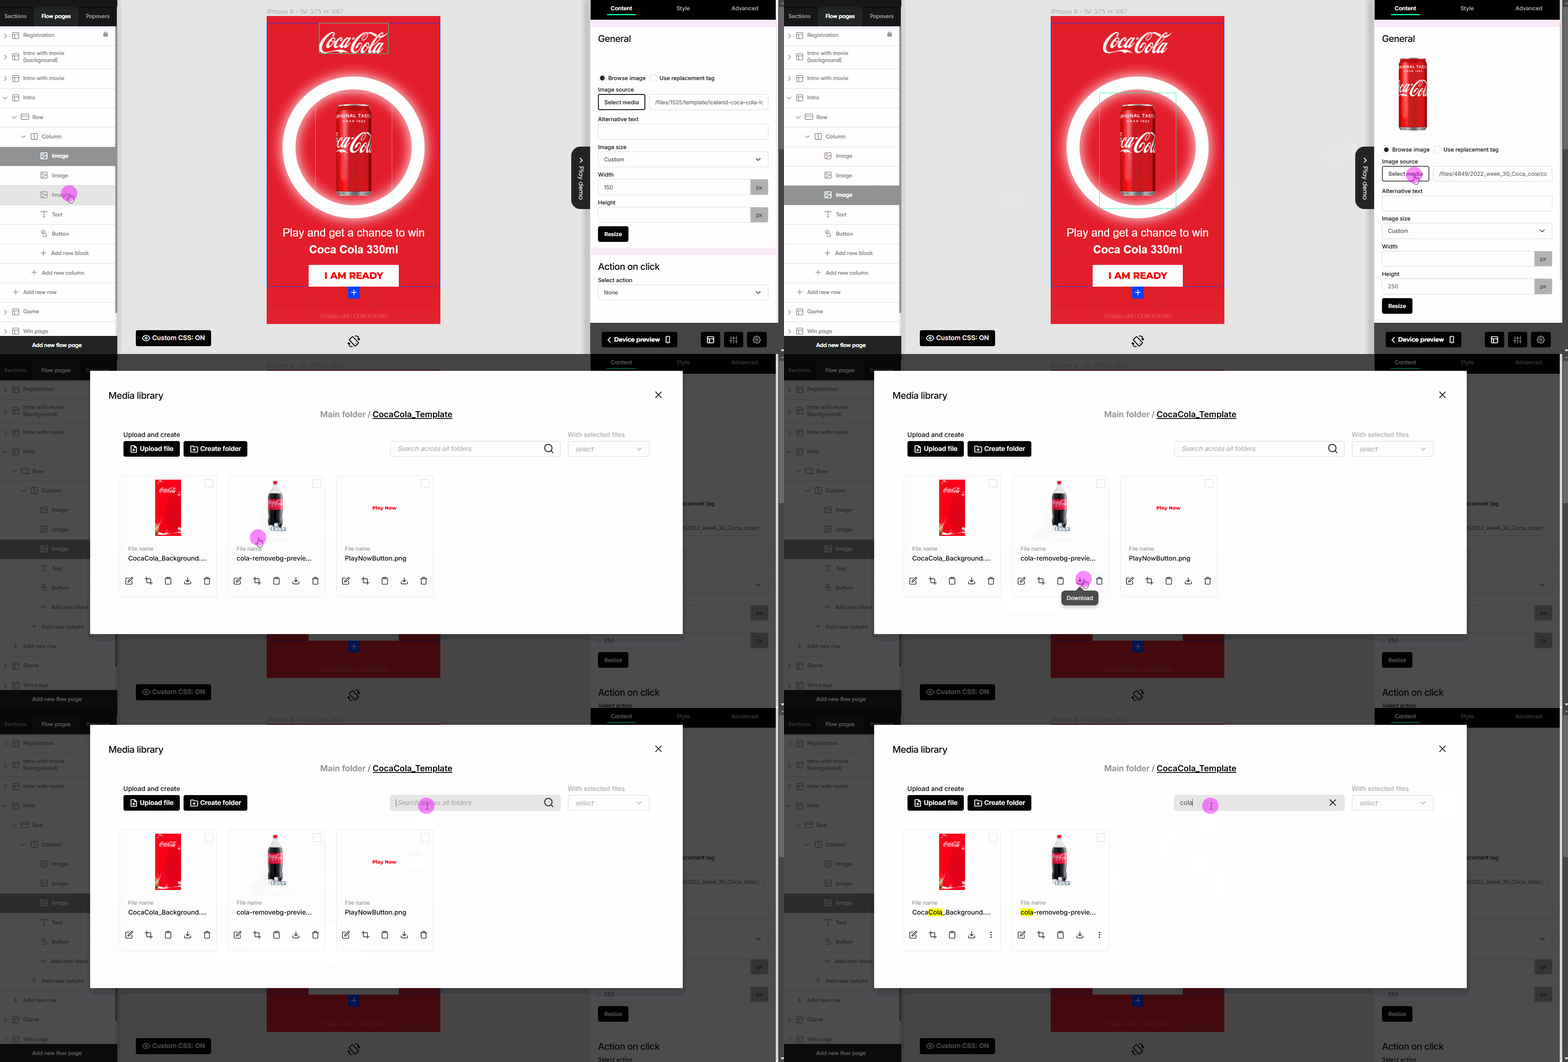
Simplify your game design process by utilizing the Media Library to store and manage all your media files—images, videos, and audio—in one centralized location. This allows you to reuse content across multiple games.
Here’s how you can make the most of it:
- Use the folder structure to group your media files by theme, project, or game type for quick access.
- Crop or resize an image.
- Copy the file path to your clipboard.
- Download the file.
- Delete unwanted files.
- Create folders, relocate files, and rename them to maintain a clean and efficient library.
Note: the images from the Lobyco templates are not directly visible in your Media Library. You can download them and adapt them or reuse the URLs, if needed.
Note: Make sure to not delete or move files that are used in other games that you might want to reuse. If needed, make a copy and move it or edit it.
Pro Tip: Establish a naming convention for your media files and folders to make searching and reusing assets even more efficient, saving time during game creation.
9. Planning: Preview on different devices
Ensure your game design looks flawless and functions smoothly on any screen size by testing it directly in the editor. Here’s how:
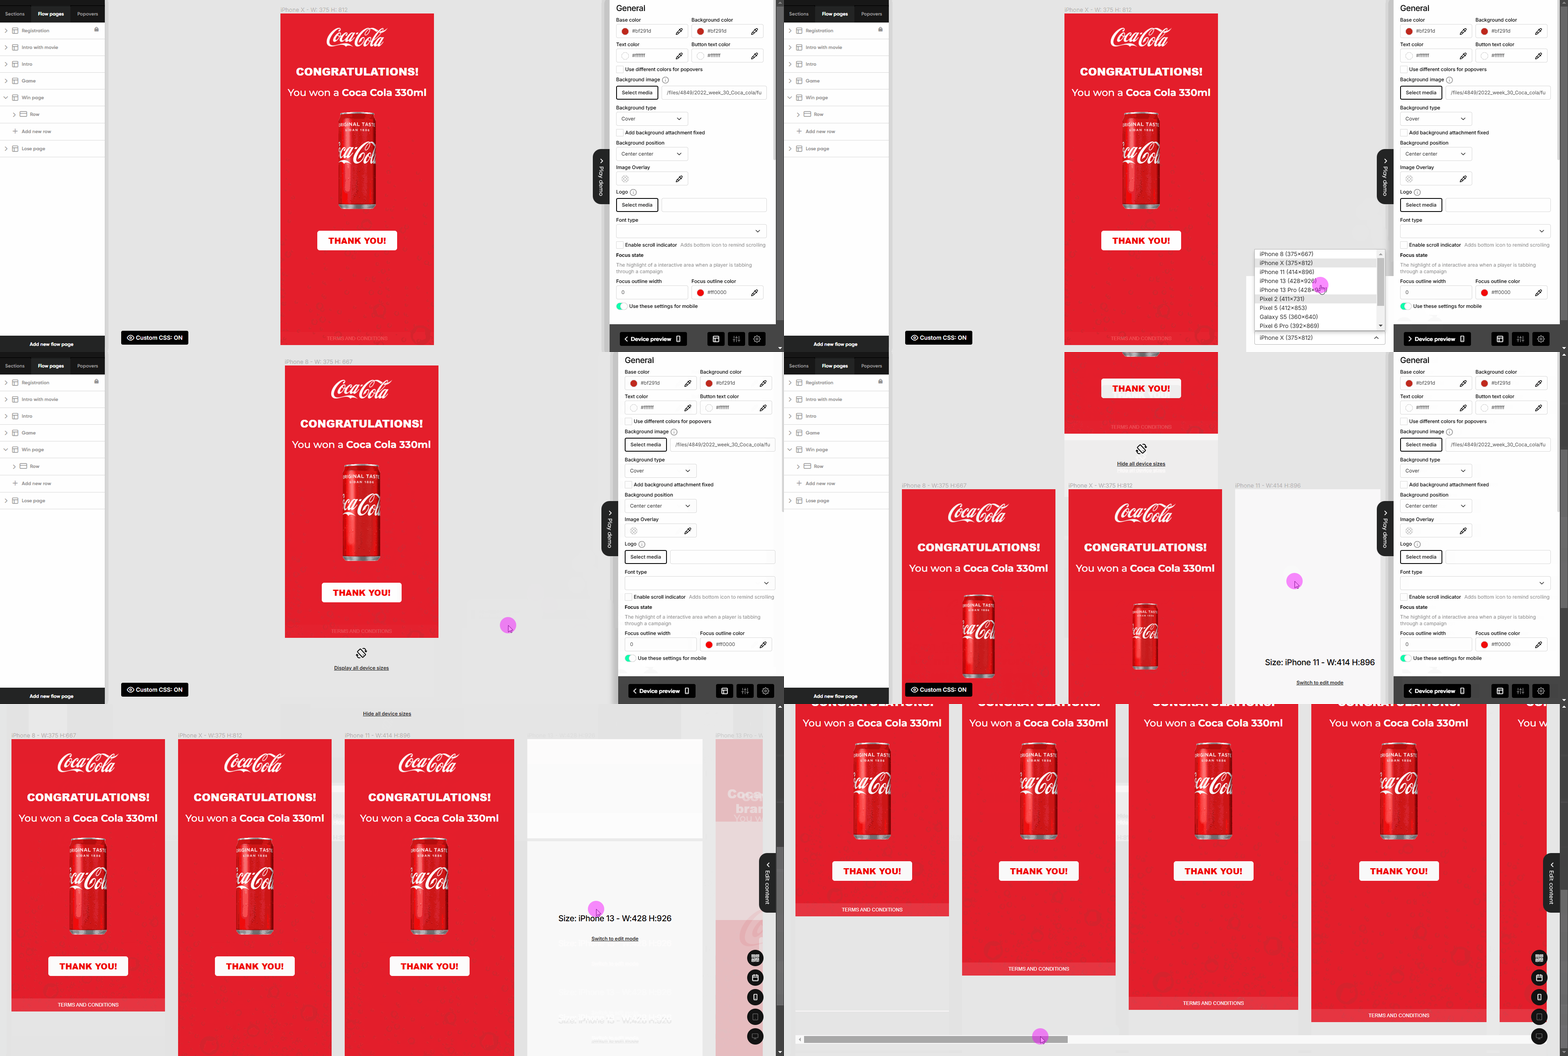
- Click Device preview at the bottom of the game menu.
- Use the dropdown to select the device type you want to preview.
For a comprehensive review, you can preview multiple device sizes simultaneously:
- Click Display all device sizes to see how your game looks across various screens.
- Scroll down to view the current page on all available devices.
Pro Tip: Start by designing with smaller screens in mind, like an iPhone 8. This approach ensures essential elements, like buttons, remain visible without unnecessary scrolling or misalignment. If your design works well on smaller screens, it will adapt with extra spacing on larger devices, ensuring a polished look across the board.
10. Planning: Design Graphics for your game
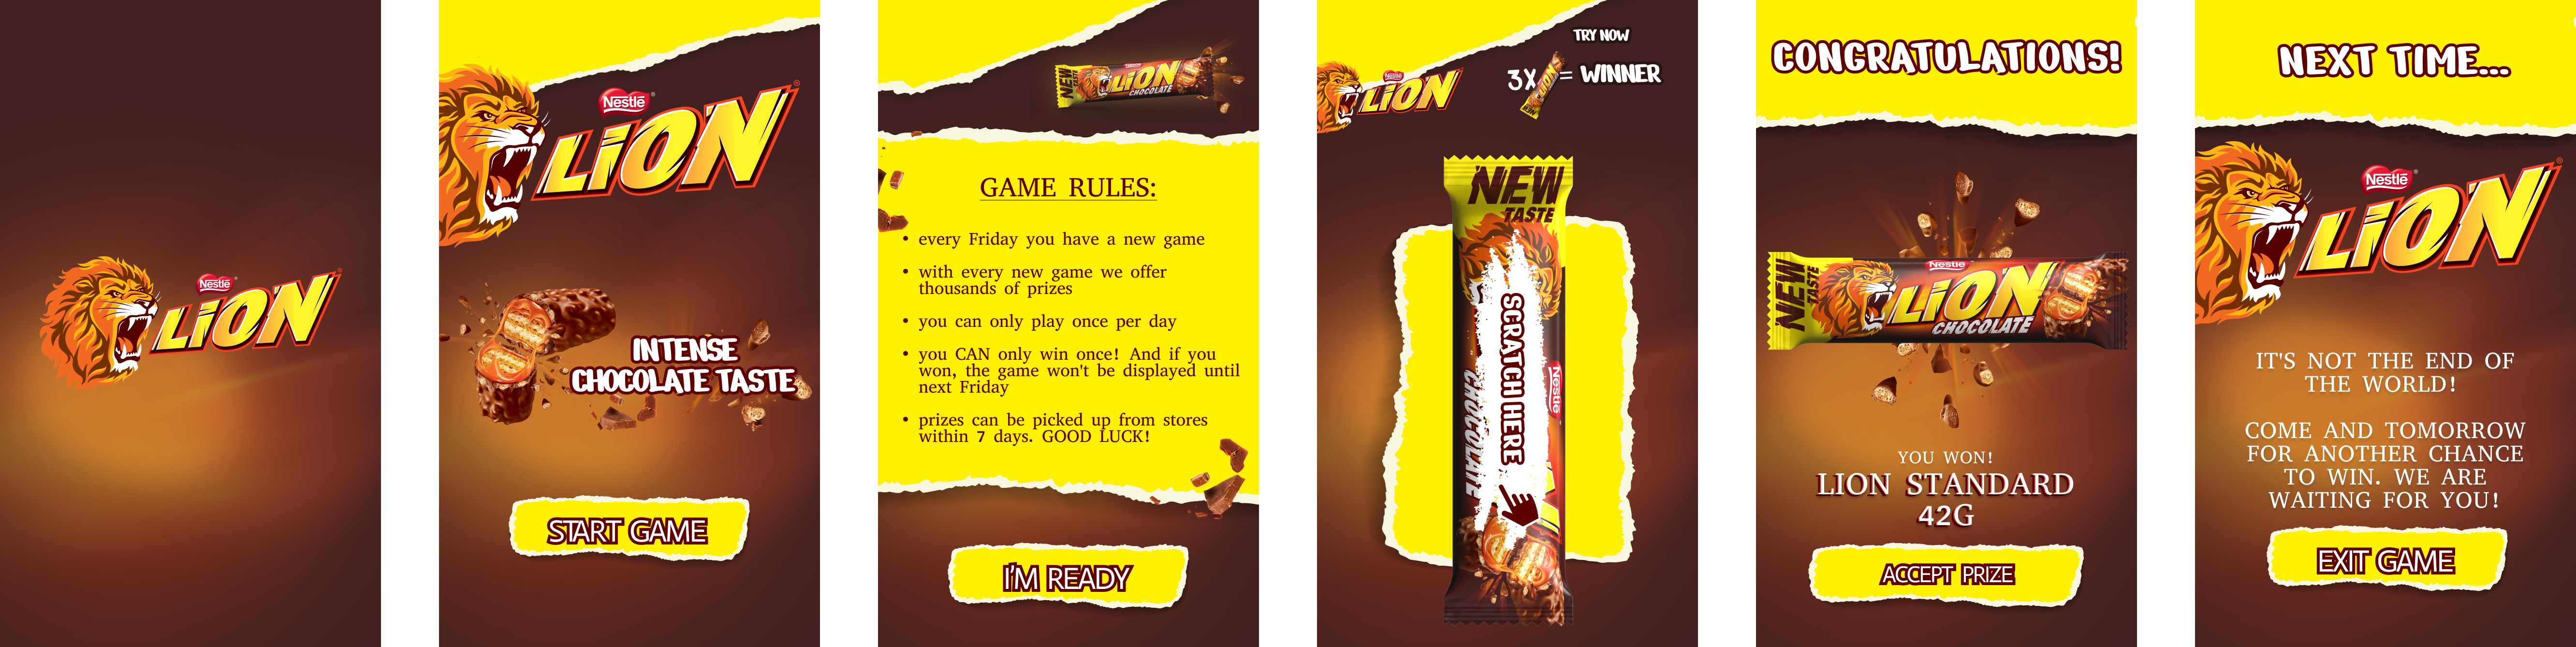
If you have access to a graphic designer or team member skilled in design, consider creating your game assets in a design tool like Figma before building in the game editor. This allows you to prepare all necessary visuals and layouts in advance, streamlining the setup process.
- Plan your game flow and design elements in graphics design software, like Figma. Of course, you can use some assets provided by the game sponsor or supplier.
- Export assets such as backgrounds, prize images, and game-specific elements (e.g., wheels, scratch cards).
- Export your designs as images and import them directly into the game editor for seamless integration.
For inspiration, you can explore our sample Figma game design examples to kickstart your creative process.
Pro Tip: Replace standard buttons with custom-designed images to make your game visuals more captivating and unique.
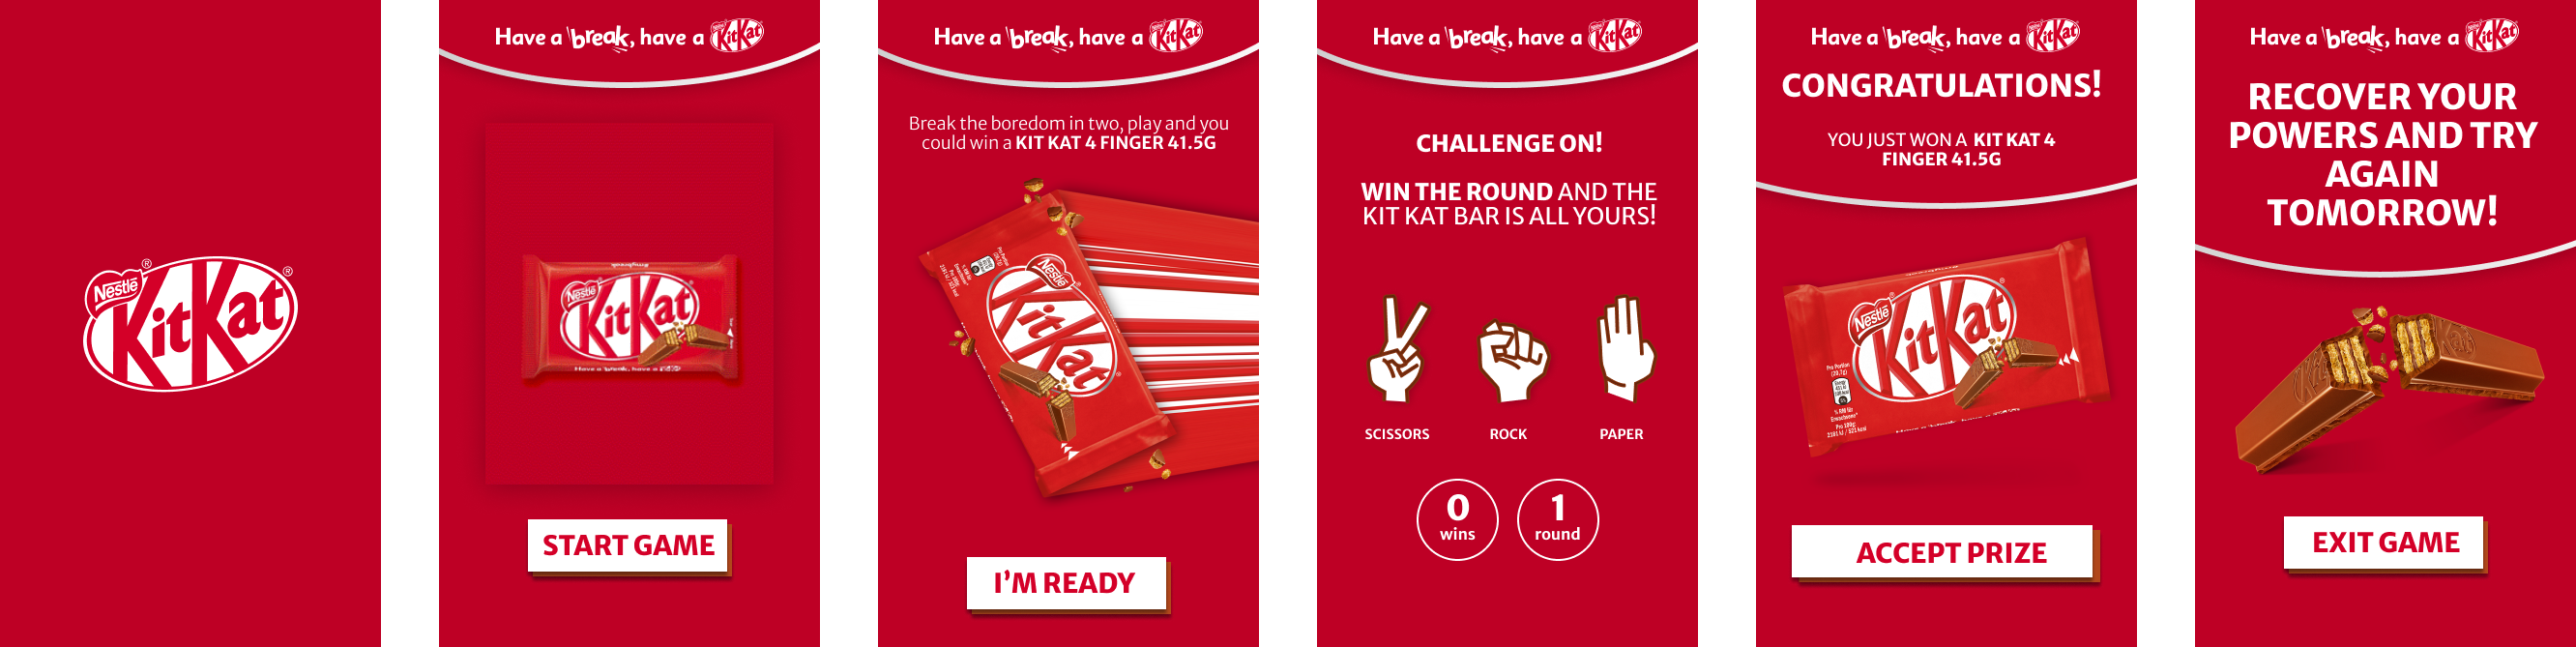
Extra Tip: How to Choose the Right Game for Your Campaign
Selecting the perfect game for your campaign begins with understanding your goals, your audience, and the resources you have available for implementation. Gamification isn’t just about fun; it’s a tool to connect with your audience and achieve measurable marketing results.
Here’s a breakdown of game types and how they align with different objectives.
1. Luck Games
These games don’t require skills or knowledge, making them ideal for attracting a broad audience. They are best for top-of-funnel campaigns focused on brand awareness and participation.
Advantages
- Low barriers to entry result in the highest conversion rates.
- Perfect for campaigns with many prizes to motivate participants, like free products, subscriptions, or discounts.
- Ideal for driving foot traffic or quick sign-ups.
2. Skill Games
These require focus, effort, and strategy, offering longer gameplay and repeat engagement. They are good for mid-funnel activities where deeper interaction and even stronger brand highlights are the goal.
Advantages
- Showcase your brand’s unique selling points (USPs).
- Encourage engagement through challenges, competition, and fun mechanics.
- Build memorable, long-lasting connections, fostering brand recognition and loyalty.
- Ideal for creating a lasting impression and solidifying relationships with customers.
3. Knowledge Games
These games test and educate participants while providing insights into your audience. They work best to inform and engage audiences while potentially gathering some customer data.
Advantages
- Highlight product features, brand values, or company culture.
- Target audiences seeking a deeper understanding of your brand.
Pro Tip: Start with luck games and less complex game flows while familiarizing yourself with the Lobyco platform. Once confident, explore more advanced options tailored to your audience and goals. Browse the available game types to find the best fit for your campaign strategy.